Welcome to our 10-minute beginner’s guide to skiing.
Are you looking to start an adrenaline filled hobby?
Or, maybe your planning your first skiing trip and don’t know where to start?
No problem.
In the next 10 minutes you’ll learn everything you need to know as a first-time skier.
We’re going to cover everything from the gear you need, through to the best exercises for leg strength (you’ll need them), and even how to plan your first ski trip.
Ready to get started?
Jump To Section
The Essential Skiing Equipment List
Before you hit the slopes, you’ll need some skiing equipment.
Like most adrenaline filled sports, it’s filled with gear junkies, and you’re about to become one!
So, here’s what you are going to need…
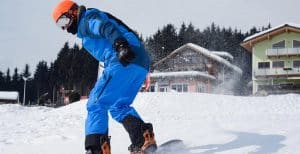
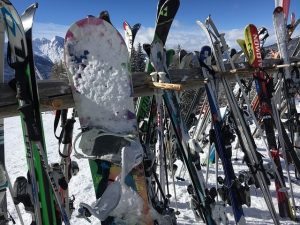
#1 – Skis, Boots & Poles
Price: $400-1000 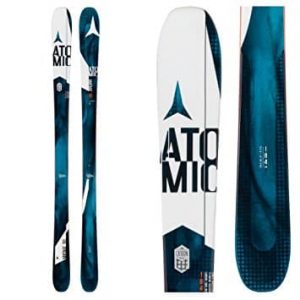
I’ve grouped skis, boots and poles together.
Why? If you’re a first-time skier, or only planning a one-off ski trip, you don’t necessarily have to buy skis, boots and poles.
If you take lessons at a dry-slope locally, they’ll have a hire shop. It’s a clever idea to have a few lessons before throwing a chunk of cash at skis, boots and poles.
Also, if you are planning your first ski holiday and want to do it as cheaply as possible, you can hire there too.
Some package holiday companies will try and bundle in ski hire, but I’ve found local hire shops (find them on arrival) will offer a much better deal.
And, the simple reason for that is, package holiday companies add on their commission to the hire cost!
If you plan on making skiing a hobby, rather than a one-off trip, then I’d definitely think about investing in your own gear.
After a few lessons, you’ll start to get a feel for what skis, boots and poles you like.
And, trust me when I say, the stuff you’ll be using at hire shops, absolutely sucks, even compared to low end ski equipment.
Ski hire shops buy low end products, and they get used and abused; big time.
Depending on whether you go budget or premium, and used or second hand, you could be paying $400-1000 for a package deal.
But, that equipment will last you a skiing lifetime. You can check out some of my recommendations for skis in our guide to the best ski brands, and for boots, in our guide to wide calf ski boots here.
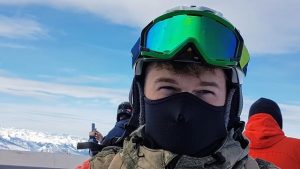
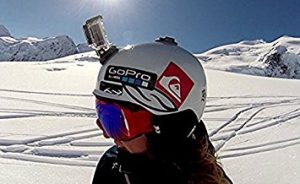
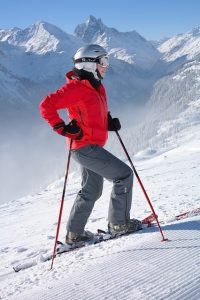
#2 – Helmet
Price: $30-90 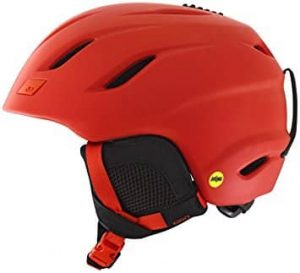
Do you need a helmet for skiing? The short answer; yes.
If you’ve already hit the slopes, you’ll find a lot of skiers don’t wear a helmet. And, I’ll admit that there have been a few occasions that I haven’t worn a helmet on the slopes, too.
But, I wouldn’t advise it. Not all the piste is powder, and smashing your head on ice when you bail, really hurts.
More importantly, you don’t know what’s under the snow. There could be rocks and they’re not just going to hurt, they could cause damage that’s scary to think about.
Finally, as you progress as a skier, you’ll want to go off-piste. You’ll be negotiating rocks and trees, and there’s a good chance you’ll hit one at some point.
So, to summarise; don’t ski without a helmet.
There’s a tonne of quality brands selling ski helmets such as Smith Optics, Salomon, and Traverse from $30 upwards.
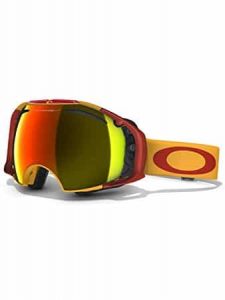
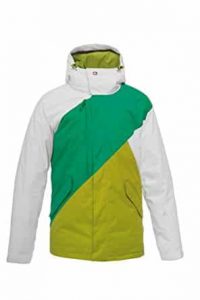
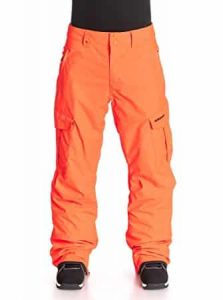
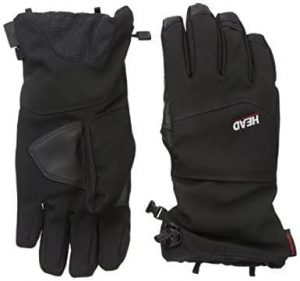
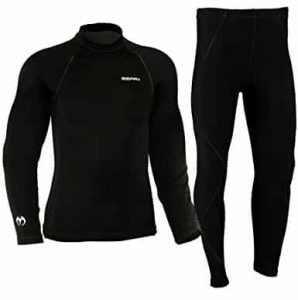
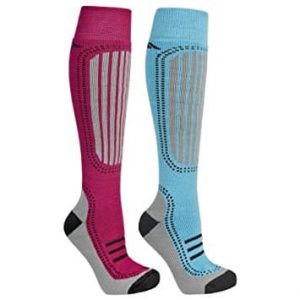
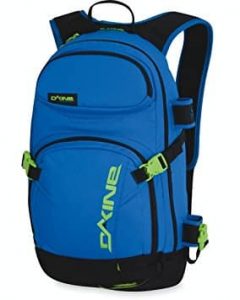
Check out our guide to the best helmets for skiing ihere. Price: $35-140 You’ll want to buy ski goggles for three reasons: A good set of ski goggles will protect you from all of the above. If you’re looking to buy ski goggles, you’ll see there’s clear and tinted lenses available. My advice is to buy good ones; with a tinted lens. A non-tinted lens is going to mean you’ve got no protection against the sun. I made this mistake the first time I hit the slopes. I was squinting so much that by the end of the day I had a headache – all I wanted to do was go to bed. I’d be looking at brands such as Smith Optics and Oakley. Both of those brands focus on manufacturing goggles and glasses (rather than just producing a vast range of ski gear); they are specialists in this field. And, I’ve used both brands of goggles for both motocross and downhill mountain biking; they’re high quality. Check out our guide to the best ski goggles under $50 & $100 here. A final note. Do you wear glasses? As a skiing beginner, you might not be aware that manufacturers like Smith and Oakley produce goggles specifically for you. Need a few examples of OTG (over the glasses) ski goggles? Checkout: Or read our guide to the best OTG ski goggles. Price: $75-150 Now we’re getting to the ski gear where you start to add your own personal style. When you hit the ski slopes, you’ll see most skiers and snowboarders wear, well, bright clothing! You’ll need a ski jacket. Most jackets I’ve had, have been water-resistant, rather than waterproof. Basically, when it snows, and the snow melts, you’ll be protected. But, if it rains heavily, you won’t be. Realistically, if it’s raining heavily, the snow will be gone in a few hours anyway. Obviously, there’s low range products around the $50-75 range, and some ski jackets RRP for well over $150. But, something in the $75-150 is going to do nicely, and not completely break the bank. I like O’Neill, Quicksilver, Oakley and Salomon. Price: $50-150 Like your jacket, your ski pants are going to be water-resistant, and highly wind-resistant. Most brands such as Salomon, Oakley and O’Neill will offer matching ski jacket and pant combos. And, if you’re lucky, they’ll offer a deal on the set. Price: $20-50 Gloves offer part protection, part warmth. I’ve bought a pair of HEAD ski gloves, after leaving mine at the resort. I liked them so much that when I lost them the same day (yes, I’m useless), I went straight back to the shop and got another pair. The main feature you want from a set of ski gloves? A zippered pocket. If you look closely at most ski gloves, you’ll see under the seam on the top of one glove (or both gloves), there’s a small pocket. That pocket is designed to keep your ski pass safe. Some ski resorts need you to show (or swipe) your pass, every time you get on a ski lift. That could mean showing your pass dozens of times per day. Trust me when I say digging into a backpack every time you need your pass, is annoying. We picked out the best ski gloves here. Price: $30-80 If you’re out for a full day skiing, you’ll want to keep warm. And, sometimes standard ski pants and jackets just aren’t enough. Thermal base layers will offer you that extra protection against the elements. You’ll want to find base layers for skiing that are breathable. Certain parts of the slope are going to be demanding, and you’ll sweat. When you stop, that sweat will draw heat away from your body. A breathable base layer will ensure that sweat dries as quickly as possible, keeping your body temperature regulated. Price: $10-25 I say skiing socks, but any warm and breathable socks will do. I prefer merino wool socks, or thick socks with breathable characteristics. If I sweat – they dry quickly. If my feet get wet – they dry quickly. Breathable skiing socks don’t just help your feet dry, but your boots too. If you buy good ski boots, you won’t really need socks for comfort. You’ll be buying ski socks simply to keep your feet warm. And, it’s going to be the best investment you’ve made yet. Nobody likes wet, cold feet. And for that reason, I always take a spare set of ski socks with me when I hit the slopes. Which brings us to our final item on our essential ski equipment list… Price: $25-60 Whether it’s sun-screen, spare socks, food, drinks, phone, keys or all of the above; you’ll need a backpack to carry everything in. Does it need to be specific to skiing? The short answer is no. What I’d look for is a ski backpack that has at least one strap across the front, such as a chest strap. If you check out the Dakine Heli Pro backpack, you’ll see it has one strap for the waist and one for the chest. This spreads the weight of the pack when your carving the slopes. Particularly important if you’re planning a ski holiday with kids and it’s likely you’ll be carrying some of their stuff. You’ll be glad of the extra straps to spread the weight across your shoulders, chest and waist. Most ski resorts will open in early November, and stay open until late March. Bear in mind, the powder is not as good in the first and last months of the ski season. Why? Snow hasn’t fallen heavily. And, the higher temperatures mean snow melts slightly, and then freezes (turning to ice, rather than a soft powder). Any skier will tell you, skiing on powder, is better than skiing on ice. When Is The Best Time To Go Skiing? Taking the above into consideration, the best time to go skiing in most resorts is mid-December through to mid-February. Ski slopes are rated based on how difficult they are. Here’s a 30-second guide to ski slope colour ratings, so you don’t end up on the wrong slope. Designed for complete beginners. It’s likely you’ll get bored of these very quickly. Again, mostly used by beginners, but slightly more technical than a green route. Red routes are where most skiers spend their time. I jumped straight to a red route when I started, because all my friends were on it. I had to have breaks because of leg burn, but apart from that, red routes are doable for beginners. Black and black diamond routes are designed for experts. So, as a beginner, avoid them at all costs. I’ve seen a couple, and they are ridiculously steep! I won’t bore you with a huge glossary of skiing terms, but you’ll already have seen a mention of piste, and off-piste. When you get to a ski resort, you’ll see a range of graded routes: blue, green, red and black. These are routes on the normal piste. This is where most beginners and intermediates will ski. Off-piste runs, are those that are not on the routes provided by the resort. There’s no set route, and it will involve negotiating rocks and trees on many occasions. This is where most expert skiers will spend their time (as well as the black ski piste routes). There’s a good chance you’ve dived into a tonne a research ready to start your new hobby, and to help plan your first ski trip. So, I just wanted to give you a little bit of motivation with an answer to a common question. Most instructors will tell you that skiing is easier to learn for beginners, than snowboarding is. Basically, to get good enough to hit the slopes and have fun, you’re better off skiing. Snowboarding is initially a little harder, but progression to intermediate and beyond comes easier. There’s not much difference in terms of difficulty, in my opinion. The only time there is a difference is if you have previous experience with relevant sports. If you’ve done any kind of inline skating (especially at skateparks), you’ll find skiing easier. If you’ve done surfing, wakeboarding or skateboarding, you’ll find snowboarding easier. Everybody learns at a different pace. If you’ve done sports like surfing, inline skating, or wakeboarding in the past, you’ll find skiing is incredibly easy to learn. I’d say the average person is going to need 2-4 hours tuition as a minimum. Personally, I’d book that into 2 x 1 hour slots or 2 x 2 hour slots. When you’re first learning to ski, you’ll pick up new skills. But, because there’s not been much repetition, when you eventually go on your next ski trip, you might have forgotten those skills. Booking lessons in 2 slots rather than 1, helps to hammer home important techniques, so you’re less likely to forget. You’ll need lessons before you hit the piste. Get yourself onto a dry-slope (artificial slopes), or on a baby slope at ski resorts. A basic turn on skis is called a parallel turn. Remember, turning (for skiing and snowboarding) isn’t just used to change direction. Turning and carving helps you to scrub off speed. If you don’t turn, you’ll be hitting some dangerous speeds, within a matter of seconds. What Is A Parallel Turn? Your feet will be parallel (and so will your skis), and you’ll lean and turn so the skis edge digs into the snow. This will scrub off speed and help you to change direction. The edge of your skis is what’s going to slow you down. The more edge you use, the more speed you’ll scrub off. So, lean more, use more edge, and turn sharper, and you’ll scrub off more speed. If you’re happy with your current speed, you’ll do smoother and wider turns, which will control your speed rather than reduce it. To turn, you’ll need to transfer weight to move your centre of gravity. Pressure always builds on the outside ski (the left ski in right hand turns, and vice-versa). For example, in a right-hand turn, we’ll be aiming to move our left shoulder towards the left ski, whilst leaning slightly to the right. All the pressure builds up on our outside ski (left). Then when you come to turn left, you’ll move your right shoulder towards the right ski, and lean slightly to the left. All the pressure builds up on our outside ski (right). This should be a fluid motion, with no jerky movements. For beginners, the best idea is to keep poles up, so they don’t dig into the piste. You shouldn’t be using your poles for support, or to push out of a turn.
#4 – Jacket
#5 – Pants
#6 – Gloves
#7 – Base Layers
#8 – Skiing Socks
#9 – Backpack
Common FAQ (Answered) For Skiing Beginners
When Does The Ski Season Start?
What Do Ski Slope Colour Ratings Mean?
Green
Blue
Red
Black, And Black Diamond
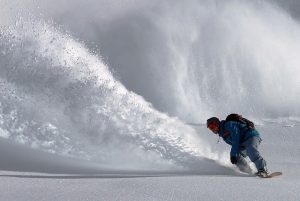
What Is Piste, And Off-Piste?
What Is Piste?
What is Off-Piste?
Skiing Vs Snowboarding For First Timers
Is Skiing Or Snowboarding Easier For Beginners?
How Long Does It Takes To Learn To Ski?
How To Ski
How To Parallel Turn
#1 – Edging
#2 – Body Position
#3- Pole Position
How To Carve
Turning and carving could technically be classed as the same thing.
But, for the sake of beginners looking to progress, let’s assume carving is a more advanced turning technique you’ll use when you start to build up more speed.
First, you’ll need to have the right stance, otherwise your centre of gravity is going to be off.
When carving, you’ll need to keep your centre of gravity (and weight) pushed forward.
And, to have the best chance of counter balancing throughout a carve, you’ll want your skis to be separated by your shoulder’s width.
How To Stop
There’s a few different ways to stop on skis.
For beginners, the two easiest are the Hockey Stop, and the Snow Plough.
How To Do A Hockey Stop On Skis
The Hockey Stop, or Parallel stop, certainly looks cool. But, how do you do it?
Essentially, the Hockey stop, is a more aggressive version of a parallel turn.
But, instead of turning fully, you’ll hold your body position so your riding with your centre of gravity pushing the edge of your skis into the snow.
If you imagine the motion of turning left, and then right. At the point where you start to take pressure off the outside ski (for instance, the left ski in right turns), that’s the position you’ll hold.
The more weight transfer you get and the more aggressively you dig in the edge of the ski, the quicker you’re going to stop.
How To Do A Snow Plough On Skis
If you’ve already hit the slopes, you’ll see people stopping by angling their skis so the fronts nearly touch; this is a Snow Plough.
#1 – Ski Position
The first phase of the Snow Plough is to angle the front of your skis so they are NEARLY touching.
They shouldn’t touch. If they do, one will dig in more than the other and you’ll upset your centre of gravity, and probably end up with a face full of snow.
#2 – Ankle Position
Now you’re sliding, you’ll want to stop.
To stop using a Snow Plough, you need to put pressure on the inside edge of the skis. You do this by rolling your ankles in.
The more pressure you put on your ankles and inside edge of the skis, the quicker you’ll stop.
For beginners, it’s important to take baby steps and get used to how your centre of gravity shifts.
Also, if you put more pressure on one ankle than the other, you’ll turn as you’re stopping, and that makes balancing extremely difficult.
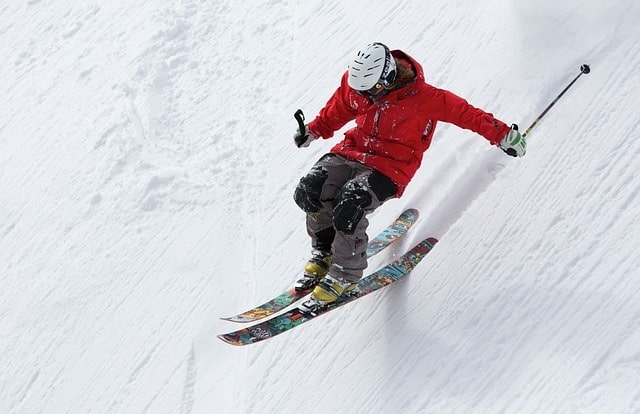
How To Jump
If you’re a bit of an adrenaline junkie, you’ll want to take your skiing to the next level by doing some tricks.
But, you won’t be able to do most tricks, without being able to jump first.
Here’s a quick video guide that shows how to jump on skis.
The Best Exercises For Skiing
The first time I hit the slopes, I loved it.
The one thing I didn’t love, is the burn I got from my leg muscles.
There were a few muscles in my core that were letting me down too, but it was my legs that were suffering the most.
If you plan to go skiing for a week or more, the last thing you want is to have a “rest day” because, well, you’re too weak.
And, that’s why we’re going to cover the best exercises for skiing beginners.
We’re trying to build up both strength and stamina here.
So, you’ll want to be completing at least 10-15 reps, and do all exercises at least twice per session.
Have 2-3 days’ rest in between exercising.
This will give your muscles the chance to repair, and grow.
#1 – Squat Jumps
An easy exercise to build leg strength that you can do at home.
Get your feet in position so they are separated by approximately the width of your hips.
Get into a body position where you’ve got a straight back, but your knees are bent at approximately 45 degrees, and jump as high as you can.
When you land, you’ll want to absorb the landing by going back to the 45-degree knee position, and repeat!
How To Do Squat Jumps
#2 – Side Lunges
For side lunges, you’ll want your feet to be positioned roughly twice the distance of your hips apart.
Throughout the exercise, make sure your feet are firmly on the floor.
Lifting your feet will reduce the effectiveness of the exercise.
How To Do Side Lunges
#3 – Drop Lunges
Next, we’ll focus on drop lunges, another easy exercise you can do from home to improve leg strength for skiing.
You’ll start with your hands on your hips, and position your feet directly below your them.
With drop lunges it’s all about posture throughout the chest, shoulder and back area.
You’ll cross one leg behind the other, and lunge by bending both knees. After each drop lunge, switch legs.
How To Do Drop Lunges
Planning Your First Skiing Trip
Looking to go on your first skiing trip? Here’s a few tips to help you plan your trip in advance.
Skiing Lessons
The first thing you’ll want to do, is book yourself some skiing lessons. 
I personally learnt at a resort, but that’s because I was already living in Bulgaria.
I travelled to Bansko, Bulgaria, for a week at a time.
And, what I saw was a lot of people on the “baby slope”.
This is where you learn basic techniques on snowboards and skis, such as turning and stopping. I had a 2 hour lesson there, and then hit the slopes.
I remember seeing some of the same people on that baby slope on my first, and last day.
They’d spent all their holiday practising, because they’d not had lessons before their trip. There were some people there that never actually got onto the main slopes.
That’s not just frustrating, it’s a huge waste of money – don’t let that be you!
Some people learn skiing quicker than others.
And, you’ll only know how quickly you’ll learn, by having lessons.
One thing is for sure, if you have lessons, you’ll spend less (or no) time on the baby slopes falling, and more time on the piste having fun.
I’d suggest getting everyone in your group to a point where they are roughly at the same level.
Otherwise, you’ll be waiting around for people (or going on different routes). So, if someone is falling behind in learning, get them to grab a few extra lessons.
Where To Find Skiing Lessons
As we rarely get snow in the UK, we’re limited to learning on dry-slopes. There’s a cool map that shows all the dry-slopes to get skiing lessons over at Ski Club.
For people in the USA, there’s a list of ski resorts here. Pretty much any ski resort will have someone offering lessons.
Still can’t a dry slope near you?
Try searching “dry slope near me” on Google.
It will account for your location, and bring up the dry slopes that are nearest to where you live.
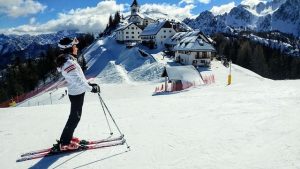
The Best Places To Go Skiing
So, you’ve got your kit, you’ve started lessons, now what? 
Well, you need to decide where you are going to go skiing.
There are thousands of resorts to choose from worldwide.
Below we’ve listed the best beginner ski resorts in Europe, the USA and Canada – to give you some ideas.
The 7 Best Ski Resorts In Europe
- Tignes, France
- Lech, Austria
- Bansko, Bulgaria
- Zermatt, Switzerland
- Chamonix, France
- Courmayeur, Italy
- Morzine, France
The 7 Best Ski Resorts In The USA
- Big Sky, Montana
- Mammoth Mountain, California
- Aspen, Colorado
- Alta, Utah
- Breckenridge, Colorado
- Jackson Hole, Wyoming
- Telluride, Colorado
The 7 Best Ski Resorts In Canada
- Whistler, BC
- Red Mountain, BC
- Revelstoke, BC
- Sun Peaks, BC
- Banff, AB
- Panorama, BC
- Lake Louise, Alberta
BONUS: The Best Skiing Websites & YouTube Channels
Websites
Finding Places To Get Lessons
If you want to get ski lessons in the UK, checkout this interactive map on Ski Club.
If you’re located in the USA, then there’s a similarly useful resources here.
AlpineZone.com – A resource for New England and Northeast skiing and hiking
YouTube Channels
Scott Herman Fitness
As I’ve mentioned above, you’ll be surprised how hard skiing is on your legs and core muscles.
There’s a tonne of good instructional videos over at Scott Herman’s YouTube channel. They are definitely transferable to skiing.
This will help you get in shape ready for your first skiing trip.
The Ski Channel
The Ski Channel is a great all-round ski channel for new skiers.
What’s Next?
Thanks for reading our 10-minute beginner’s guide to skiing.
Hopefully there’s enough information for you to go and buy your gear, get some lessons and book your first trip.
Feel free to bookmark this page and come back to it closer to your ski trip.
And, if you like what you’ve read, jump on our email list.
We’ll send you updates with skiing tips, and product recommendations.