Whether you’re planning on making this your hobby and obsession, or just preparing for a one-off first snowboarding trip, we’ll leave no stone unturned.
This guide includes everything from the essential snowboarding equipment list, right through to the best snowboard resorts in the world.
Let’s get started!
Jump To Section
The Essential Snowboarding Equipment List
I’m not going to lie; snowboarding equipment is expensive.
So, it’s important that you purchase the right gear first time round.
As a first-time snowboarder, here is all the kit you are going to need.
#1 – Snowboard, Snowboard Bag & Bindings
Price: $300-750 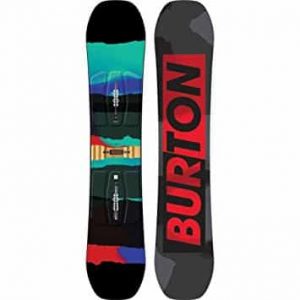
Here’s the good news; as a beginner you don’t necessarily have to buy a snowboard, snowboard bag and bindings.
Every dry-slope and ski resort in the world will have hire shops. There, you’ll be able to hire a suitable snowboard and bindings for your trip.
Is this advisable? If you’re a complete beginner, and not sure if you’ll ever go on a snowboard trip again, yes.
If you’re planning on starting snowboarding as a long-term hobby, then yeah, you’re going to need your own equipment. You can check out our guide to the best snowboard brands here.
Snowboard hire shops are notorious for buying the cheapest, hardwearing equipment they can get their hands on.
And, who can blame them? Hire gear gets trashed.
What this means is the boards don’t have loads of pop (and, if it’s busy, you might not have the exact size board that’s suitable for you), and the bindings tend to be pretty-uncomfortable.
But, I’m not suggesting jumping on Amazon and buying a snowboard and suitable bindings right now.
At the very least, you’ll need to read up on snowboard sizing, the best snowboard brands and determine which board suits you best. It’s a big investment.
You’ll only be able to do this after visiting a dry-slope before going on your trip, and getting a lesson.
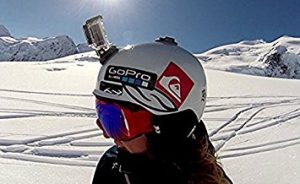
#2 – Helmet
Price: $30-90 
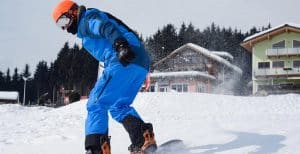
You’re probably going to see cool snowboarding videos and pictures, where riders aren’t wearing a helmet.
So, should you wear one?
Snowboarding is a little more dangerous than it looks.
Anything could be hiding under the snow (like rocks). Even if they’re not, bailing and smashing your head on the piste, hurts big-time.
My advice? You, your family and your friends shouldn’t be hitting the slopes without a decent helmet. It’s just not worth the risk.
So, this is something I’d buy beforehand and tuck into my pack.
Sure, you can hire them, but hire-shop helmets have been used, abused, and they tend to stink of the last person’s sweaty head – yuck!
Where do you start when buying a snowboarding helmet?
Luckily, we’ve already created a guide to the best skiing and snowboarding helmets here.
You’ll be grabbing one for as little as $30.
The only important piece of advice I’d give, is buy one from a reputable brand. I’ve listed the best snowboard helmet brands below.
Buy one from any of these brands, and you’re good to go.
The Best Snowboarding Helmet Brands
- Smith Optics
- Giro
- POC
- Oakley
- Salomon
- Sweet Protection
- Bolle
- Atomic
- Anon
- UVEX
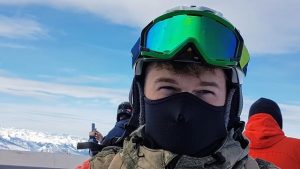
#3 – Snowboarding Goggles
Price: $35-140 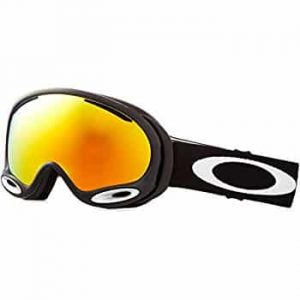
Necessary? Nope.
Worthwhile investment? Yup.
If you plan to go snowboarding, you’re going to want to buy a set of snowboarding goggles.
My advice is to buy a quality set of snow goggles with a tinted lens.
They’ll act like a pair of sunglasses and that means you won’t have to squint because of the sun reflecting off the snow.
Snowboarding goggles give you:
- Protection from the sun – slopes will reflect rays
- Protection from wind, and sleet (sleet hurts your eyes!)
Again, where do you start? Which are the best snowboard goggle brands?
I’ve heard horror stories of cheap snowboard goggle brands offering a tinted lens, but without UV protection. This is bad-bad news.
Your pupils will dilate, to help see through the tinted lens.
That’s exposing you to more UV rays than if you weren’t wearing them, but you’ve got no UV ray protection. Dangerous.
So, you’ll want to buy goggles again, from reputable brands. I can’t stress this enough.
Over my years racing motocross, enduro, mountain biking, and snowboarding, I’ve come across a tonne of cool brands (they make different goggles, for different sports), and I’ve listed them below.
We’ve created a guide to the best snowboarding goggles under $50, and $100 (from my experience).
The Best Snowboard Goggle Brands
- Smith Optics
- Oakley
- Giro
- Spy Optics
- Salomon
- Bolle
- Bloc
- POC
- UVEX
#4 – Snowboard Jacket
Price: $75-150 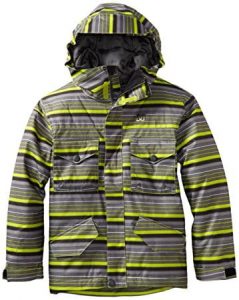
You might already wear base layers, a hoodie, sweater; whatever.
But, you’re going to need a ski jacket.
You’ll want one that’s thick enough to protect you from the elements, but breathable enough so you don’t overheat (snowboarding is extremely hard on the body, so you will sweat).
There’s a tonne of high-quality brands offering snowboarding gear, including jackets.
You’ll get a much better deal if you buy snowboard jackets outside of the typical ski season.
In most countries, that means buying gear after March, but before November.
Looking for snowboard jacket brand recommendations?
Look towards Salomon and Oakley if you have a large budget, and O’Neill or Quicksilver if your budget is a little tighter.
#5 – Pants
Price: $50-150 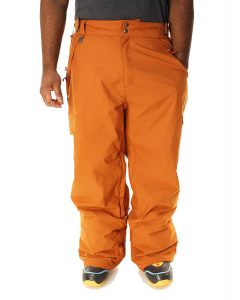
Most snowboarding clothing brands will offer a matching set of gear (snow jacket and pants), but hey, you don’t have to match.
Expect to pay $50-150 for a quality set that’s going to last.
But, there are cheap brands out there selling snowboarding pants for as little as $35 that will get you through a singular trip.
#6 – Snowboarding Gloves
Price: $20-50 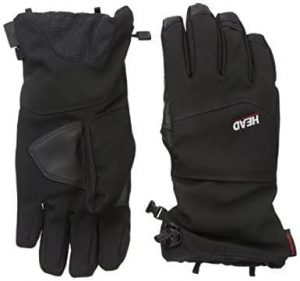
If you don’t wear gloves when you’re snowboarding, you are seriously crazy.
Sure, they’ll protect you from the general elements, but they’ll also protect you from something more important.
Cold-burn.
If you bail at speed, you’ll put your hands out – it’s a natural reaction. And, you’ll get a cold-burn that is seriously uncomfortable.
Like every other piece of snowboarding gear, there’s loads of brands to choose from (Quicksilver, Oakley etc).
My current set of snowboarding gloves come from HEAD. They’re a few years old, but if I remember rightly, they were around $35; I rate them highly.
A quick note if you’re trying to buy snowboarding gloves on a budget.
You need gloves with a zippered pocket on the hand. This is to keep your ski pass safe.
Some ski resorts require snowboarders to show their pass on every entry (i.e. not just to get into the resort).
Taking off your gloves, and fumbling for a pass in a backpack, gets incredibly annoying.
Check out our review of the best gloves for skiing and snowboarding this year.
#7 – Base Layers
Price: $30-80 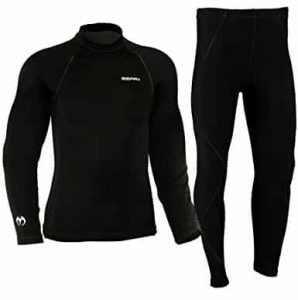
Sometimes I wear base layers, sometimes I don’t; it depends how cold it is.
If you feel the cold easily, I’d definitely advise wearing them.
Most base layers are breathable. So, even if the outside temperature isn’t ridiculously cold, you won’t overheat.
What they also do is wick sweat away from your body, allowing it to dry.
With normal clothing, this sweat stays where it is, and that starts to draw heat from your body (and smells).
So, if you’re choosing to buy base layers, make sure they are breathable.
#8 – Snowboarding Socks
Price: $10-25 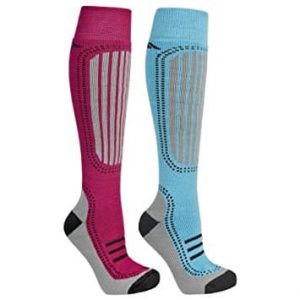
Next, you’ll want a thick pair of snowboarding socks. Look for socks that offer moisture wicking materials.
If your socks have moisture wicking properties, when your feet get wet, they’ll dry quickly.
Personally, I always take a spare set of snowboard socks when I hit the slopes.
Having wet feet is a real pet-hate for me.
Where do you store your spare socks though???
I pick out the warmest socks in 2019 here.
#9 – Backpack
Price: $25-60 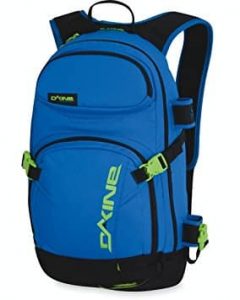
You’ll need a backpack where you can stash all your gear for the day.
Anything in the 15L-30L capacity will be fine for a snowboarding daypack.
I’d be leaning towards the bigger capacity if you’re carrying bits and pieces for others (i.e. children).
One backpack worth looking at is the Dakine Heli Pro.
You’ll notice it has a waist and chest strap. This will help distribute weight evenly which makes an enormous difference when it comes to comfort.
The last thing you want is your pack flying around as you head down the slopes, and straps cutting into you.
Snowboarding FAQ
When Does The Snowboarding Season Start?
Most snowboarding resorts will open their doors in November. The season continues up until the end of March.
When Is The Best Time To Go Snowboarding?
Aim to book your snowboarding trip from the middle of December, through to the middle of February.
If you book outside of these timeframes, you’re running the risk of slopes lacking snow (they use snow cannons to top up the snow, and they suck), and powder being thin.
Because of the warmer temperatures in November and March, snow will melt and then freeze again.
This creates hard-packed ice like snow, rather than powder, and it’s not as fun to ride on!
Snowboard Route Difficulty – Which Route Should You Take?
Ski resorts will rate slopes based on difficulty. 
To make the route difficulty easy to understand, they mark each route on a resort map by colour.
Green
Green routes are designed for complete beginners. There’s very little elevation change, and nothing technical involved.
Blue
Blue routes are generally only used by beginners, or those looking for a calm and relaxing route.
Elevation changes are slightly more noticeable than snowboarding route with a green difficulty rating.
Red
Red snowboarding routes get a little bit more technical.
These are usually the busiest routes on the resort with anyone from beginner-expert riding them.
They’ll be small technical sections, and lots of elevation change. Most beginners should start on at least a blue (or green if necessary) route before heading to the red runs.
Black, And Black Diamond
Designed only for experts. Basically, stay away from them.
They are technical, steep and certainly not ideal for beginners.
What Does Snowboarding On-Piste Mean?
You’ll hear a lot of references to piste.
The piste is the route marked on the ski resort map.
It’s the route that they recommend you stick to. And, as a beginner, you should.
What Does Snowboarding Off-Piste Mean?
Snowboarding off-piste is designed for intermediate-expert snowboarders. Instead of following the predefined route mapped out by the resort, riders will make their own route; on the fly.
This will usually mean negotiating trees and rocks.
Because off-piste routes are not regularly used, the powder tends to be better, which is why so many expert snowboarders ride off-piste.
Is Snowboarding Easier Than Skiing?
Snowboarding is typically harder than skiing to learn initially. So, getting to the minimum level to hit the slopes, might take an extra hour or two.
But, the progression from complete beginner to intermediate, comes a lot quicker than it does with skiing.
So, unlike skiers that might still be fumbling around on the blue runs after a few days tuition, you should be up onto the red routes carving some turns, within your first few days on the slopes.
How Long Does It Take To Learn To Snowboard?
If you’ve got previous experience surfing, wakeboarding or skateboarding, you are going to fly through beginner sessions. I wouldn’t think it would take more than 2 hours to learn.
As a rule of thumb, expect to book in 2-4 hours as a complete beginner (with no other board experience) to get good enough to move from the baby (learning) slopes onto the main slopes.
Learning How To Snowboard
If there’s one suggestion I’d make before going on your snowboard trip; it’s get some lessons. 
Snowboarding holidays aren’t cheap, so you don’t want to be wasting time on the baby slopes.
Here’s some pointers to help you as your learning snowboarding basics and beyond.
Goofy Or Regular?
When you get to the slope for your first lesson, you’re going to need to know one important thing; do you ride goofy or regular?
This determines which foot you use as your lead foot.
Goofy
Riding goofy is a term given to those that ride with their lead foot being their right.
Typically, you’ll find that most left-footed people will ride a snowboard goofy.
Regular
Riding regular is much more common. The lead foot for regular snowboard riders is going to be their left foot.
Most people that are right-footed will ride regular, and therefore, their lead foot is their left.
Which Is Better For Snowboarding, Goofy Or Regular?
Neither. You should ride in the way you feel most comfortable.
It’s not a set rule that right-footed people ride regular, and left-footed people ride goofy (although, that’s usually the case).
If you feel comfortable, you’re in control of your board. That means you’ll learn to turn, carve, stop and do tricks on a snowboard much more quickly.
How To Snowboard
Below we’ve got a tonne of tips and videos to help you learn how to snowboard as a beginner.
When watching any instructional videos, look to see if the instructor is riding goofy or regular.
Depending on which way you ride, you might have to switch what they are saying around.
For instance, the toe side edge is used to turn right for regular riders, but it’s the heel side for goofy riders.
How To Fall On A Snowboard
Pretty-much every single extreme sport involves bailing – hard. And, snowboarding certainly isn’t any different.
So, before you hit the slopes, make sure you know the basics of how to fall without completely ruining your body!
How To Turn On A Snowboard
Nailing down that first turn on a snowboard is literally the hardest part of being a beginner.
Until you learn how to turn on a snowboard, you’re going to be limited to the baby slopes.
Turning isn’t just used for changing direction, it allows you to control speed on the slopes.
If you can’t turn, you’ll rocket down the slopes at scary speeds, and probably take someone out.
The most important aspect of turning, is getting used to looking at where you want to go, not your feet.
By moving your torso to look where to need to go, your body position and centre of gravity will follow suit.
Learning to focus on a fixed point will help you nail down your first turn quickly.
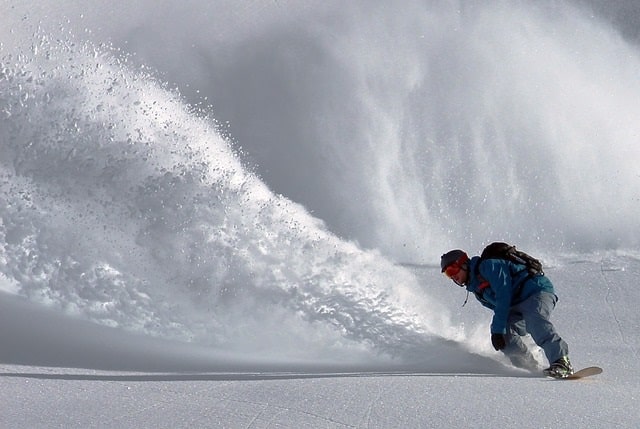
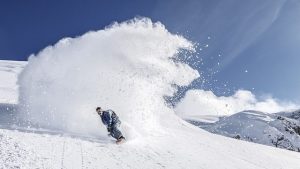
How To Carve On A Snowboard
Learning how to carve a snowboard isn’t particularly difficult, once you’ve learnt to turn.
Essentially, it’s a more aggressive variation of turning. The more edge of your snowboard you use, the harder and bigger you’ll carve, spraying up a tonne of powder in the process.
It’s a way to not just look cool, but gives you a way to reduce speed (and stop) quickly.
How To Stop On A Snowboard
Your instructor is going to have you doing the equivalent of a snow plough stop, almost straight away. This will give you experience in control both on the heel side and toe side of your board.
Basically, you’ll be stopping by either pointing toes uphill, or downhill. And, you’ll using your toe side or heel side (depending on if you are riding goofy or regular) to stop.
The more you angle the edge of the board into the snow, the quicker you’ll stop.
As you progress, you’ll start to use turning and carving to slow you down, and finish the stop with a snow plough.
There’s no one method of stopping that you must use; use whatever you feel comfortable with.
The Best Snowboarding Tricks For Beginners
Now, I wouldn’t expect you do be learning to do tricks on a snowboard on your first trip, but hey – here’s a few examples of tricks for beginner-intermediate riders.
The easiest snowboarding tricks for beginners are the butter, ollie, nollie and ground 180.
How To Butter On A Snowboard
How To Ollie On A Snowboard
How To Nollie
How To 180 On A Snowboard
Fitness & Strength For Snowboarding
Snowboarding is a lot harder on your body than you might think.
As a beginner, you’ll need reasonable core strength.
More importantly, you’ll need some good leg strength and overall fitness.
The first time I went snowboarding, I couldn’t believe how much emphasis was on leg strength. After a few hours, I had to stop for a break.
As my first day progressed, the gaps between breaks became shorter and shorter. My legs were spent!
If you build up your leg strength for snowboarding before your trip, you’ll spend less time resting and more time snowboarding.
For those looking to get in tip-top shape (and not just for snowboarding), we’ve created a Tabata workout plan; an intense program that can be completed in less than 4-minutes per session.
How Often Should You Exercise?
We’re not looking at a full-blown fitness plan here, just something to get the juices flowing.
As a minimum, I’d be looking to start training at least 6-weeks before leaving for a trip.
Ideally, exercise every 3-4 days. This will give you enough time in training, but also enough time to rest in between training days.
How Many Reps Of Each Exercise Should You Do?
We’re not looking for bodybuilding type strength (low reps). Instead, we want good overall strength, with an element of stamina built in.
For that, you’ll need to be aiming for 10-15 reps per exercise, and repeating each exercise 2-3 times per training session.
The Best Exercises For Snowboarding
#1 – Squats
If you do just one exercise to build leg strength for snowboarding, do this one.
Basic squats will give just enough stamina to last a trip, but probably not the strength.
If you combine the squat with a jump, you’ll get stronger and fitter much more quickly.
More importantly, you can do this exercise at home; no excuses!
#2 – Side Lunges
Rather than a basic lunge, a side lunge will increase flexibility, strength and stamina; not just flexibility alone.
The most important thing to remember when doing side lunges, is not to lift your feet off the ground. If you do, you’ll reduce how effective the lunge is.
#3 – Drop Lunges
Natural progression from side lunges, is to move to drop lunges.
By doing lunge variations, you’ll be ensuring that you’re not just maintaining flexibility, but improving it too.
Planning Your First Snowboarding Holiday
You’ve got your equipment and you know the exercises you need to do to make sure your trip is a good one.
Now for the fun part; planning your snowboarding holiday.
Get Snowboarding Lessons
I can’t stress this point enough. You HAVE to get snowboarding lessons before you go on your trip.
Some people learn quicker than others. One person might take an hour to nail down a turn, another might take a day or longer.
As a group, it’s going to be extremely frustrating, waiting around for someone.
If someone in your group isn’t learning how to snowboard as quickly as another, no problem; they can grab a few more lessons.
More importantly, snowboarding trips are ridiculously expensive. The last thing you want to do is spend your time on the baby slopes, learning how to turn!
And, trust me, this happens.
I’ve been on multiple snowboard trips (5-7 days at a time) and seen the same people on the baby slopes on day 1, as the day I left.
They wasted their whole holiday on the baby slopes; because they didn’t have any lessons beforehand.
Where To Find Snowboarding Lessons
Ski Club has an interactive map that shows where dry-slopes are located. This is the easiest and cheapest place to learn how to snowboard.
Some dry-slopes will have an “arrive and ride” policy, but for lessons, there’s a good chance you’ll need to book in advance.
It’s rare that dry-slope operators want beginners having lessons, when experts are having a jam session!
If there’s nothing suitable locally over at Ski Club, then there’s a tonne of great snowboarding resorts listed here with listings throughout the USA.
The Best Places To Go Snowboarding
There are 1000s of snowboarding resorts across the globe, so how do you choose?
Admittedly, a lot of the time it comes down to price. And, the price is going to vary, depending where in the world you are.
So, we’ve devised a list of the best snowboarding resorts in Europe, the USA and Canada.
The 7 Best Snowboarding Resorts In Europe
- Tignes, France
- Lech, Austria
- Banrlandsko, Bulgaria
- Zermatt, Switze
- Chamonix, France
- Courmayeur, Italy
- Morzine, France
The 7 Best Snowboarding Resorts In The USA
- Big Sky, Montana
- Mammoth Mountain, California
- Aspen, Colorado
- Alta, Utah
- Breckenridge, Colorado
- Jackson Hole, Wyoming
- Telluride, Colorado
The 7 Best Snowboarding Resorts In Canada
- Whistler, BC
- Red Mountain, BC
- Revelstoke, BC
- Sun Peaks, BC
- Banff, AB
- Panorama, BC
- Lake Louise, Alberta
BONUS: The Best Snowboarding Websites & YouTube Channels
Feel clued up, hyped-up but want to read and see more?
Awesome.
Here’s a few of the best websites and YouTube channels for snowboarders I found researching this guide, and when planning trips in the past.
Snowboarding Websites
Finding Places To Get Lessons
The two great resources for finding snowboarding lessons we mentioned above are here, and here.
Transworld
Transworld Sports is a great website for a tonne of adrenaline filled activities, and snowboarding isn’t any different.
You can check out their site here.
Snowboarding YouTube Channels
SnowboardProCamp
A great channel you anyone looking to learn how to snowboard, there’s a tonne of useful tutorials here just for you.
Check out SnowboardProCamp here.
White Lines
Looking for cool snowboard videos in general? There’s no place better to checkout than White Lines.
What’s Next?
Thanks for reading our 10-minute guide to snowboarding for beginners.Hopefully, we’ve got you hyped-up, clued-up, and ready to book your first lesson, and your first trip.Like what you’ve been reading?Signup to our email list and we’ll email you the second we publish any snowboarding product recommendations or tips.