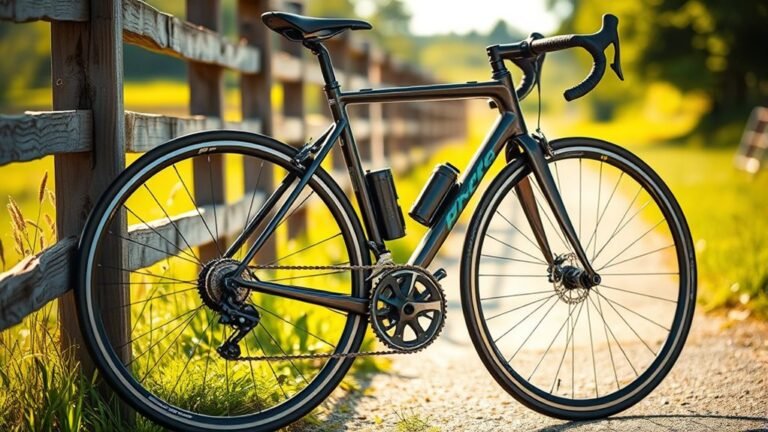
How to Measure Bike Size in 7 Easy Steps
To measure your bike size in 7 easy steps, start by measuring the frame from the bottom bracket to the seat tube top. This gives you the core frame size, which is super important for finding a comfortable ride.
Then, measure your wheel diameter across the tire through the hub to understand the bike’s overall size better.
Next, get your height and inseam. For the inseam, press a book up to your crotch—this helps you measure accurately.
Setting your seat height just right is key. Aim for about an inch below your inseam for balance bikes, or a bit higher if you’re an experienced rider.
After that, check the handlebar reach and standover clearance to make sure the bike feels comfortable and safe.
Finally, match all these measurements to a size chart, and remember to consider special sizes if you’re shopping for kids or an e-bike.
Keep going, and you’ll find exactly how to get your perfect fit!
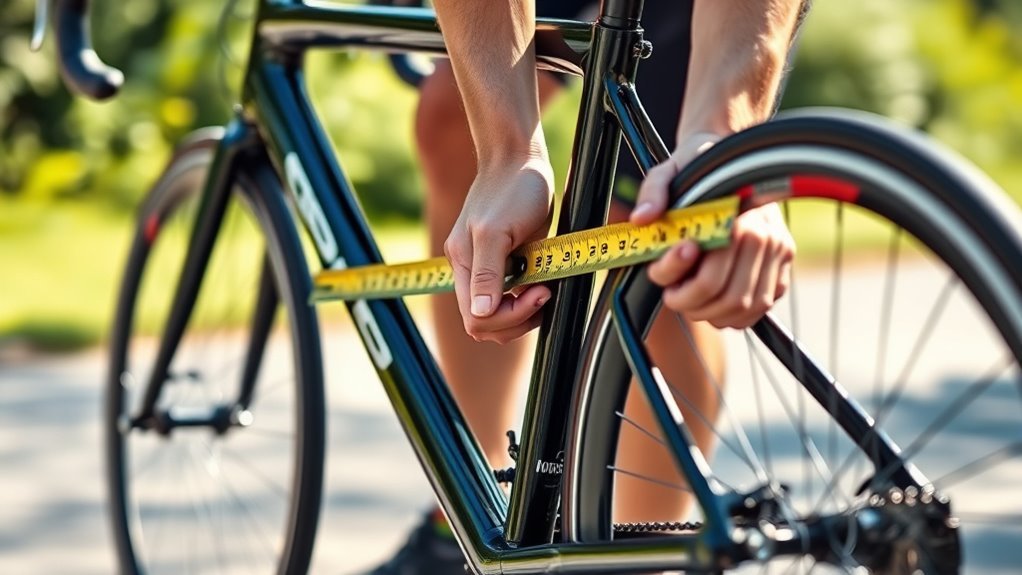
Measure the Bike Frame Size
How do you determine the right bike frame size? Start by measuring the length from the center of the bottom bracket—the spot where the pedals connect—up to the top of the seat tube.
Use a measuring tape to guarantee an accurate measurement, keeping it straight along the seat tube’s length. Make sure your bike is upright on a flat surface for precision.
Ensure accuracy by measuring along the seat tube with the bike upright on a flat surface.
This measurement typically defines the bike frame size and is usually expressed in centimeters or inches, depending on the bike type. Once you have your measurement, consult the manufacturer’s size chart to confirm the proper fit.
Choosing the right bike frame size assures comfort, safety, and better control while riding. So, make this step essential before purchasing or adjusting your bike.
Measure the Wheel Diameter
Measuring the wheel diameter involves placing a tape measure straight across the tire from one edge to the other through the hub, ensuring you capture the full size. First, make sure the tire is at full inflation to get accurate measurements.
Position the tape measure across the widest part of the tire, running it straight through the hub for precision. This tire size affects how the bike handles and its suitability for various terrains.
Common adult wheel diameters include 26-inch, 27.5-inch, 29-inch, and 700c, while kids’ bikes usually have 12-inch to 24-inch wheels. After measuring, compare your wheel diameter with the manufacturer specifications to confirm a proper fit and perfect performance.
Using correct measurements helps you choose the right bike size effortlessly. It’s a simple step that makes a big difference!
Measure the Rider’s Height and Inseam
Now that you know your bike’s wheel diameter, the next step is to determine your rider measurements to find the right bike size. Start by measuring your rider’s height standing straight against a wall with shoes on.
Then, for the inseam measurement, stand with your back against the wall, feet slightly apart, and press a book firmly into your crotch. Mark where the book touches, then measure from the floor to that mark.
Wearing typical biking shoes ensures accuracy for bike fitting.
| Measurement | How to Measure |
|---|---|
| Rider’s Height | Stand straight against a wall |
| Inseam Measurement | Book pressed firmly in crotch |
| Footwear | Wear typical biking shoes |
| Importance | Determines frame size and seat height |
Measuring correctly guarantees a proper fit and comfortable ride.
Determine the Proper Seat Height
Since a proper seat height directly affects comfort and control, you’ll want to adjust it based on your child’s inseam measurement.
To find the right seat height for a proper fit, follow these steps:
- Measure the inseam by pressing a firm object like a book against your child’s crotch while standing. Then, measure from the ground to the top of the object.
- For balance bikes, set the saddle 0.5 to 1.5 inches below the inseam. This allows comfortable leg extension.
- If using training wheels, adjust the seat so your child’s feet reach the ground comfortably — about 0 to 3 inches above the inseam.
- For experienced riders, position the seat 2 to 4 inches above the inseam. This helps with efficient pedaling and a slight knee bend.
This way, the seat height matches your child’s bike size perfectly.
Check Reach and Standover Clearance
Now that you’ve set your seat height, it’s important to measure the distance from the saddle to the handlebars to guarantee a comfortable reach.
Next, stand over the bike and check the clearance between your inseam and the top tube for safety. These steps help you confirm the frame fits your body properly and supports safe riding.
Measure Saddle to Handlebar
When you measure the horizontal distance from the saddle to the handlebar, you can check your reach and guarantee a comfortable riding posture. This reach measurement is key to your bike fit and overall comfort.
- Use a ruler or tape measure to find the distance from the center of the saddle to the center of the handlebar stem.
- Ensure your elbow has a slight bend when gripping the handlebars; this indicates proper reach.
- Adjust the saddle height and handlebar position if you feel stretched out or cramped to maintain natural riding posture.
- Confirm that your saddle to handlebar distance promotes control and comfort on every ride.
This simple step ensures your bike’s reach suits you perfectly, enhancing riding posture and comfort.
Assess Frame Clearance
Although choosing the right frame size is crucial, you also need to assess frame clearance to guarantee comfort and safety. Start by measuring your inseam and then stand over the bike’s top tube, making sure you have 1-2 inches of standover height clearance. This prevents discomfort or injury when stopping.
Next, check the reach by sitting on the saddle and extending your arm to the handlebars; your elbows should bend naturally without stretching or cramping. Use a tape measure to note the vertical gap between your inseam and top tube height to confirm a proper fit.
Frame clearance ensures you can control the bike comfortably and safely without any contact with the frame.
| Measurement Type | How to Measure | Ideal Clearance/Position |
|---|---|---|
| Inseam Measurement | Measure inside leg length | N/A |
| Standover Height | Stand over top tube | 1-2 inches clearance |
| Top Tube Height | Vertical distance from ground | Matches inseam for clearance |
| Reach | Arm extension from saddle | Natural bend at elbows |
| Frame Clearance | Inseam to top tube gap | Comfortable, no contact |
Use a Size Chart to Match Measurements
Since bike sizes vary by type and manufacturer, you should always start by comparing your height and inseam measurements with the appropriate size chart. Bike size charts help you find the right frame sizes by matching your inseam measurements and height.
To use them effectively, first measure your inseam carefully to ensure proper leg extension for comfort and efficiency. Then, select the size chart specific to your bike type—road, mountain, or kids—to get accurate frame sizes.
Next, check that the suggested size fits your riding style. If you’re between sizes, think about whether you prefer a tighter or looser fit.
And if you need to measure your child’s bike size, make sure to use the kids’ chart and verify frame sizes for safety.
This method helps you make sure your bike fits well and rides comfortably. It’s worth taking the time to get it right!
Consider Special Sizing for Ebikes and Kids
Because ebikes carry extra weight and deliver more power, you’ll need to think about special sizing beyond standard frame measurements. For proper ebike sizing, consider a slightly larger size frame to handle the added motor torque and weight. This helps ensure better ride comfort on longer trips.
Always check manufacturer recommendations, as geometry and weight capacity can vary by model. When sizing kids’ bikes, focus on wheel size and inseam measurement to make sure they can safely reach pedals and handlebars.
Use a kids’ bike size chart as a guide, but prioritize fit and comfort over age alone. By paying attention to these details in frame measurements and sizing charts, you’ll ensure a safer, more enjoyable ride for both adults on ebikes and young riders.
Conclusion
Now that you’ve mastered these seven easy steps, finding your perfect bike size will feel like riding off into the sunset—smooth and effortless. Just like Goldilocks found her perfect fit, you’ll discover the bike that’s “just right” for you.
Remember, a well-measured bike not only boosts comfort but also turns every ride into an adventure. When you get your bike size right, you enjoy better control, increased efficiency, and less strain on your body.
So, gear up with confidence and ease! Measuring your bike size properly ensures that every ride is comfortable and fun. Now, go out there and enjoy the journey on a bike that fits you perfectly!