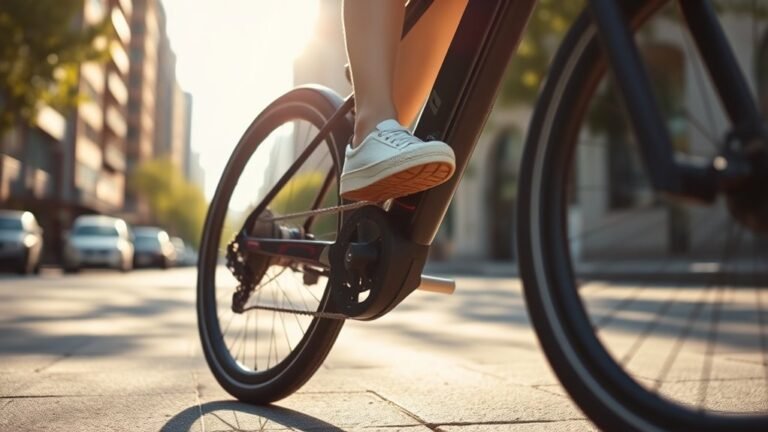
How to Adjust Bicycle Brakes in 7 Easy Steps
Start by inspecting your brake pads and rims for wear or damage. This step is crucial to ensure your bike can stop safely and effectively. If you spot any issues, it’s best to replace the worn parts before moving on.
Next, loosen the brake cable anchor bolt to release tension. This makes it easier to adjust the cable properly.
Adjust the cable so you get a firm brake lever feel without slack. You want the brakes to respond quickly when you squeeze the lever—no delays or sponginess.
Align your brake pads so they contact the rim evenly without touching the tire. Proper alignment prevents uneven wear and keeps your stops smooth and safe.
Secure the cable anchor bolt tightly to hold the tension in place. This keeps your adjustments from slipping during rides.
Fine-tune the lever reach and pad contact for smooth stopping. Make sure the lever feels comfortable and the pads hit the rim right away.
Finally, take a quick test ride to guarantee everything works perfectly. This lets you feel the brakes in action and tweak any last details before hitting the road or trail.
Keep going to master precise brake adjustments and safety tips!
Inspect Brake Pads and Rims
How do you know if your bicycle brakes need attention? Start with a thorough inspection of the brake pads and rim. Check that the brake pads have at least 1-2mm of rubber remaining and are aligned evenly with the rim’s brake surface.
Begin by inspecting brake pads and rim alignment to ensure safe and effective braking performance.
Misalignment or uneven wear can reduce braking efficiency. Look closely for any contamination on the brake surface, like dirt or oil, which also affects performance.
Inspect the rim for dents, cracks, or excessive wear, and make sure it’s true without wobbling. The brake pads should only contact the braking surface, never the tire sidewall.
These checks are essential before any brake adjustment, ensuring your brakes respond effectively and safely during rides.
Loosen the Brake Cable Anchor
To adjust your brakes properly, start by releasing the cable tension. Locate the anchor bolt that holds the brake cable in place on the caliper or arm.
Use the right tool to loosen this bolt so you can make the necessary adjustments. This will give you the slack needed to tweak the brake settings just right.
Release Cable Tension
Before making any adjustments, you’ll want to loosen the brake cable anchor bolt using an Allen wrench or the appropriate tool. This step releases the brake cable’s tension, allowing you to adjust it properly.
Once you loosen the bolt, gently pull the brake cable out of the anchor point to create slack. Make sure the cable housing is free of tension and the brake calipers are open to avoid any resistance.
Fully disengaging the cable prevents unwanted tension during setup, ensuring smooth brake lever movement. Check that the cable and housing have no residual tension before proceeding.
Releasing cable tension correctly is key to adjusting your brakes effectively and safely. It might seem simple, but taking the time here makes all the difference.
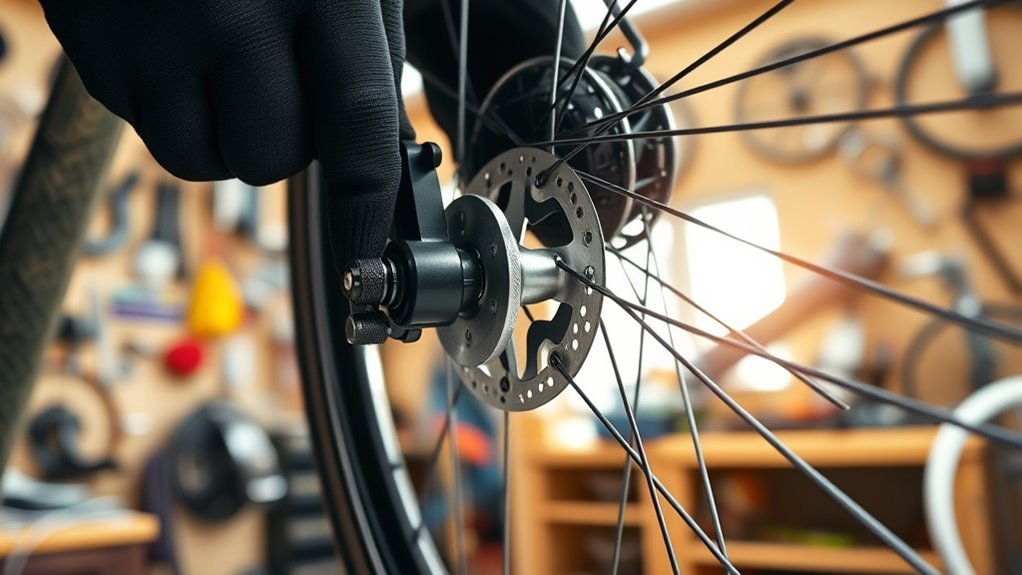
Locate Anchor Bolt
Where exactly do you find the anchor bolt that holds your brake cable in place? The anchor bolt is located on the brake caliper or brake arm, securing the brake cable firmly to prevent slippage.
Before making any adjustment, you’ll want to support the brake caliper properly to avoid misalignment. Use an Allen wrench or screwdriver, depending on your brake system, to carefully loosen the anchor bolt.
Loosening this bolt lets you adjust or replace the brake cable length, which is essential for managing cable tension and ensuring effective braking. After you’ve made your adjustment, don’t forget to re-tighten the anchor bolt securely.
This step is vital to maintain cable tension and keep your brake system functioning safely and reliably.
Adjust Cable Tension for Firm Lever Feel
Although adjusting cable tension might seem tricky, you can achieve a firm brake lever feel by carefully using the barrel adjuster on your brake lever or caliper. Start by making sure the brake cable is securely seated in the anchor bolt to prevent slippage.
Then, turn the barrel adjuster clockwise to increase brake tension or counter-clockwise to loosen it. This fine-tuning helps compensate for cable stretch and ensures ideal pad position without compromising lever travel.
After adjustments, pull the brake lever to test for a firm, responsive feel—too much slack causes a spongy lever, while over-tightening reduces lever travel and may wear pads prematurely.
Finally, spin the wheel and test braking power to confirm your adjustments deliver quick, reliable stopping. If needed, adjust the caliper to perfect brake function.
Align Brake Pads With Rim or Rotor
Now that your cable tension feels right, it’s time to align the brake pads with the rim or rotor. You’ll want to position the pads so they touch the braking surface evenly without overlapping the tire or rim edges.
This guarantees consistent contact and effective stopping power every time you squeeze the lever. It might take a little tweaking, but getting it just right makes a big difference when you’re out riding.
Pad Positioning Basics
Two key steps will help you position your brake pads correctly: align them centrally on the rim or rotor and guarantee they make full contact without touching the tire. To achieve proper pad positioning, start by loosening the mounting bolts so you can adjust the brake pads freely.
Then ensure the pads are parallel to the braking surface to prevent uneven wear and squealing. Finally, check the spacing so the pads almost touch the rim or rotor but don’t interfere when the wheel spins.
Keep in mind these essential points for correct alignment and adjustment:
- Brake pads must cover the braking surface fully without touching the tire.
- Pads should be parallel to the rim or rotor for even pressure.
- Tighten mounting bolts securely after final positioning to maintain contact.
Ensuring Proper Contact
After positioning your brake pads correctly on the rim or rotor, the next step is to guarantee they make proper contact. For caliper brakes, start by adjusting the caliper mounting bolts to achieve centered contact between the pads and rim. Make sure the brake pads aren’t tilted or rubbing the tire.
When working with disc brakes, loosen the caliper bolts, squeeze the brake lever to center the pads evenly on the rotor, then tighten the bolts while holding the lever. Always check that the pads touch the braking surface evenly and consistently when pulling the brake lever.
Proper alignment and adjustment ensure maximum braking efficiency and prevent noise or uneven wear. Taking these steps helps you maintain safe, reliable stopping power every ride.
Secure the Cable Anchor Bolt
How do you guarantee your brake cable stays firmly in place? Start by securing the cable anchor bolt correctly. This bolt holds the brake cable, maintaining the proper tension essential for effective braking.
Here’s how to do it:
- Ensure the brake cable is properly seated in the anchor bolt’s slot or hole.
- Use the correct Allen wrench to tighten the cable anchor bolt by turning it clockwise until snug.
- Avoid overtightening to prevent cable damage or excessive brake lever pull.
After securing the bolt, test the brake lever feel. If needed, adjust the tension by loosening the anchor bolt slightly, repositioning the cable, and retightening.
Following these steps ensures your brake cable stays secure, giving you reliable brake performance every ride. Easy, right?
Fine-Tune Brake Lever Reach and Pad Contact
Once you’ve secured the brake cable anchor bolt, you can focus on fine-tuning the brake lever reach and pad contact to match your riding style. Turn the barrel adjuster on the brake lever or caliper to adjust the lever reach until it feels comfortable.
Next, loosen the caliper bolts, squeeze the brake lever, and align the brake pads evenly on the rim or rotor before tightening. Use adjustment screws on side-pull or V-brakes to fine-tune pad contact.
| Step | Action | Tip |
|---|---|---|
| 1 | Adjust barrel adjuster | Comfortable brake lever reach |
| 2 | Loosen caliper bolts | Prepare to align brake pads |
| 3 | Squeeze brake lever | Position pads evenly |
| 4 | Tighten bolts & adjust pads | Avoid rubbing, ensure alignment |
Perform a Safety Test Ride
Why is a safety test ride essential? It confirms that your brakes are correctly adjusted and ready for real-world use. Before you ride, check the brake pads make even contact with the rim or rotor without rubbing.
A safety test ride ensures your brakes are properly adjusted and effective before hitting the road.
Then, during the ride, apply pressure on the brake levers firmly to test the brake response. Focus on both front and rear brakes separately to ensure balanced stopping power.
Here’s what to do during your test ride: Spin the wheel and check for any dragging or wobbling. This could indicate alignment or cable adjustment issues.
Pull the brake levers to verify quick, smooth stopping without excessive travel. After riding, re-inspect brake pads, cables, and calipers for wear or misalignment to make further tweaks if needed.
Conclusion
Now that you’ve adjusted your brakes in just seven easy steps, you’re ready to ride confidently and safely. Well-tuned bicycle brakes are like a trusted friend—always there to catch you when you need them most.
Keep checking your brake pads and cables regularly to maintain that reliable grip. Smooth and responsive brake adjustments mean your bike stops exactly when you want it to.
With your bike stopping smoothly and swiftly, every ride becomes a journey you can fully enjoy. Knowing you have control at your fingertips makes cycling safer and more fun. So, take a moment to ensure your bicycle brakes are always in top shape—it’s a small effort that leads to big peace of mind on the road.