How to Tighten Bicycle Brakes in 10 Easy Steps
To tighten your bicycle brakes, start by inspecting the brake pads and rim for any wear or damage. This step is crucial because worn pads or a damaged rim can affect braking performance and safety.
Next, loosen the brake cable clamp. Then, adjust the cable tension using the barrel adjuster until the brake lever feels firm and stops about halfway to the handlebar. This ensures your brakes engage properly when you pull the lever.
Once you have the right tension, re-clamp the cable securely. Be sure to center the calipers over the rim to get even brake pad contact.
Tighten all bolts and lock nuts to stabilize your adjustments and keep everything in place.
Finally, test the brakes by spinning the wheel and pulling the lever firmly. This quick check helps you confirm that your brakes are working safely and effectively.
Understanding each step will help you fine-tune your brakes perfectly for a smoother, safer ride.
Key Takeaways
- Inspect brake pads, cables, and rims for wear or damage before adjusting brake tension. This helps ensure everything is in good shape before you start.
- Loosen the cable clamp and use the barrel adjuster to finely tune brake cable tension. Take your time here to get it just right.
- Center brake calipers and pads on the rim, making sure the pad clearance is even. Also, give the pads a slight toe-in to help with better braking.
- Tighten lock nuts and mounting bolts securely. This keeps your brake adjustment stable and reliable while you ride.
- Test the brake lever engagement and wheel spin. Then, make any final adjustments to make sure your brakes are safe and work effectively.
Inspect Brake Pads for Wear and Rim Alignment
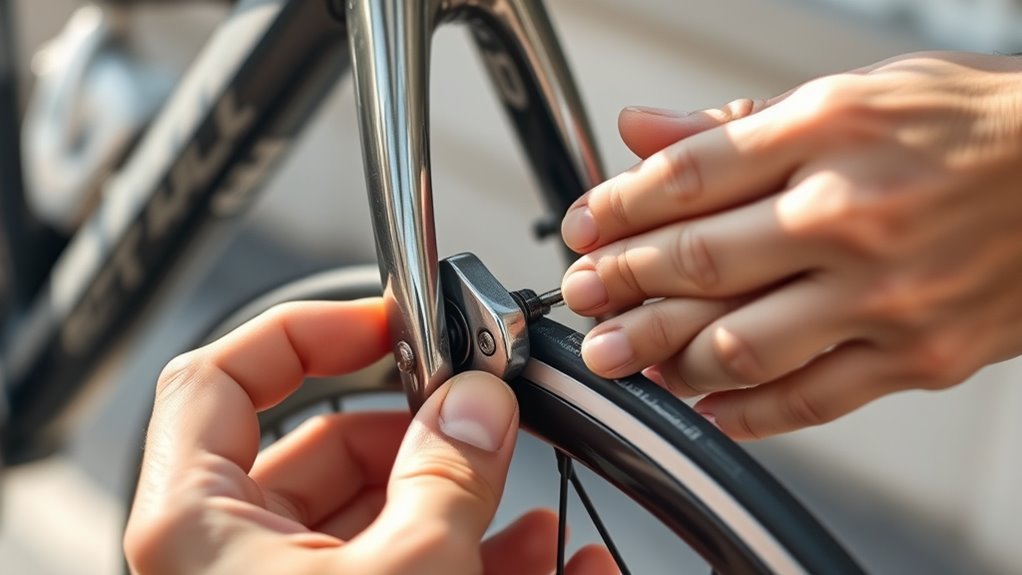
How do you know when your brake pads need attention? Start by inspecting the brake pads closely for visible wear lines or grooves. If the pads have worn past the wear line indicators, it’s time to replace them.
Next, check the rim alignment to make sure the brake pads sit perfectly centered on the rim surface. Proper alignment means the pads make even contact with the rim, which is essential for effective braking.
Make sure the brake pads don’t touch the tire or spokes when engaged, avoiding any damage. When inspecting, look for uneven gaps or tilting in the pads; they should sit flush against the rim without any misalignment.
Also, inspect the rim itself for dents or bends, as a warped rim can affect brake performance. Keeping your brake pads properly aligned and in good condition guarantees safer and more responsive braking every time you ride.
Release the Brake Cable to Loosen Tension
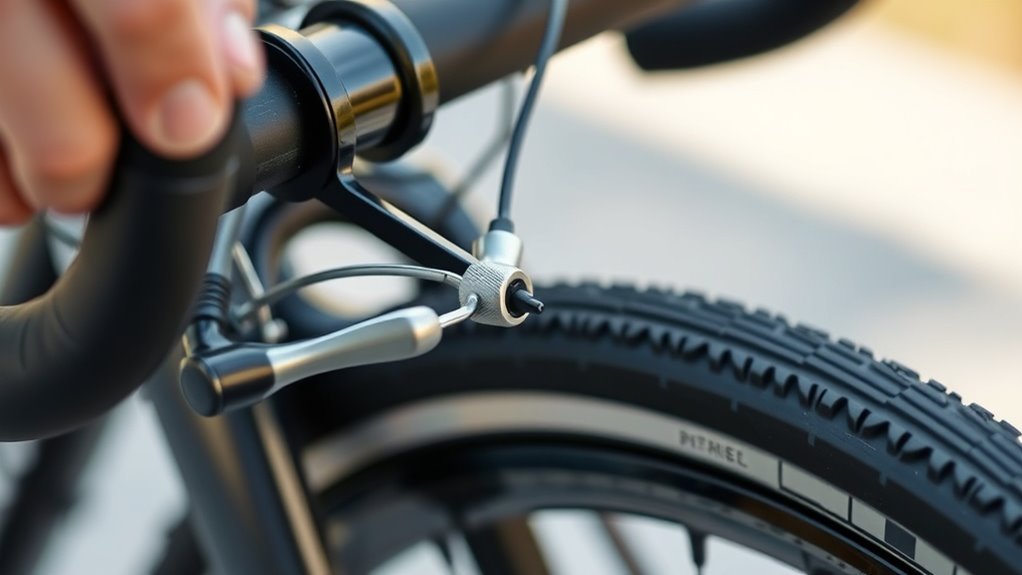
Start by loosening the cable clamp to release the brake cable tension gradually. This lets you adjust the cable without causing sudden changes that could affect brake performance.
Take your time to guarantee the tension eases off smoothly before making further adjustments. It’s all about making sure everything moves just right.
Loosen Cable Clamp
Before you can properly adjust your bicycle brakes, you’ll need to loosen the cable clamp to release tension. Use the appropriate Allen wrench or screwdriver to carefully loosen the bolt securing the brake cable.
While holding the brake arms open, gently pull the brake cable out of its housing to fully release tension. This step prevents the brakes from snapping back and allows you to adjust or replace the cable as needed.
Once loosened, inspect the brake cable for any fraying or damage before proceeding. With the cable clamp loosened and the brake cable released, you have the freedom to adjust the brake arms, clean the cable housing, or replace worn components.
This way, you ensure your brakes perform safely and effectively.
Release Tension Gradually
Once you’ve loosened the cable clamp, you’ll want to release the brake cable tension gradually to avoid sudden changes that could misalign your brakes. Start by loosening the brake cable at the pinch bolt while holding the brake arm steady.
Then, carefully unscrew the barrel adjuster counter-clockwise in small increments to release tension. Make sure the brake pads stay clear of the rim and the wheel stays aligned.
Check that the brake lever travel increases as you loosen the cable.
| Step | Action |
|---|---|
| Loosen brake cable | Use Allen key/spanner at pinch bolt |
| Unscrew barrel adjuster | Turn counter-clockwise slowly |
| Check brake lever | Ensure increased travel and pad clearance |
This method keeps your brake pads aligned and brake lever responsive. Easy does it!
Adjust Cable Tension Using the Barrel Adjuster
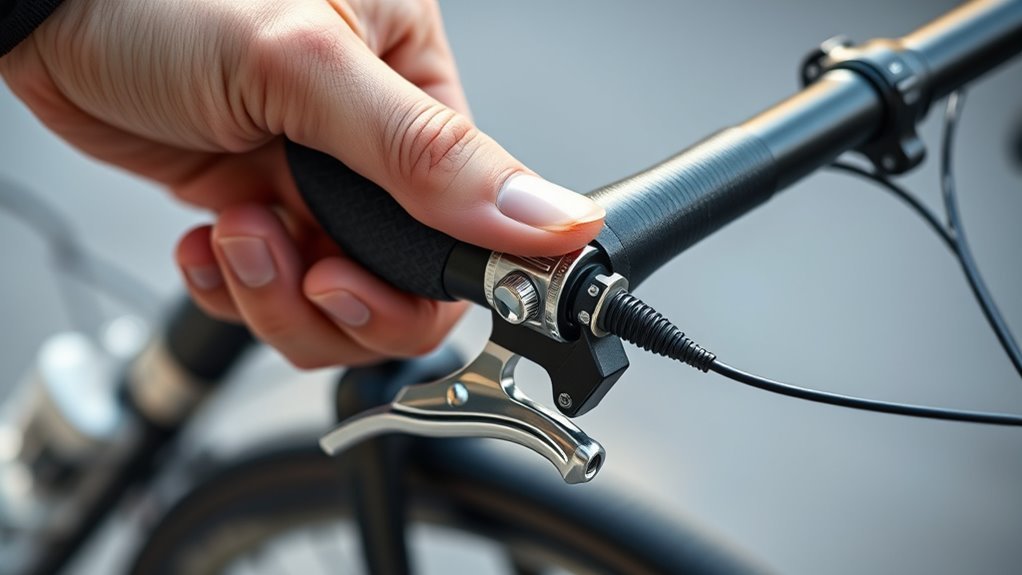
While adjusting your bicycle brakes, you’ll want to focus on the barrel adjuster to fine-tune cable tension. The barrel adjuster lets you easily adjust cable tension without tools, helping you tighten the brake and improve brake response.
To increase cable slack and make the brake lever easier to pull, turn the barrel adjuster counterclockwise. To tighten the brake and reduce cable slack, turn it clockwise. Make small, incremental turns—about half a turn each time—and test the brake lever feel after every adjustment.
Aim for the brake lever to stop roughly halfway to the handlebar grip, ensuring ideal tension in the brake system. Once you achieve the desired brake response, tighten the lock ring on the barrel adjuster to keep it secure and prevent slipping during rides.
Re-clamp the Brake Cable Securely
How do you guarantee your brake cable stays firmly in place after adjusting tension? First, release the brake caliper and use an Allen wrench to loosen the clamp bolt holding the brake cable. This lets you reposition the cable without resistance.
Next, pull the brake cable taut with your fingers or pliers, making sure there’s no slack that could reduce cable tension. Carefully align the cable into the clamp slot so it sits straight and won’t slip when tightened.
Then, securely tighten the clamp bolt, but be cautious not to over-tighten and damage the cable. Once clamped, test the brake lever to confirm the cable is secure and the brakes engage smoothly.
If you feel any looseness or slack, just repeat the process, adjusting the cable tension and clamp bolt as needed. By following these steps, you’ll keep your brake cable firmly clamped, ensuring consistent and reliable braking performance every ride.
Center Brake Calipers Around the Rim
To center your brake calipers, start by loosening the mounting bolts so they can move freely. Squeeze the brake lever to align the calipers precisely over the rim. Then, tighten the bolts while holding the lever.
Finally, check that the brake pads have equal clearance from the rim. Adjust if needed to make sure everything sits just right. It’s a simple way to keep your brakes working smoothly!
Align Calipers Precisely
Since properly aligned calipers guarantee even brake pad contact and effective stopping power, you’ll want to loosen the mounting bolts just enough to shift the caliper over the rim. Squeeze the brake lever to hold the brake caliper centered, then adjust its position so the brake pads are equidistant from the rim on both sides.
Make sure the caliper is aligned straight and not tilted before you tighten the mounting bolts securely. Test the brake lever to confirm the caliper stays centered and the pads engage evenly.
| Step | Action |
|---|---|
| Loosen mounting bolts | Allow caliper movement |
| Squeeze brake lever | Hold caliper centered |
| Adjust caliper position | Center brake pads over rim |
| Align brake caliper | Ensure straight, not tilted |
| Tighten mounting bolts | Secure caliper in position |
Adjust Pad Clearance
After you’ve aligned the calipers so the brake pads sit evenly on both sides of the rim, the next step is to adjust the pad clearance for peak braking performance.
Loosen the caliper mounting bolts slightly, then squeeze the brake lever to center the calipers over the rim. While holding the lever, tighten the bolts to lock the calipers in this centered position.
Use the small adjustment screw on the caliper to fine-tune the brake pads’ alignment. Make sure they sit evenly and maintain proper spacing from the rim without touching the tire or spokes.
Spin the wheel to check that the pads contact the rim evenly without rubbing. If needed, keep adjusting the pad clearance until the brake pads are perfectly centered and spaced for maximum stopping power.
Adjust Brake Pads and Toe-In for Smooth Braking
When you adjust your brake pads, make sure they’re centered on the rim with about 0.5mm of the rim visible on either side. This precise positioning guarantees proper alignment, preventing uneven wear and ineffective braking.
Start by loosening the bolts holding the brake pads, then carefully shift them inward or outward to achieve this centered placement.
Next, apply a slight toe-in by tilting the front of each pad about 1-2 degrees away from the rim. This small adjustment helps reduce annoying squealing noises during braking.
After positioning the pads correctly, tighten the bolts securely to keep them stable. Be sure the pads don’t touch the tire or spokes to avoid damage.
Finally, test your brakes by squeezing the lever and confirming the pads hit the rim simultaneously and smoothly without rubbing. This methodical adjustment will give you smooth, quiet, and reliable braking every time you ride.
Secure Adjustments by Tightening the Lock Nut
To keep your brake adjustments stable, you need to tighten the lock nut securely. This prevents the adjustment knob from loosening and changing cable tension while you ride.
Hold the knob steady, then turn the lock nut clockwise until it’s snug against the brake arm. Doing this helps ensure consistent performance every time you hit the brakes.
Lock Nut Purpose
Although adjusting the brake cable tension is essential, securing that adjustment with the lock nut guarantees it stays put. The lock nut plays a key role in keeping your brake adjustment stable by preventing the adjustment knob from loosening during rides.
Here’s why the lock nut matters:
- Securing the adjustment knob – The lock nut tightens against the adjustment knob, locking it in place on the threads.
- Prevent loosening – It stops vibrations from causing the knob to move, which could alter brake cable tension.
- Maintain consistent tension – Properly tightened, the lock nut ensures your brake adjustment holds steady, reducing frequent readjustments.
Use a wrench or your fingers to tighten the lock nut firmly. But don’t over-tighten it, or you might damage the threads.
Securing Adjustment Stability
Because vibrations and movement can loosen your brake adjustments, you need to tighten the lock nut firmly after setting the desired cable tension. This lock nut secures the adjustment knob or cable housing, preventing them from slipping and ensuring consistent brake tension.
Use a wrench to tighten the lock nut snugly against the adjustment mechanism. This step locks in your adjustment, providing stability and reliable brake response over time.
Without securing the lock nut, you risk frequent readjustments and inconsistent braking performance.
| Component | Purpose |
|---|---|
| Lock Nut | Secures brake tension |
| Adjustment Knob | Fine-tunes cable tension |
| Cable Housing | Guides and protects the cable |
| Wrench/Spanner | Tightens lock nut securely |
Always tighten the lock nut after adjustments to keep your brakes stable and secure. It’s a simple step that makes a big difference!
Test Brake Lever for Proper Engagement
How can you tell if your brake lever is properly engaged? Testing it is key to ensuring your bike stops safely and responsively.
Testing your brake lever is essential to ensure safe and responsive bike stopping power.
When you pull the brake lever, it should engage firmly within the first half of its travel, showing the right tension. If it feels loose or hits the handlebar before engaging, you’ll need to adjust the brake cable tension.
Follow these steps to test your brake lever for proper engagement:
- Pull the brake lever firmly and check that it doesn’t touch the handlebar or feel slack. This confirms there’s enough tension in the cable.
- Observe that the brake pads contact the rim or rotor simultaneously when you pull the lever, ensuring balanced braking.
- After adjusting tension, test the brake lever again for quick and responsive stopping power.
Spin the Wheel to Check for Rubbing or Drag
Once you’ve confirmed that the brake lever engages properly, the next step is to spin the wheel and check for any rubbing or drag. Spin the wheel slowly and watch closely to guarantee it rotates smoothly without wobbling or resistance.
Listen carefully for any rubbing sounds, which usually mean the brake pads are touching the rim or rotor unevenly. If you hear noise or feel drag, inspect the caliper brakes and brake pads for misalignment.
Sometimes, the brake pads can press too tightly or unevenly against the wheel, causing friction. If you spot issues, adjust brake cable tension or reposition the caliper brakes to achieve proper brake alignment.
Mark the rim or rotor with tape to track any shifts after adjustments. By regularly spinning the wheel and checking for rubbing, you’ll keep the brakes on your bike responsive and safe. This helps ensure smooth rides without unnecessary drag or wear.
Perform Final Ride Test to Confirm Brakes
Before you take your bike out for a full ride, spin the wheel off the ground to make sure it turns smoothly without rubbing. This final check ensures the brakes are properly adjusted and the wheel alignment is spot on.
Now, perform a quick ride test to confirm the brakes respond effectively. Focus on these steps:
- Firmly pull the brake lever several times to make sure the brake pads engage quickly and evenly, with no slack.
- Confirm the brake lever stops about halfway to the handlebar grip, which shows the tension is just right.
- Ride in a safe, open area and apply the brakes to test their stopping power and responsiveness.
After the ride, double-check the wheel alignment and pad positioning. Adjust if necessary to keep your braking performance consistent.
This final test guarantees your brakes are safe and reliable for every ride.
Frequently Asked Questions
How to Tighten Bicycle Brakes at Home?
You’ll release the brake cable, pull it tight, then secure it with the pinch bolt. Next, use barrel adjusters for fine-tuning.
Check pad alignment, and test lever feel. Finally, tighten all bolts for safe braking. Easy, right?
Why Are My Bike Brakes Not Gripping?
Your bike brakes aren’t gripping because the pads might be worn, misaligned, or dirty. Loose or stretched cables can also cause slack, preventing firm engagement.
Check for debris and guarantee proper cable tension for better braking. It’s usually a simple fix once you spot the problem. Just a little maintenance can get your brakes working like new again!
Which Way to Tighten Brakes?
You’d think tightening brakes could stop a speeding rocket!
Turn the barrel adjuster counterclockwise to tighten your brakes. This increases cable tension, giving you better grip and safer rides every time you hit the lever.
Why Are My Bike Brakes so Loose?
Your bike brakes feel loose because the cables might be stretched, worn, or improperly adjusted.
You could also have dirty or damaged cable housing, loose bolts, or worn brake pads causing the slack and reducing braking power.
Conclusion
Now that you’ve tightened your bicycle brakes with these simple steps, you can confidently cruise with control and comfort. Remember to regularly review and refine your brake adjustments to maintain maximum safety and smooth stopping.
Staying sharp and secure guarantees your cycling sessions stay stress-free and satisfying. So, saddle up, stay steady, and savor every safe spin on the streets or trails ahead!
Keeping your bike brakes tightened properly is key to enjoying a safe ride. Regular maintenance not only improves braking performance but also extends the life of your bicycle components.
So, make it a habit to check your brakes before every ride. That way, you’ll always be ready for anything the road or trail throws your way!