With most sports and hobbies, it’s easy to take baby steps. The problem with kayaking is that you’re dealing with Mother Nature, and it can be incredibly dangerous.
You’ll be thrown in at the deep-end; literally.
We’d always getting professional instruction before going out in your own group.
Whether that’s perfecting paddling technique, improving your flipping technique, or being able to judge unpredictable stretches of water.
Jump To Section
Kayaking Tips For Beginners
1. Don’t Set Out Without A Life Jacket
A kayaking life jacket is going to be more streamlined than the average life jacket. It allows you to fit essentials in your pockets, plenty of flexibility and offers some spray protection.
Water is unpredictable, and it shouldn’t be underestimated. You might think you’re a strong swimmer, but there’s just no telling what can happen out on the water, especially for those surfing and hitting rapids.
Want to know what other gear you’ll need? Check out our guide to kayaking essentials.
2. Get Kayaking Training
Some types of kayaking looks tame, others don’t. Regardless, it’s always worth getting a handful of lessons.
Bad habits are hard to get out of, so it’s always a good idea to start as you mean to go on.
And, you’ll be surprised how basic precautions can help keep you safe on the water.
Depending on where you are and the supply of kayaking training in the area, you could be looking at lessons as cheap as $10 per session.
That’s a worthy investment to keep yourself safe.
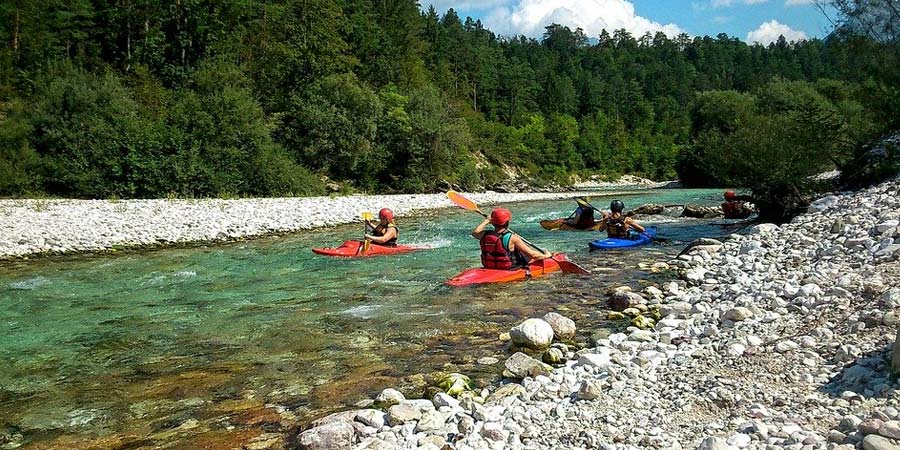
3. Stick To The Same Type Of Water
Unfortunately, there’s not really a one size fits all approach to kayaking.
There’s a slight crossover between surf and whitewater kayaking, but apart from that, you’ll want to pick a kayak and paddle, based on the types of water it’s suited to.
As an example, a sea kayak is going to be too long and heavy for white water. And, that makes it dangerous.
On the flip side, a whitewater kayak isn’t stream lined enough for touring, you’ll tire out in a matter of minutes; and that’s no fun.
If you plan to paddle in different types of water, there’s a good chance you’ll need multiple kayaks that are fit for purpose.
4. Find The Balance Point
Every time you’re paddling, be conscious of the balance point of the kayak. Sitting correctly and adjusting your hips will help to counter balance the kayak in rough waters. This is a measure that prevents your kayak from capsizing.
A 90-degree upright sitting position will offer the most stability, but you’ll need to feel where the kayaks going, and counter it.
The quicker you manage to find a balance point (and counter), the less likely you are to capsize.
5. Outside Temperature Isn’t Water Temperature
For whitewater and sea kayakers, don’t dress based on the weather.
Oceans are only slightly affected by the weather (mainly because they are so deep, it’s a lot of water to heat up). Sea temperatures are usually a far-cry to the outside temperature.
You can see sea temperatures for the USA here and for the UK here.
Likewise, because whitewater moves rapidly, it doesn’t have the time to absorb the sun’s heat.
So, there’s a good chance it’s colder than you think.
Understand the temperature of the water you’ll be paddling in and dress appropriately.
Being too cold will reduce you’re paddling strength.
More importantly, your body must work overtime to heat up your body, and if you don’t have enough energy to roll after capsizing, it could be fatal.
Refer to our kit list to see what you need, for every type of water temperature.
6. Losing Kayaks And Paddles
If you’ve just had a lucky escape, and have lost your kayak or paddle, don’t chase it. Look around, check everyone else is OK, and get to safe ground.
There’s a good chance you’ve been caught out in an unpredictable area of water, and it makes no sense going further into it.
Never underestimate the power and danger of water.
7. Team-Kayak!
Never go kayaking alone. If you don’t have someone willing to come with you. Don’t go.
Don’t have any family or friends that fancy the challenge?
There’s a tonne of cool places to find fellow kayakers.
But, how do you find people to go kayaking with?
Meetup.com have a worldwide group of meetups for kayakers. There’s currently over 2m members and 2,000 meetups.
Or, join a club.
There’s a tonne of kayaking clubs out there. In the UK, we have the British Canoeing where you can find over 400 clubs and kayaking centres.
Likewise in the USA, there’s American Canoeing.
If you are looking at a surfing kayak, join local surfing forums, meetups and go to local surf spots. I used to surf boards and kayak surf with the same group of people.
If you are looking for surf spots. I’ve only ever relied on one resource, and that’s Magic Seaweed.
It’s a huge community – they even have surf forecasts and surf cams at many of the spots. So, you can see exactly what the swell is going to be like before you set out.
Still stuck? Drop into your local kayaking store and ask the sales staff. There’s a good chance they kayak themselves, and they know local groups that are always welcoming new members.
8. Participate In A Rescue Class
Hopefully, you already plan to grab a few kayaking classes designed for beginners.
Not all kayaking schools will offer in-depth safety classes that cover rescuing yourself and others. This is partly since many people kayak on a recreational basis, at local kayaking centres.
But, if you plan to go kayaking in your own group. You need to know how to save yourself and others.
This means everything from the right way to hold a paddle to rescue a fellow kayaker and what to do when you capsize in rough water.
How To Roll A Kayak
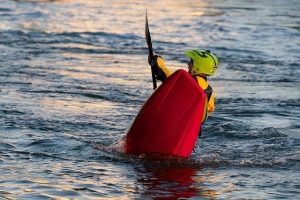
Being able to roll a kayak after it capsizes is literally a lifesaving skill. You shouldn’t be paddling choppy waters in groups, unless everyone knows how to roll a kayak.
It puts an unnecessary burden on the rest of the group, not to mention putting the person in question in danger.
Rule? If you don’t know how to capsize, keep going to local kayaking centres to get training until you can.
Although we’ve outlined this in steps, remember the roll should be done in one swift movement.
1. Get Into The Correct Position
The first thing you need to understand, is body and paddle positioning.
Safety first, you’ll need to do the equivalent of an abdominal crunch; your upside down and you don’t want to hit your head.
In the tucked position, you’ll need to angle your paddle so it’s along one side of the kayak (parallel).
Next, tuck and stretch enough so your paddle starts to break the surface of the water.
2. Flip Your Paddle To A 90-degree Angle
Now you’re as stretched as you can be, you’ll need to flip the paddle to a 90-degree angle. As you do this you’ll be keeping your bottom arm extended, but the aim is for your other arm to break the surface further with the paddle.
As you go through this movement, put your head on the shoulder of the arm that is breaking the surface with the paddle. This sets up a position that’s going to provide power for the flip in the next move.
3. Start To Roll
You’re now in a position where you can maximise your body’s power.
You’ll force your hips to provide power in the direction of the shoulder your head is leaning on.
As you do this, you’ll break more of the surface of the water, which allows you just enough to dig the paddle in.
4. Complete The Roll
You’ll naturally feel the effectiveness of your hips in the roll reduce, and as you do, you’ll switch that power into the blade of the paddle.
Like any sport (golf, motorcycling etc), you tend to go exactly where you are looking (even if it’s in the wrong place). So, you want to keep your eyes fixed on the paddle, until the kayak begins to right itself, then move your focus to straight ahead.
As you begin to surface, you’ll need to counter balance with your hips, otherwise you’ll be exactly where you started; upside down.
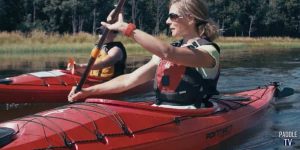
How To Roll A Kayak (In Video)
Still unsure? Check out this video from Paddle TV.
Beginner Paddling Techniques
Paddling is one of the most important parts of kayaking.
If you don’t paddle correctly, you could be putting yourself and others in danger (a paddle to the head hurts). Or, you’ll not have the technique to get yourself out of trouble.
At the very least, you’ll be wasting valuable energy.
How To Hold A Paddle
It might sound basic, but holding the paddle correctly is extremely important. Not only will it allow you to execute a perfect stroke, but it reduces the chance of dropping the paddle.
And, a dropped paddle is a pain to retrieve, not to mention a danger to others; they really hurt when they hit you!
1. Distance Between Grip
To utilise all your power in a paddle stroke, you’ll need the correct grip. The distance between your hands should be approximately the width of your shoulders.
This is the most consistent positioning. A shorter grip will require less effort to paddle, but you’ll have less power.
And, a larger spaced grip will increase power, but you won’t sustain that power for long.
2. Grip Strength
One of the most common mistakes beginners make, is holding onto the paddle too tight.
There’s millions of litres of water below you, and you’re not going to be able to control all of it.
So, go with a more relaxed grip, focusing on grip spacing and consistent paddling.
Holding on too tight won’t allow blood to circulate round your fingers. That’s going to mean incredibly cold hands and cramp within a matter of minutes.
3. Finger And Paddle Positioning
Loosely connect your index finger and thumb to make an O. Have all your fingers in line with your index finger. That’s how you should be holding your paddle.
And, then sit with your paddle so your knuckles are upward facing.
How To Forward Stroke
Next up, you need to learn how to forward stroke. Getting this technique right is going to mean you have more power, for longer. It’s extremely easy to waste energy by paddling incorrectly.
1. Movement Means More Than Power
Although you’ll need plenty of power in your stroke, don’t make that the focus. It’s more important that you make each stroke smooth and consistent to provide maximum power. That way, you won’t burn out easily.
So, you’ll want to make one fluid motion of putting the blade in the water and easing it past your side, rather than frantically paddling.
2. Paddle Entry
Aim for an area on the side of the kayak that’s next to your feet.
You’ll already need to be progressing in your stroke, as it enters.
If you just jam the paddle downwards, the water will simply take your paddle, and you’ll have missed out on part of the forward stroke.
3. Torso Position
As the paddle enters the water you’ll want to angle your torso to reach optimum power.
When you paddle on the left side, you’ll angle your torso to the right (the left side of your rib cage will aim towards the front); and vice-versa.
4. Create Power
Use your torso, arms and shoulders in sync; this is how you’ll get the most power from your forward stroke.
When paddling on the left, with your left rib cage aiming towards the front, slowly power back to a normal seating positioning, aiding the power with your arms and shoulders.
5. Switch
As the paddle breaks the surface, you’ll be turning your torso the opposite way, ready for the next stroke.
Once you’ve done this a few times, you’ll get to a point where the two strokes become one fluid movement.
How To Turn In A Kayak
Regardless of the type of kayaking you plan to do, you’ll need to turn, whether that’s aiming for a landing area, to catch a wave, or avoid rocks in whitewater.
It’s simple. If you drop your paddle blade on one side of the kayak and hold it there, that’s the way you’ll turn.
A more complex turning method is the sweep stroke. This requires you to lean the kayak, and sweep in a smoother and wider arc.
There’s a good reason for doing this. Simply dropping a paddle in and holding it there will reduce speed. And, to get back up to speed is going to take a lot of energy.
- Next: Kayaking Exercises – 3 Essential Moves To Improve Paddling Strength
- Previous: The Different Types Of Kayaking [And Which Is Right For You]