Fix Your Bike Chain in 10 Easy Steps
To fix your bike chain in 10 easy steps, start by gathering the right tools and parts. You’ll need things like a chain tool, replacement links, and possibly a master link.
Identifying why the chain broke is key—common reasons include worn links, misalignment, or dirt buildup.
Next, inspect your chain carefully and separate it using the chain tool.
Removing any damaged links comes next. If you have a master link, use it to reconnect the chain properly.
Don’t forget to loosen any stiff links before moving on.
After that, check your chain’s length and tension to make sure everything fits just right.
Finally, test your bike by shifting through the gears to ensure a smooth ride.
Keep following along for a detailed guide that makes bike chain repairs simple and reliable. You’ll be back on the road in no time!
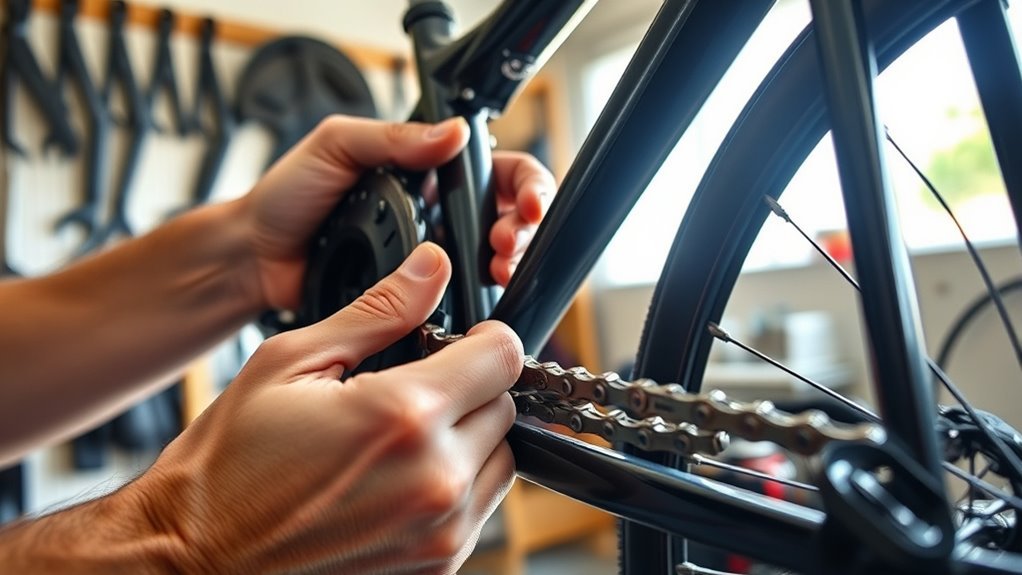
Gather Necessary Tools and Parts
Before you plunge into fixing your bike chain, make sure you gather all the necessary tools and parts. You’ll need a chain tool or a multi-tool with a chain breaker to remove or install chain links efficiently.
Gather your chain tool and parts before fixing your bike chain for a smoother repair process.
Always carry spare parts like a master link, chain pin, or a short section of replacement chain, especially for emergencies. Confirm these parts match your bike’s drivetrain, whether it’s 9-speed, 11-speed, or another type.
Don’t forget gloves and a towel to keep your hands clean and to check for any metal shards after re-driving pins. Using bike-specific degreasers and lubricants will also help maintain the chain once repaired.
Being prepared with the right tools and compatible parts saves time and hassle during your repair. Trust me, it makes the whole process a lot smoother!
Identify the Cause of the Chain Break
When your bike chain breaks, you’ll want to pinpoint the cause to prevent it from happening again. Common reasons include derailleur misalignment, excessive chain wear, or debris lodged in the links.
Forceful pedaling while shifting gears can also lead to chain breakage. Sudden impacts may stress the chain, causing weak spots.
Use the table below to quickly identify potential causes.
| Cause | Indicator | Prevention Tip |
|---|---|---|
| Derailleur Misalignment | Poor shifting performance | Adjust derailleur alignment |
| Chain Wear | Excessive stretch (>0.75%) | Replace chain timely |
| Visible Damage | Bent or cracked links | Inspect regularly |
| Debris | Dirt or grit in chain | Clean chain frequently |
| Impact | Chain stress or snaps | Avoid obstacles |
Inspect the Chain for Damage
Since the chain endures constant stress, you should inspect it closely for visible damage like bent or cracked links. Start your chain inspection by looking for damaged links and checking the connecting pins for looseness, bending, or missing parts.
These issues can compromise the chain’s strength. Next, examine the rollers—stiff rollers that don’t rotate smoothly indicate wear or damage.
Use a chain wear tool to measure stretch; if it reads between 0.5 and 0.75, it’s time to replace the chain. Also, watch for excessive dirt, rust, or corrosion, which can weaken the chain and affect performance.
Addressing these signs early helps maintain your bike’s reliability and prevents further damage during rides.
Prepare to Separate the Chain
Before you separate the chain, check its condition to decide if repair or replacement is needed. Find the connection point, whether it’s a master link or a pin, to know where to work.
Then, use a chain tool carefully to push the pin halfway out without causing damage. Take your time with this step so you don’t harm the chain.
Assess Chain Condition
Although you might be enthusiastic to separate your bike chain, take a moment to carefully evaluate its condition for any visible damage, rust, or stiff links.
Inspect the entire chain closely, looking for bent or broken links that could compromise performance. Rust can weaken the metal, so if you spot corrosion, consider cleaning or replacing the chain.
Stiff links may cause shifting issues, so try bending each link gently to check flexibility. Shifting your bike to the smallest chainring and sprocket helps reduce tension, making inspection easier.
Properly assessing chain condition before separation ensures a smoother repair process and prevents further damage. Taking this step saves time and effort when you move on to disconnecting or replacing your chain.
Locate Connection Point
After evaluating your chain’s condition and shifting to the smallest chainring and sprocket to ease tension, you can focus on locating the connection point. Look closely for the master link or a removable pin—this is where the chain comes apart.
Identifying the master link makes chain removal straightforward, while a removable pin will require chain tools. Make sure the chain is properly aligned and supported to avoid damage during separation.
Keep track of how the chain is oriented and note any special components to ensure smooth reassembly. Once you find the connection point, you’ll be ready to remove links or disconnect the chain as needed.
This step sets you up perfectly for using chain tools in the next phase of repair.
Use Chain Tool
When you’re ready to separate the chain, use a chain tool to push the pin connecting the links. First, properly align the chain in the chain tool to avoid damaging the chain links or pins.
Turn the handle slowly to push the pin partway out—you don’t want to push it all the way through. Leaving the pin partially pushed keeps the link intact, making it easier to disassemble and later reassemble the chain.
If your chain has a master link, use master link pliers instead of the chain tool to disconnect or connect it smoothly. When you reassemble the chain, double-check that the pin is securely driven and the chain is properly tensioned to ensure smooth and safe operation.
Remove Damaged Links
Start by locating the broken or worn links using a chain wear tool or by checking the link length. Shift your bike to the smallest chainring and sprocket to reduce tension before you begin.
Then, use a chain tool to carefully push out the pin that holds the damaged links together. It’s a bit tricky at first, but take your time and you’ll get the hang of it.
Locate Broken Chain Links
You’ll need to carefully inspect your bike chain to locate any broken or damaged links, looking for bent, cracked, or missing plates. As you inspect the chain, focus on identifying a broken chain link that disrupts smooth movement.
For chains with a master link, check for the quick-release clip or pin that allows easier removal. Once you spot a damaged link, you’ll prepare to remove it without affecting the rest of the chain.
Using a chain tool will come next, but first, pinpoint exactly where the chain is compromised. Removing only the damaged link maintains the correct chain length, ensuring your bike runs smoothly after repair.
Keep the master link in mind—it often simplifies reconnecting the chain after fixing the broken chain link.
Use Chain Tool
Although removing damaged links requires some care, using a chain tool makes the process straightforward and precise. Start by aligning the chain pin with the tool’s fences to ensure proper engagement and avoid damage.
Slowly turn the handle to push the pin partway out, maintaining perfect alignment with the side plates. Once the pin is partially removed, you can carefully separate the links and remove the damaged section.
When reassembling, insert the pin back into the chain, ensuring it sits slightly proud for a secure fit.
| Step | Action | Tip |
|---|---|---|
| 1 | Align pin with fences | Prevents damage |
| 2 | Turn handle slowly | Maintains pin alignment |
| 3 | Push pin partway out | Avoid full removal first |
| 4 | Remove damaged links | Separate carefully |
| 5 | Reinsert pin | Pin should be slightly proud |
Always utilize a dedicated chain tool to remove links safely and effectively. Trust me, it makes the whole job way easier!
Select the Appropriate Replacement Links
When selecting replacement links for your bike chain, matching the length to your old chain is essential to guarantee a proper fit. Start by comparing the chain length of your new chain to the old one and make sure they match old chain exactly.
Thread the chain through the derailleur and over the largest sprockets to get an accurate length. Use a chain tool to remove excess links, ensuring the ends are compatible for joining.
Remember to add two extra links to accommodate derailleur movement and tension. Finally, include a master link to simplify reconnecting later.
Taking these steps ensures your chain fits perfectly without slack or tight spots, helping your bike run smoothly.
Reconnect the Chain Properly
Now that you’ve got the right links, it’s time to reconnect the chain properly. Use a chain tool to push the pin halfway before snapping it fully in, or if your chain has a master link, lock the two halves together securely.
Make sure everything’s flush and the chain moves smoothly before you start pedaling. It really helps to double-check this so you don’t run into any issues on your ride.
Master Link Connection
How do you guarantee your bike chain reconnects securely using the master link? Follow these steps to ensure a safe and reliable chain connection every time.
First, align the two halves of the master link so their tabs face each other, ready to connect. Then, snap the master link halves together firmly until you hear a click or feel it lock in place securely.
Next, use your fingers or a master link plier to double-check both sides are fully engaged and seated properly. Give the pedals or chain a few turns to make sure the master link moves smoothly without catching or feeling loose.
Finally, confirm your chain tension is correct and the master link stays locked before you ride. Doing this will keep your chain connection solid and secure every time.
Using Chain Tool
Securing your bike chain with a master link is just one way to reconnect it, but using a chain tool gives you precise control over the link pins for a strong, custom fit.
To join the chain, align the chain links in the chain tool’s slot and turn the handle clockwise to push the chain pin partially out. Make sure the pin is driven out straight and to the right depth, leaving it slightly proud of the link.
When reconnecting, insert the pin back into the chain ends and press it carefully without over-driving to avoid damage. Use the chain tool’s secondary fence to loosen any stiff chain links before pressing the pin in, ensuring smooth movement.
This method gives you a secure, tailored connection beyond the master link option. It’s a bit more hands-on, but the result is worth it!
Loosen Any Tight Links
Why does your bike chain sometimes skip or bind? Often, tight links are the culprit, causing your chain to resist smooth movement.
To fix this, you’ll want to loosen those tight links using a chain tool carefully. Here’s how:
- Position the chain tool to gently push the side plates without driving the pin out completely.
- Apply perpendicular force to the stiff link to help it bend more easily and reduce tightness.
- If the link remains tight, work it back and forth gradually to loosen the side plates.
- Ensure the loosened link moves freely, allowing the chain to maintain proper tension during rides.
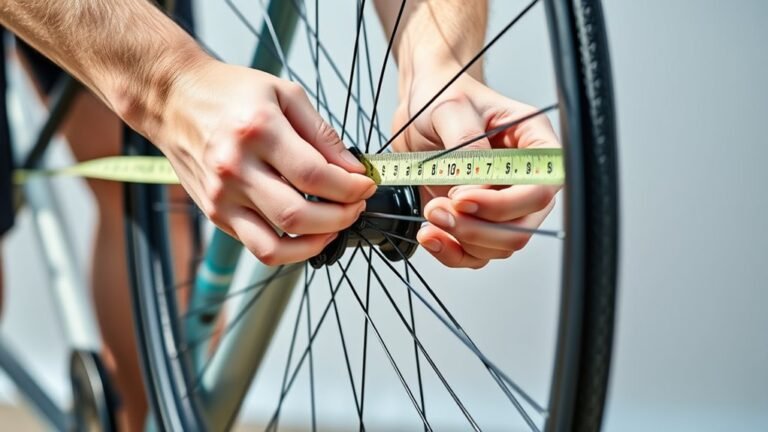
Verify Chain Length and Tension
Once you’ve loosened any tight links, the next step is to verify your chain’s length and tension. Start by laying the new chain alongside the old one, matching the number of links to measure the correct chain length. Use a chain tool to remove any excess links.
Next, thread the chain through the derailleur and over the largest sprockets, adding two extra links before connecting. This ensures proper chain tension without binding or sagging. If your bike has full suspension, fully compress it during measurement to account for chain growth.
Check that the chain runs smoothly through the chain guide and derailleurs, moving freely between gears. Proper chain tension keeps your drivetrain efficient and shifting seamless, preventing issues before you even hit the road.
Test the Chain and Adjust if Needed
Before you hit the road, you’ll want to test your chain thoroughly to guarantee it operates smoothly. Checking for chain wear and stiff spots is essential for ideal shifting performance.
Follow these steps:
- Use a chain wear tool to measure stretch; replace if beyond 0.5%-0.75%.
- Manually flex each link to detect any tight or stiff spots.
- Shift through all gears and watch for skipping or hesitation, indicating derailleur alignment or cable tension issues.
- Adjust the derailleur alignment and cable tension as needed to ensure smooth chain movement.
After adjustments, take a test ride and listen for unusual noises. Fine-tune based on how the chain responds to maintain reliable shifting performance.
Conclusion
Fixing your bike chain is like tending a garden—each step you take nurtures the path ahead. Just as pruning away the damaged leaves lets new growth thrive, removing broken links ensures smooth rides.
By carefully reconnecting and adjusting, you cultivate a chain that flows freely, ready to carry you farther. With a little patience and care, your bike will bloom back to life.
Taking the time to fix your bike chain properly means fewer interruptions and more enjoyment on every ride. Remember, a well-maintained chain not only improves your bike’s performance but also extends its lifespan.
So, follow these easy steps to repair your bike chain, and soon you’ll be back on the road with confidence. Your bike will run smoother, your rides will feel effortless, and you’ll enjoy the freedom that comes with a perfectly functioning chain.