How to Measure a Bike Frame Size in 10 Easy Steps
To measure your bike frame size in 10 easy steps, start by accurately measuring your inseam and height to find a base size. These two measurements are key to getting a frame that fits you well and feels comfortable. Once you have these, you’ll have a good starting point to work from.
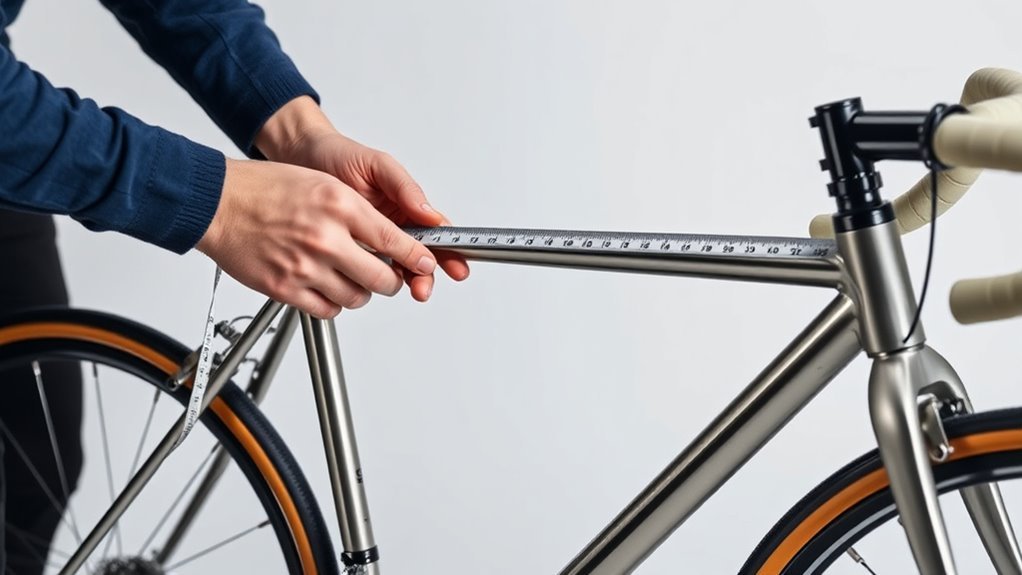
Next, measure the seat tube and top tube lengths on the bike frame. These dimensions help determine how the bike will fit your body.
After that, check the reach and stack measurements for added comfort and control.
Compare your numbers with manufacturer size charts, keeping in mind the type of bike and the brand’s specific geometry.
Don’t forget to adjust based on your riding style — whether you prefer a relaxed ride or a more aggressive stance.
Keep going to discover helpful tips on perfecting your fit and choosing the ideal bike that suits your needs.
Key Takeaways
- Measure your inseam by standing barefoot with a book between your legs. Then, measure from the floor to the top of the book for an accurate standover height.
- Measure the seat tube length from the bottom bracket center to the top of the seat tube. Make sure to exclude the seat post and saddle.
- Measure the top tube length horizontally from the center of the head tube to the center of the seat tube. Do this on a level surface for the best accuracy.
- Check standover clearance by standing over the bike. You want to have about 2-5 cm (1-2 inches) of space between the top tube and your crotch.
- Use your rider height, inseam, and frame measurements together. Then, compare these with manufacturer size charts to find the best frame size match for you.
Measure Your Inseam for Accurate Frame Size
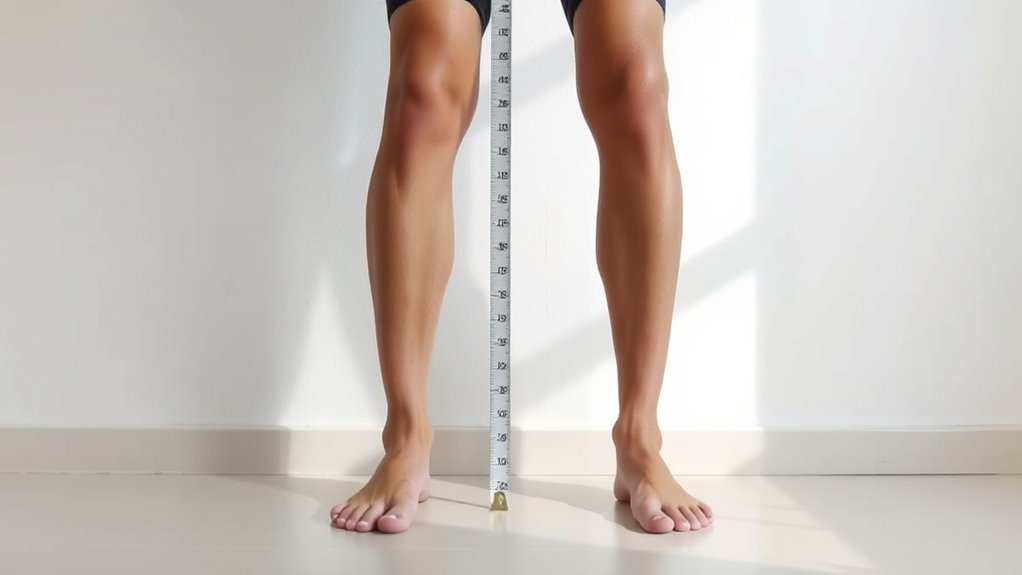
Before choosing a bike frame, measure your inseam to guarantee a proper fit. Stand barefoot against a wall with your feet shoulder-width apart, then place a hardcover book snugly between your legs, aligned with your crotch. This setup helps you get accurate inseam measurements.
Measure your inseam by standing against a wall with a book between your legs for accuracy.
Use a measuring tape or ruler to measure straight from the floor to the top of the book, making sure it stays vertical. Once you have your inseam, convert it to centimeters if needed by multiplying inches by 2.54.
This measurement is vital because it helps determine the proper standover height, which affects your bike size and frame size selection. For a comfortable cycling fit, subtract 2-3 cm from your inseam to find the ideal standover height.
This guarantees you have enough clearance when standing over the bike. Your seat tube length and overall height also relate to these measurements, but focusing on inseam first guarantees a better cycling fit.
Why Your Height Matters for Frame Size
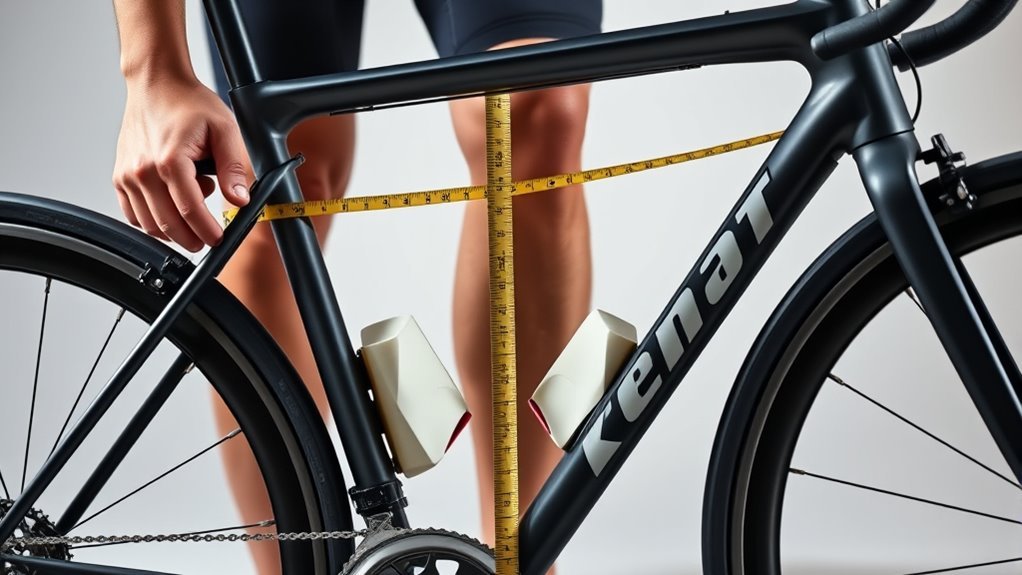
Your height gives you a solid starting point for choosing a bike frame size, but your body proportions play a big role too. While most size charts match height to frame size, factors like reach can affect how the bike fits you.
Understanding this helps you find a frame that feels comfortable and supports good riding posture. So, don’t just rely on height alone—it’s all about how the bike works with your unique shape.
Height Guides Frame Size
Although height alone doesn’t guarantee the perfect fit, it gives you a solid starting point for choosing the right bike frame size. Height guides and size charts help you quickly narrow down your recommended frame sizes.
To measure bike size accurately, stand straight against a wall for precise height measurement. Remember, inseam length and other body measurements also affect bike fit, so use height as a guide, not the only factor.
| Rider Height (ft/in) | Recommended Frame Size (in) |
|---|---|
| 4’10” – 5’2″ | 13 – 15 |
| 5’3″ – 5’6″ | 15 – 17 |
| 5’7″ – 5’10” | 17 – 19 |
| 5’11” – 6’2″ | 19 – 21 |
Proportions Impact Fit
Because your height influences both reach and standover clearance, choosing the right bike frame size depends heavily on your proportions. Your inseam measurement plays a vital role in determining saddle height and standover clearance, while your overall height affects reach and top tube length.
Taller riders typically need larger frames with longer top tubes to avoid overstretching, guaranteeing a comfortable bike fit. Conversely, shorter riders benefit from smaller frames that offer better control and easier mounting.
The bike’s geometry must align with your body’s proportions to optimize comfort and efficiency. Paying attention to these details guarantees your frame size fits you perfectly, enhancing riding safety and performance.
Height Vs. Reach
While height sets the baseline for choosing a bike frame size, reach determines how stretched out or compact you feel when riding. Your height mainly guarantees proper standover clearance and overall comfort, but reach—measuring the horizontal distance from the bottom bracket to the head tube—affects your riding position and ergonomic alignment.
Taller riders usually need longer reach and larger frames, but your body proportions, like torso and arm length, influence the ideal top tube length. Ignoring reach can leave you cramped or overextended, which impacts control and efficiency.
A good bike fitting balances both height and reach, helping you find a frame size that matches your body and riding style perfectly. Remember, height matters, but reach completes the fit for a comfortable ride.
Measure Seat Tube Length Accurately
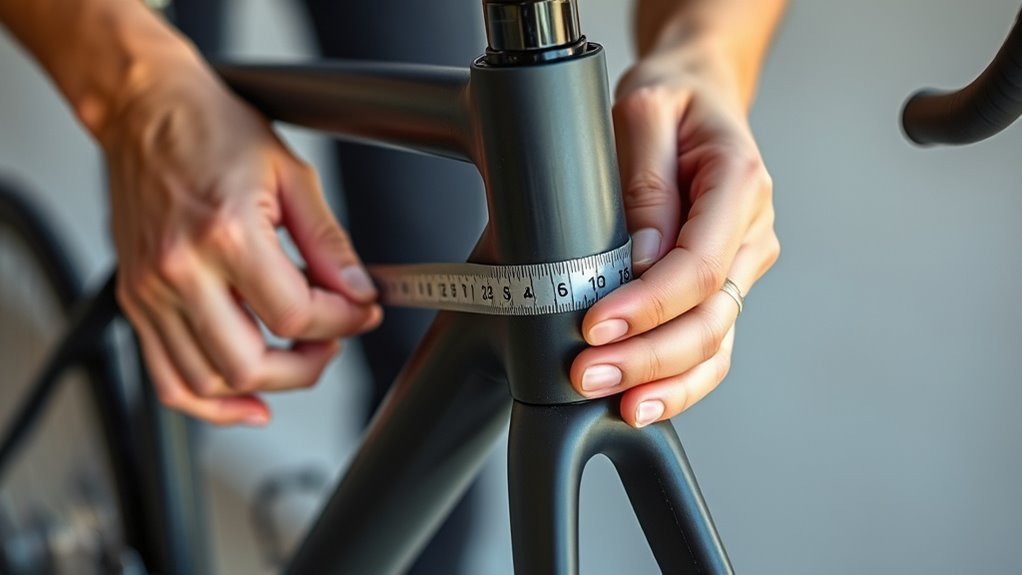
To measure seat tube length accurately, start from the center of the bottom bracket and go straight up to the top of the seat tube or its intersection with the top tube.
Use a rigid tape measure to guarantee precision, especially since bike designs and brand sizing standards can vary.
Understanding these measurement techniques helps you find the right frame size for your ride. It’s a simple step that makes a big difference!
Define Seat Tube Length
How do you measure seat tube length accurately? The seat tube length defines your bike size and is crucial for selecting the right frame size. It’s the measurement from the center of the bottom bracket to the top of the seat tube, where the saddle post inserts.
This tube length determines how well the bike fits your body.
To get an accurate measurement, first locate the center of the bottom bracket as your starting point. Then, measure straight along the seat tube’s angle—not the top tube, especially with sloped top tubes.
Use a flexible tape measure to follow the tube precisely without slack. Make sure to record the measurement in centimeters or inches, depending on the bike brand’s sizing standards.
This method ensures a precise frame size tailored to you. Pretty straightforward, right? It really helps in picking the perfect bike fit.
Measuring Techniques Explained
Getting the seat tube length right depends on using the proper measuring techniques. Start by measuring from the center of the bottom bracket to the top of the seat tube, excluding the seat post and saddle.
For bikes with sloped top tubes, use the effective top tube length or measure to the intersection with the seat tube. Make sure the bike sits on a flat, level surface and keep your tape measure straight and tight to avoid errors.
Different brands may use varied measurement methods, so always check their size charts for accurate bike size and frame dimensions.
| Step | Description | Tip |
|---|---|---|
| Position Bike | Place bike on flat surface | Prevents skewed measurements |
| Measure Seat Tube Length | Bottom bracket center to seat tube top | Exclude seat post and saddle |
| Sloped Top Tubes | Use effective top tube length | Measure intersection if preferred |
| Tape Handling | Keep tape straight and tight | Avoid slack or bending |
Brand Variation Impacts
Although measuring the seat tube length seems straightforward, different bike brands use varied methods that can considerably impact your size choice. Understanding brand measurement standards is essential to avoid size discrepancies.
Here’s what you need to know:
- Brands may measure seat tube length from center-to-center or center-to-top, affecting size comparison.
- Frame geometry, especially sloped top tubes, can change measurement methods and result in different seat tube length values.
- Some brands use actual seat tube length, while others rely on effective top tube length—check geometry charts carefully.
- Ignoring brand-specific sizing and measurement methods can lead to mismatched frames when switching brands.
To measure seat tube length accurately, always verify the brand’s measurement approach and consult their geometry charts before making your selection. It really pays off to double-check before you buy!
Measure Top Tube Length Correctly
When measuring the top tube length, you’ll want to start by placing your bike on a flat, level surface to guarantee accuracy. To measure top tube length correctly, focus on the horizontal distance from the center of the head tube to the center of the seat tube.
Begin by setting your bike on a flat surface and measure horizontally from head tube center to seat tube center.
For bikes with sloped frames, don’t just measure along the tube itself. Instead, use a flexible tape measure to follow the actual path if needed, or refer to the manufacturer’s reach or virtual top tube length for an accurate measurement.
This method accounts for compact frame designs, ensuring you capture the effective top tube length rather than just a straight line. After measuring, cross-reference your result with the bike’s geometry chart to determine the appropriate bike size.
Getting this measurement right is essential for a proper fit and helps you choose a frame that matches your riding style and body dimensions perfectly.
Measure Reach and Stack to Improve Fit
To improve your bike fit beyond just frame size, you should measure reach and stack—two key dimensions that define your riding position. Reach measures the horizontal distance from the bottom bracket’s center to the top of the head tube, showing how far forward you’ll be.
Stack is the vertical distance between these same points, indicating your upright height and frame height.
Here’s how to take these measurements accurately:
- Place the bike on a level frame surface to ensure precision.
- Use a tape measure aligned along the bike’s centerline from the bottom bracket to the top of the head tube.
- Verify vertical alignment with a plumb line to measure stack correctly.
- Record reach and stack to compare bike geometry and optimize fit beyond traditional bike frame size.
These measurements help you assess comfort and handling. So, they’re essential for a tailored bike fit.
Check Standover Height for Correct Frame Size
You’ll want to check your standover height to make sure there’s enough clearance between the top tube and your crotch—about 2-5 cm is ideal.
Stand over the bike with your feet 15-20 cm apart and measure from the ground to the top tube’s highest point. This clearance helps prevent discomfort and keeps you safe during quick stops or uneven terrain.
Importance Of Clearance
Why does standover height matter so much when choosing a bike frame? Proper clearance between the top tube and your crotch is crucial for safety and comfort.
When you stand over the bike, the standover height ensures you can dismount quickly without discomfort or injury. Here’s why clearance is essential:
- It guarantees a proper fit by providing 2-5 cm (1-2 inches) of space for safe dismounts.
- It prevents the top tube from pressing against your body during stops.
- It reduces the risk of accidents caused by awkward stops or discomfort.
- It confirms accurate bike measurement by checking ground measurement to the top tube.
Always prioritize standover height clearance to find the right frame size for confident, safe riding.
Measuring Proper Stand-Over
Although it might seem simple, measuring your bike’s standover height correctly is key to finding a frame that fits safely and comfortably.
To measure, stand over the bike frame with your shoes on and feet shoulder-width apart. Place the bike on a level surface to verify accuracy.
Use a ruler or tape measure to check the distance from the ground to the top tube—on sloped frames, measure to the lowest point of the top tube.
You want at least 2-5 cm (1-2 inches) of clearance between your crotch and the top tube for a proper fit.
Compare this measurement to your inseam measurement to confirm the bike frame suits you.
This clearance ensures safe mounting and dismounting while providing comfort during rides.
Compare Your Measurements With Size Charts
When choosing a bike frame size, comparing your height and inseam measurements with manufacturer size charts guarantees a better fit. Start by consulting a reliable bike size chart that matches your rider height with the recommended frame size.
Don’t rely solely on height; always cross-check your inseam to ensure proper standover clearance and comfort.
Follow these steps for an accurate sizing comparison:
- Measure your rider height and inseam precisely.
- Refer to the specific manufacturer size charts, as sizing can vary between brands.
- Use geometry charts alongside the bike size chart to understand frame dimensions and riding posture.
- Confirm that your inseam measurement allows enough standover clearance for safety and comfort.
Consider Bike Type When Choosing Frame Size
How does the type of bike you choose affect the frame size that fits you best? Different bike types have unique sizing standards and geometry that shape your frame size decision.
For example, road bikes usually measure frame size in centimeters based on seat tube length, while mountain bikes use inches or size categories like S, M, and L. Wheel size also matters—mountain bikes with 27.5” or 29” wheels may need a different frame size than those with 26” wheels, even if your height is the same.
Your intended riding style influences geometry and bike fit priorities. Road bikes emphasize reach, while mountain bikes focus more on standover height and maneuverability.
Understanding these differences ensures you select the right frame size tailored to your bike type, providing comfort and control. So, always consider how bike type affects sizing standards and geometry to get the best fit for your rides.
Adjust for Brand Geometry Differences
Since bike brands use different methods to measure frame size, you can’t rely solely on numbers when comparing models. Brand-specific geometry differences mean that identical frame measurements might not fit the same way.
To adjust for these brand variations, consider these key points:
- Understand each brand’s measurement methods—some use center-to-center, others center-to-top seat tube measurements.
- Check if the brand factors in slope top tubes, which can affect effective top tube length and overall fit.
- Review geometry charts carefully, noting head tube angles and seat tube slopes that influence riding position.
- Make sizing adjustments based on these insights rather than just frame sizing numbers.
Incorporate Professional Bike Fitting Insights
Although choosing the right frame size is essential, incorporating professional bike fitting insights guarantees your bike matches your unique body dimensions and riding style. Professional bike fitting involves precise measurements of your inseam, reach, and stack to identify the ideal frame size and geometry tailored to you.
A skilled fitter uses advanced tools like laser devices and motion analysis software to assess your body and riding posture. They consider your standover height and overall flexibility to recommend adjustments that optimize comfort and performance.
During the fitting, fit adjustments such as saddle height, stem length, handlebar position, and cleat placement refine your bike’s setup. These customizations ensure efficient pedaling and reduce injury risk.
Frequently Asked Questions
Is My Bike 24 or 26 Inch?
You can tell if your bike is 24 or 26 inches by checking the tire sidewall for size markings or measuring the wheel diameter across the tire.
Make sure the tires are properly inflated because this gives you the most accurate measurement.
It’s pretty simple once you know where to look! Just take a quick peek at the side of your tire or grab a tape measure and check the diameter yourself.
How Can I Tell the Size of My Bike Frame?
Think of your bike frame size as its skeleton—measure from the bottom bracket center to the top of the seat tube. Grab a tape measure, and you’ll quickly reveal your bike’s true size with ease.
It’s pretty straightforward once you know what to look for. Just a quick measurement, and you’re all set!
What Size Bike Is a 20 Inch Frame?
A 20-inch bike frame usually fits riders around 5’8″ to 6’0″. It’s common for mountain bikes and sometimes hybrids.
Always check the brand’s sizing chart since measurements can vary between models. You don’t want to end up with a frame that feels too big or too small!
What Size Bike Is a 17 Inch Frame?
Wondering what size bike fits a 17-inch frame? It’s typically a medium, great for riders with a 30-32 inch inseam.
Don’t forget to check your height and bike geometry for the perfect fit! It really makes a difference when you’re comfortable on the bike.
Conclusion
Now that you know how to measure your bike frame size, don’t worry if it seems complicated at first. Just picture your bike as a puzzle where each measurement—inseam, top tube, reach—fits perfectly together.
This helps give you comfort and control while riding. By following these steps and comparing your numbers with size charts, you’ll find your ideal fit in no time.
Remember, a well-fitted bike feels like an extension of you. It makes every ride smoother, more enjoyable, and less tiring.
Getting the right bike frame size is key for comfort, performance, and safety. So take your time measuring, use the tips here, and soon you’ll be riding with confidence on a bike that truly fits you.