7 Simple Steps to Tighten Bike Brakes
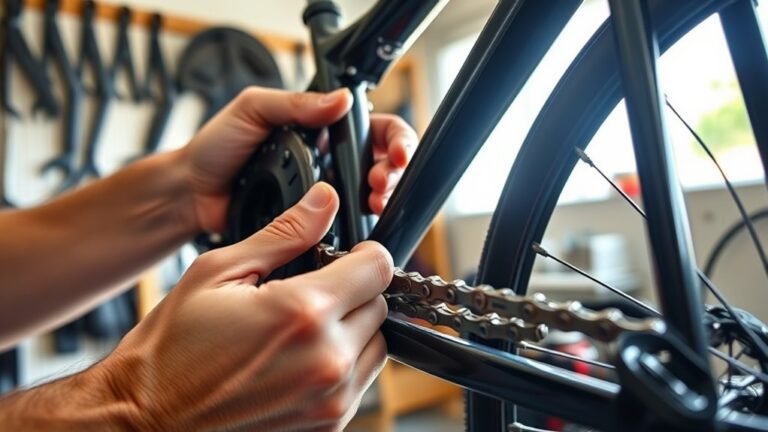
Start by inspecting your brake pads and rims for wear or dirt. This is crucial because dirty or worn parts can seriously affect your bike’s stopping power.
Next, locate the barrel adjuster near the brake lever and turn it clockwise to tighten the cable tension. This will give you a firmer brake feel and better control when you squeeze the brake lever.
After that, tighten the brake cable bolt at the caliper securely but be careful not to overtighten it. You want it snug enough to hold the cable firmly in place without causing damage.
Now, center the brake arms so that the pads make even contact with the rim. This ensures your brakes apply pressure evenly and work efficiently.
Finally, test the brake lever and wheel engagement. Make any fine-tune adjustments needed to get maximum response from your brakes.
Follow these simple steps, and you’ll notice a big improvement in your bike’s braking performance. It’s easier than you think to keep your brakes tight and safe!
Inspect Brake Pads and Rims
Start by inspecting your brake pads and rims carefully. Check that the brake pads have at least 1-2 mm of rubber left and that they’re aligned evenly with the braking surface of the rims. Misalignment can cause uneven rim wear and reduce braking efficiency.
Make sure the pads aren’t touching the tire or the rim sidewalls, which can harm your brake system’s performance. Next, examine the rims for any dents, cracks, or excessive rim wear. Clean the braking surface with alcohol or brake cleaner to remove dirt and oil.
Also, inspect brake cables for damage before making any brake adjustment. Ensuring your brake pads and rims are in good condition sets a solid foundation for effective brake tightening. It’s a simple step that really pays off!
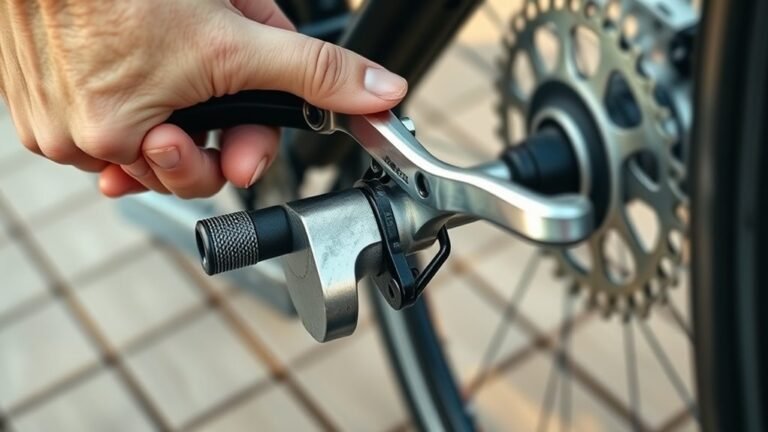
Locate and Identify the Barrel Adjuster
Start by finding the barrel adjuster, a small cylinder usually located on the brake lever or along the brake cable housing. You’ll recognize it by its knurled surface, which makes it easy to turn by hand.
Some barrel adjusters even have a numbered scale to help you track your adjustments precisely. It’s a handy feature that lets you know exactly how much you’ve turned it.
Barrel Adjuster Location
Where exactly can you find the barrel adjuster on your bike? Typically, it’s located either at the brake lever or along the brake cable housing. You’ll often see it near where the cable enters the brake caliper.
This small, cylindrical component has a threaded exterior that lets you fine-tune cable tension by turning it. Adjusting bike brakes becomes easier once you spot the barrel adjuster. It’s usually a knurled or smooth cylinder you can rotate by hand.
Turning it clockwise tightens the brake cable, which increases brake response. On the other hand, turning it counter-clockwise loosens the cable for softer braking.
Some bikes actually have two barrel adjusters: one at the brake lever for quick tweaks and another near the brake caliper for more precise tuning. Knowing where your barrel adjuster is makes maintaining *ideal* brake performance a breeze.
Recognizing Adjustment Features
Although it might seem small, the barrel adjuster plays a crucial role in maintaining your bike’s braking performance. So, learning to locate and identify it is essential.
You’ll find this small, cylindrical component near the brake lever or caliper. Its threaded body and knurled exterior let you adjust cable tension by hand, improving brake response without tools.
Turning it clockwise tightens the cable, boosting brake response, while counter-clockwise loosens it. Most barrel adjusters have markings like “+” and “−” or arrows to guide tightening and loosening.
| Feature | Description |
|---|---|
| Location | Brake lever or caliper |
| Shape | Small, cylindrical, threaded body |
| Exterior | Knurled or ridged for grip |
| Function | Adjusts cable tension |
| Markings | “+” / “−” or directional arrows |
Adjust Cable Tension Using the Barrel Adjuster
When you need to fine-tune your brake responsiveness, modify the cable tension using the barrel adjuster on the brake lever or caliper. Turning the barrel adjuster counter-clockwise loosens the cable tension, making the brakes engage faster.
Turning it clockwise tightens the cable, delaying brake response. You can easily adjust bike brakes by manipulating this small but essential component on the brake lever or brake calipers.
After adjusting, always test the brake feel to ensure both pads hit the rim simultaneously. Once satisfied, lock the barrel adjuster in place by tightening its lock ring clockwise.
- Small barrel adjuster near the brake lever
- Twist barrel adjuster to loosen cable tension
- Smooth brake lever pull with perfect pad contact
- Lock ring securing the barrel adjuster tightly
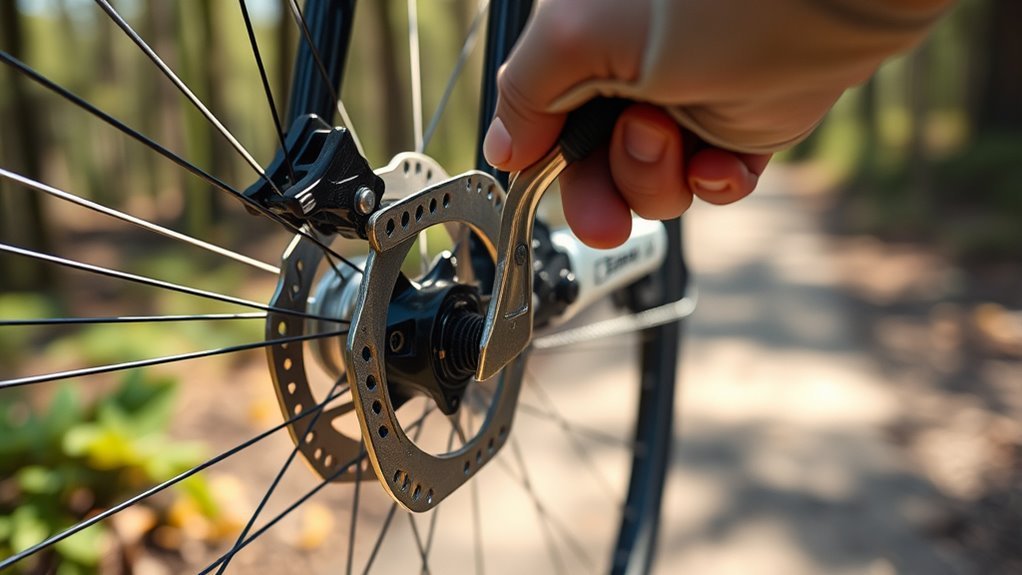
Tighten the Brake Cable at the Caliper or Brake Arm
First, loosen the bolt on the brake caliper or arm to access the cable clamp. Then, pull the brake cable tight by hand, making sure the pads sit close to the rim without rubbing.
Finally, securely retighten the bolt to hold the cable tension in place. It’s important to get this just right so your brakes work smoothly.
Locate Cable Bolt
Where exactly do you adjust the brake cable tension? Start by locating the cable bolt, which secures the brake cable to the caliper or brake arm. This bolt is typically found where the cable enters the mechanism.
To adjust the tension, you’ll need an Allen wrench or screwdriver to loosen the cable bolt slightly.
Visualize these key steps:
- Spot the cable bolt on the caliper or brake arm.
- Use an Allen wrench to loosen it just enough to adjust.
Then, firmly pull the brake cable to increase tension. Prepare to tighten the cable bolt securely once the tension feels right.
Secure Cable Tension
Although you’ve loosened the cable bolt, you’ll need to pull the brake lever firmly to take up slack and bring the brake pads close to the rim or rotor. Hold the brake lever in this engaged position while you tighten the lock nut or bolt to secure the brake cable and lock in the correct cable tension.
This step is vital for tightening brake response and ensuring the pads engage properly. After securing the cable, use the barrel adjusters on either the brake lever or caliper to fine-tune the tension.
Keep adjusting brake cable tension until the brake pads contact the rim evenly and the brake lever feels firm, without excessive travel. This precise cable tension guarantees safe, responsive braking every time you squeeze the brake lever.
Center the Brake Arms for Even Pad Contact
When you loosen the brake arm bolts slightly, you can reposition the brake pads to make sure they contact the rim or rotor evenly. To center the brake arms for consistent pad contact on rim brakes, squeeze the brake lever firmly. This holds the calipers in place so you can adjust the brake arms precisely.
While keeping the lever pressed, tighten the brake arm bolts securely to lock their position. Then, spin the wheel and observe the brake pads’ alignment. Make sure they touch the rim evenly without rubbing or gaps.
Visualize this process: brake arms moving symmetrically toward the rim, brake pads lining up parallel to the rim surface, brake lever held tight to stabilize the arms, and a smoothly spinning wheel with even pad contact.
This simple trick ensures balanced braking and better control. Give it a try next time you need to adjust your brakes!
Test Brake Lever Feel and Wheel Engagement
After centering the brake arms and securing the pads, the next step is to test how the brake lever feels and how the wheel responds. Squeeze the brake lever firmly and observe wheel engagement; the wheel should stop quickly without rubbing when released.
If the brake lever feels soft or spongy, or if it hits the handlebar before the wheel stops, your brake tension or brake cable may need adjustment. Make sure the brake pads engage the rim or rotor evenly and promptly through the brake caliper.
When fully squeezed, the wheel must stay stationary, ensuring strong braking power. Finally, release the brake lever to confirm the brake arms open fully, allowing the wheel to spin freely without dragging.
This test helps verify your brake adjustment is effective and safe. So, take your time with this step to make sure everything feels just right.
Fine-Tune Adjustments for Optimal Braking Response
To achieve ideal braking response, you’ll want to fine-tune your brake cable tension using the barrel adjuster on the lever or caliper. Turn it clockwise to increase brake tension or counter-clockwise to loosen it.
Before adjusting, make sure your brake pads are perfectly aligned with the rim to avoid uneven wear or rubbing. After setting the right tension, securely tighten the cable bolt to lock it in place.
Then, test the brake lever by squeezing it while spinning the wheel and watch how the caliper brakes respond. Repeat small cable adjustments until the brakes engage quickly without dragging.
Visualize this process:
- Turning the barrel adjuster on the brake lever
- Checking rim alignment of brake pads
- Tightening the cable bolt firmly
- Squeezing the brake lever to test response
Fine-tune regularly to maintain top-notch braking. It really makes a difference!
Conclusion
Now that you’ve inspected the brake pads and rims, adjusted the barrel adjuster, tightened the brake cable, centered the brake arms, tested the brake lever, and fine-tuned the brakes, you’re ready to ride with confidence.
You’ve taken control, guaranteed safety, and improved performance. Keep checking your bike brakes regularly, stay proactive, and enjoy every smooth, secure stop.
By following these simple steps to tighten bike brakes, you’re not just fixing an issue—you’re mastering your ride. Properly maintained brakes mean safer rides and better control. So, keep practicing these techniques, and your bike will be ready for any adventure ahead!