How to Turn on Your Peloton Bike in 10 Easy Steps
To turn on your Peloton bike, start by plugging the power adapter into a grounded outlet. Then, securely connect the adapter to the bike itself.
Next, locate the power button on the rear of the touchscreen or frame. Press and hold it for 1-2 seconds until the screen lights up. It’s that simple!
Once your bike powers on, connect to your WiFi network and sign in to your Peloton account. This will get you all set up to access your rides and classes.
Your bike will then calibrate automatically, preparing everything so you can start your ride without any hassle. Keep following for more helpful tips to make the most out of your Peloton experience!
Locate the Power Adapter and Connect to Outlet
Before turning on your Peloton Bike, locate the power adapter that came with it and check for any damage. You want to make sure the power adapter is intact and safe to use before proceeding.
Once you’ve confirmed it’s in good condition, find a grounded electrical outlet that supplies stable voltage. It’s best to use a surge protector to protect your bike from electrical fluctuations.
Make sure the outlet is switched on and ready to supply power. Then, connect the power adapter to the outlet securely. Double-check that the connection is firm to avoid any power interruptions.
Plug the Power Adapter Into the Bike
After securing the power adapter to a grounded outlet, the next step is to connect it to your Peloton Bike. First, locate the power adapter that came with your bike and check for any damage. Then, find the power port on the rear of the bike.
Carefully plug the power adapter connector into this port, making sure it aligns and fits securely. Confirm the other end of the power adapter remains plugged into the grounded electrical outlet you previously connected.
Verify the outlet is switched on and delivering power. Double-check that the power cable is firmly attached at both ends to prevent any disruptions during startup. Taking these steps guarantees your Peloton Bike receives a stable power supply, setting you up for a smooth start.
Find the Power Button on Your Peloton Bike
You’ll find the power button on the rear side of your Peloton Bike’s touchscreen monitor. It’s a small, circular button often marked with a power symbol for easy spotting.
Once you locate it, you’ll be ready to turn on the bike and start your workout. Pretty straightforward, right? Just a quick press, and you’re good to go!
Locate Power Button
Finding the power button on your Peloton Bike is simple and quick. You’ll find it either at the rear of the frame near the bottom right side or on the side of the touchscreen, depending on your model.
The button is small, round, and marked with a power symbol for easy recognition.
Here’s what to remember about the power button on your Peloton Bike:
- Located near the bottom right rear frame or touchscreen side
- Small and round with a clear power symbol
- Press and hold for about one second to turn on
- Make certain the bike is plugged into a working outlet if it doesn’t power on
Knowing where to locate the power button helps you start your workout without delay. So, no fumbling around—just a quick press and you’re good to go!
Power Button Placement
Knowing where the power button is located on your Peloton Bike makes turning it on straightforward. The power button’s placement is on the rear side of the touchscreen monitor arm. It’s a small, round button you can easily press to power the bike on or off.
Before you press the power button, verify your bike is plugged into a power source. To turn the bike on, press and hold this button until the screen lights up. When you want to switch it off, hold the same power button until the display powers down.
This specific placement keeps the button accessible yet discreet. It maintains the bike’s sleek design while offering easy control for powering your Peloton bike.
Identifying Bike Controls
Where exactly is the power button on your Peloton Bike? You’ll find this vital control on the right side of the touchscreen bezel. It’s a small, circular button marked with the universal power symbol—a circle with a vertical line.
On newer models, the power button might be integrated right into the touchscreen itself. Before pressing the power button, make sure your bike’s plugged into a power outlet. To turn it on, press and hold the button for a few seconds until the screen lights up.
Here’s what to remember about your bike’s controls:
- Power button location: right side of touchscreen bezel
- Small, circular button with power symbol
- May be integrated into touchscreen on new models
- Must be plugged in before powering on
Knowing these controls helps you start your workout smoothly. Easy, right?
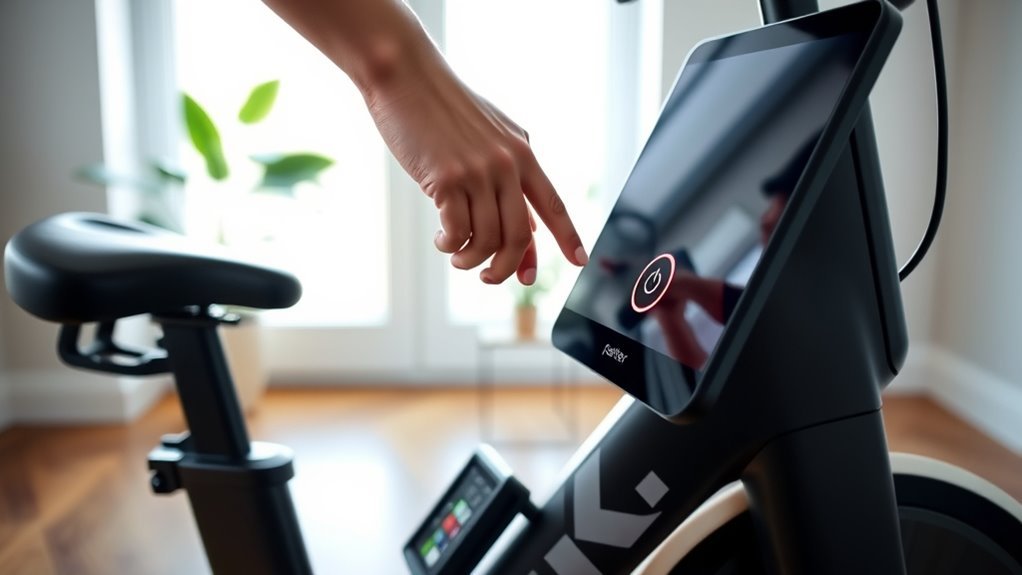
Press and Hold the Power Button
Although it might seem straightforward, pressing and holding the power button correctly is vital to start your Peloton Bike.
First, locate the power button, usually found near the bottom right or left side on the front of the bike. To turn on the bike, press and hold this button for about 1 to 2 seconds.
You’ll know you’re doing it right when the screen lights up, showing the Peloton logo or a loading screen. Once the screen activates, release the power button to complete the process.
The screen lighting up with the Peloton logo signals it’s time to release the power button.
If your Peloton doesn’t turn on, double-check that it’s plugged into a working electrical outlet. Mastering this step guarantees your bike powers up smoothly every time you’re ready to ride.
Wait for the Screen to Light Up
After pressing the power button, wait a few seconds for the screen to light up. This signals that the bike is starting.
Make sure the bike is plugged in properly. If there’s no screen, it usually means no power.
If the display doesn’t turn on, check your connections before pressing any buttons again. It’s best to make sure everything’s secure first.
Screen Activation Process
Before you start using your Peloton Bike, make sure it’s plugged in and powered on so the touchscreen can begin lighting up. The screen activation process is straightforward but requires a few seconds to complete.
Once powered, the touchscreen will display the Peloton logo and start to light up. During this time, you might see a calibration message or loading indicator while the system initializes.
Keep these points in mind for smooth screen activation:
- Confirm the bike is connected to a stable power source
- Wait 10-15 seconds for the screen to fully light up
- Watch for the Peloton logo and calibration messages
- Wait until the home menu appears before starting your workout
Following these steps ensures your Peloton’s screen activates properly and is ready to use.
Initial Power Connection
Getting your Peloton Bike’s screen to light up starts with connecting it to power correctly. First, plug the power adapter into a standard electrical outlet and connect the other end securely to the rear of your bike. Make sure the outlet works and the power connection is tight.
Once powered, the touchscreen should automatically display the Peloton logo within seconds. Just be patient — the screen might take up to 30 seconds to fully load during the initial power.
If your bike has a power switch, confirm it’s turned on. Try to avoid touching cables unnecessarily to keep that initial power connection solid.
| Step | Action |
|---|---|
| 1 | Plug adapter into outlet |
| 2 | Connect adapter to bike |
| 3 | Verify power connection is secure |
| 4 | Wait for screen to display logo |
| 5 | Confirm power switch is on (if any) |
Troubleshooting Screen Issues
If your Peloton Bike’s screen doesn’t light up within 30 seconds, check that the power adapter is firmly connected to both the outlet and the bike. Make sure the power source is active.
If the screen remains blank, try a simple reset by unplugging the bike, waiting 10 seconds, then plugging it back in. Also, verify the touchscreen is securely attached and bolts are tightened.
To troubleshoot screen issues, remember to:
- Wait 30 seconds for the touchscreen to power on and show the Peloton logo
- Confirm the power adapter is securely connected
- Check the touchscreen connection and tighten bolts if loose
- Ensure your WiFi is active to avoid delays in screen activation
These steps help you get your Peloton bike’s display working smoothly.
Allow the System to Initialize
Once you press the power button on your Peloton Bike, the system will start an automatic initialization process that prepares the touchscreen and console for use. This system startup involves a brief calibration, during which you’ll hear a sound similar to a printer.
It’s important to wait patiently while the initialization completes to guarantee all components are properly configured. If the screen doesn’t finish calibrating or remains unresponsive, unplug the bike from the power source, then plug it back in to restart the initialization.
Remember, before powering on, double-check that the power adapter is securely connected to both the wall outlet and the bike. Also, stabilize the bike by rotating the stabilizer feet clockwise until firmly on the ground.
This helps avoid interruptions during system startup and initialization.
Connect to WiFi Network
To connect your Peloton Bike to WiFi, start by selecting the WiFi icon on the home screen to open the network settings. From there, you’ll see a list of available WiFi networks.
Find your network and tap it to proceed. Next, enter your WiFi password using the on-screen keyboard, then confirm to connect. Make sure the connection is strong before moving on.
Here’s how to connect to WiFi quickly:
- Tap the WiFi icon on the home screen
- Select your WiFi network from the list
- Enter and confirm your WiFi password
- Check for a strong WiFi connection indicator
Once connected, your Peloton Bike is ready for the next steps. Easy, right? Just follow these simple steps and you’ll be all set!
Sign in to Your Peloton Account
After powering on your Peloton Bike and connecting to WiFi, you’ll be prompted to sign in to your Peloton account. On the home screen, the Peloton app will ask for your email and password. Simply enter your credentials using the touchscreen keypad.
Power on your Peloton Bike, connect to WiFi, then sign in with your email and password on the touchscreen.
If you’re a new user, you might need to enter an activation code instead to link your account. Make sure your information is correct to avoid login issues.
Signing in gives you access to all Peloton features, including live classes, on-demand workouts, and personalized tracking. Once you’ve successfully signed in, you’re ready to start your fitness journey with your Peloton Bike.
Keep your login details handy for future sessions to speed up the sign-in process. It makes getting started next time a breeze!
Complete the Calibration Process
Once you turn on your Peloton Bike, let it run through the calibration process without moving the screen or pedals.
If you hear a printer-like noise, that’s normal as the bike adjusts its settings. Follow the on-screen prompts to complete calibration.
If anything goes wrong, just unplug and restart the process before setting up your profile. It’s pretty straightforward once you get the hang of it!
Calibration Procedure Overview
The calibration process on your Peloton Bike+ automatically activates during setup. You’ll hear a sound similar to a printer as it adjusts the brake system. This essential step guarantees accurate resistance control and smooth firmware updates.
It usually takes a few minutes and must be completed before your first ride. So, make sure you stick around and let it finish.
To guarantee proper calibration: don’t move the bike or touch the screen during calibration. Just wait patiently until the process finishes.
If calibration fails, unplug the bike, wait a few seconds, then reconnect it. Also, be sure to complete the calibration during setup for ideal performance.
Following these steps assures your Peloton Bike+ is ready for precise workouts and a seamless user experience. You’ll be all set to ride!
Troubleshooting Calibration Issues
If your Peloton Bike+ calibration doesn’t complete successfully, don’t worry—you can troubleshoot by unplugging the bike, waiting 30 seconds, then reconnecting it to restart the process.
During calibration, keep pedals and touchscreen still to guarantee accurate sensor readings. This helps avoid any interference that might throw off the calibration.
If problems persist, tilt the monitor up, remove bolts with a 4 mm Allen wrench, slide the monitor off, then reattach it securely before retrying calibration.
Also, make sure your Bike+ is on a flat, stable surface. This helps stabilize the front feet firmly for the best results.
| Step | Action | Tip |
|---|---|---|
| 1 | Unplug & wait 30 seconds | Restart calibration |
| 2 | Keep pedals & screen still | Avoid sensor interference |
| 3 | Remove & reattach monitor | Use 4 mm Allen wrench |
| 4 | Ensure flat surface | Stabilize front feet firmly |
Activation and Profile Setup
After powering on your Peloton Bike, you’ll follow on-screen prompts to activate your device and complete the calibration process. During activation, you’ll enter your email and create a password or input an activation code if you received one as a gift.
Next, proceed with profile setup by confirming your name and preferred leaderboard name to personalize your account. Don’t forget to connect to your WiFi network by selecting it and entering the password.
Finally, allow the bike to finish calibrating, which ensures the brake and firmware are properly set before you start riding.
Here’s what to do during activation and profile setup:
- Enter email and create a password or use an activation code
- Confirm profile info, including display names
- Select and connect to your WiFi network
- Wait for the bike to complete calibration
Explore the Home Screen and Start Riding
Once you power on your Peloton Bike, you’ll find the home screen packed with personalized recommendations and easy access to classes designed just for you. Use the touchscreen to navigate Live Rides, On-Demand Classes, and Profile settings.
To start riding, simply select a class, check filters, and follow on-screen prompts. Make sure your WiFi is active and the screen calibrated for smooth use.
Here’s a quick guide to explore the home screen and start riding efficiently:
| Feature | Purpose | Tip |
|---|---|---|
| Live Rides | Join real-time classes | Check schedule regularly |
| On-Demand Classes | Access various workouts | Filter by duration |
| Profile | Manage settings & progress | Update info as needed |
| Recommendations | Personalized class picks | Try new instructors |
| Start Riding | Begin your workout instantly | Follow on-screen cues |
Conclusion
Now that you’ve powered on your Peloton bike and completed setup, you might wonder if it really makes a difference in your workout. The truth is, turning it on is just the first step—once connected and calibrated, your bike becomes a gateway to motivation, community, and progress.
So, don’t just sit there; hop on and start pedaling. You’ll quickly see how this simple action can transform your fitness journey.
With your Peloton bike turned on, you gain access to live classes, personalized metrics, and an inspiring community. This creates an engaging and motivating atmosphere that keeps you coming back for more. Turning on your Peloton bike isn’t just about powering a machine—it’s about unlocking a whole new way to reach your fitness goals.