How to Change Bike Pedals in 7 Easy Steps
To change your bike pedals in seven easy steps, start by gathering the right tools like a pedal wrench or Allen key. Knowing how to change bike pedals is essential for any cyclist, whether you’re upgrading or replacing worn-out parts. It’s not as tricky as it sounds once you get the hang of it!
Next, identify your pedals’ left and right sides, then prepare the threads by cleaning and applying grease. This step ensures smooth installation and prevents any damage to your bike’s crank arms.
Loosen and remove the old pedals—remember, the left pedal has reverse threads, so it’s a bit different to take off. Don’t worry, a little practice makes this part easier.
Grease the new pedals’ threads before hand-threading them in correctly. This helps them go in smoothly and keeps everything secure.
Finally, tighten the pedals securely and check for any play. Once you’ve done that, you’re all set! Keep following along, and you’ll master every detail of pedal replacement in no time.
Gather the Necessary Tools
Before you start changing your bike pedals, make sure you have the right tools on hand. Most bike pedals require either a pedal wrench or an 8mm Allen key for removal and installation.
Some pedals might need a 15mm spanner or a 6mm hex key based on their spindle design. Check if your pedals have flat wrench faces or hex sockets to pick the correct tools.
Having a multi-tool with various Allen keys can be a lifesaver, accommodating different pedal types and sizes. Using the proper tools not only makes the process easier but also protects the pedal threads from damage.
Identify Left and Right Pedals
Two key features help you identify left and right bike pedals: thread direction and side markings. The right pedal uses standard thread direction, tightening clockwise and loosening counterclockwise.
In contrast, the left pedal has reverse threads, meaning it tightens counterclockwise and loosens clockwise. Most pedals have clear pedal markings—an “L” denotes the left pedal, and an “R” marks the right pedal—usually stamped or printed on the spindle or pedal body.
You can also look for visual cues like textured areas near the wrench flats, which often indicate the left pedal’s reverse threads. By confirming these pedal markings and understanding the thread direction, you’ll avoid cross-threading and ensure each pedal goes on its correct side smoothly.
Prepare the Pedal Threads
Since pedal threads can seize or get damaged easily, you should clean both the pedal spindle and crank arm threads thoroughly before installation. Remove any dirt, debris, or old grease to guarantee a smooth fit.
Next, apply a thin layer of grease or anti-seize compound to the pedal threads. This prevents seizing and makes future removal easier.
Check if your pedals need washers on the spindle and install them if necessary before inserting the pedal into the crank arm. Always verify the threads are clean and free from thread damage to avoid cross-threading.
Remove the Old Pedals
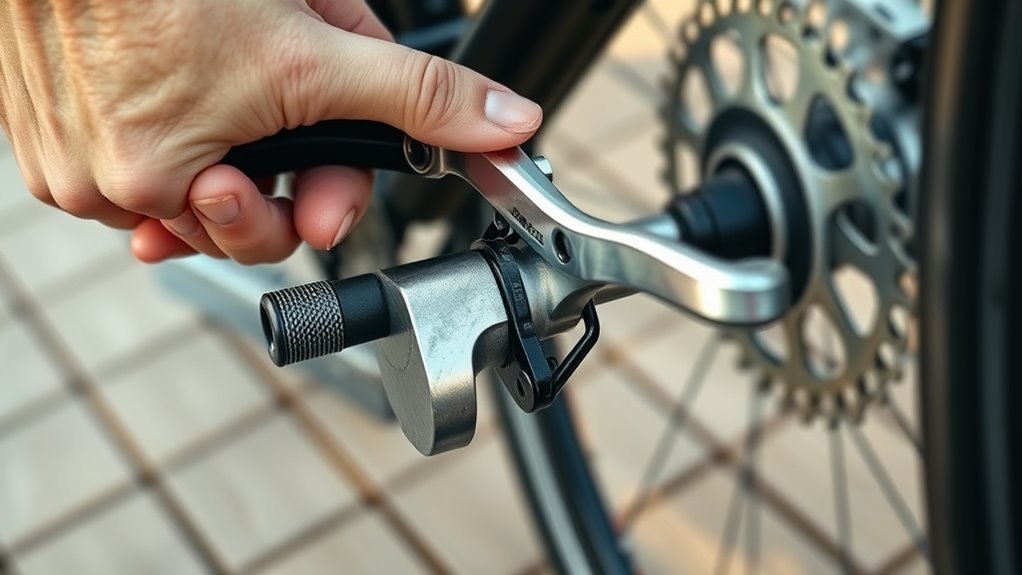
To remove your old pedals, position the crank arm so the pedal is easiest to reach—3 o’clock on the right or 9 o’clock on the left. Use a pedal wrench or an 8mm hex key to firmly grip the pedal before turning it.
Turn counterclockwise on the right side and clockwise on the left, thanks to reverse threading. Hold the opposite crank arm steady for leverage. If a pedal won’t budge, apply some penetrating oil and try again carefully.
Loosen Pedals Correctly
Before you start loosening the pedals, position the crank so the pedal you want to remove is at the 3 o’clock mark with the right crank facing forward.
To loosen the thread correctly, remember the right pedal requires counterclockwise turning, while the left pedal has reverse threading, meaning you turn clockwise.
Use steady pressure with a pedal wrench to avoid damaging the threads. Support the crank to prevent damage and apply leverage carefully if the pedal is stuck.
Here’s a quick reference for loosening pedals:
| Pedal Side | Direction to Loosen |
|---|---|
| Right Pedal | Counterclockwise |
| Left Pedal | Clockwise (reverse) |
| Tool Needed | Pedal wrench or hex |
| Pressure | Steady and even |
| Support | Crank or frame |
Use Proper Tools
When you’re ready to remove the old pedals, make sure you have the right tools on hand—either a pedal wrench, a 15mm open-ended wrench, or an 8mm hex key. These will help you grip the pedal flats or socket securely.
Check the pedal side markings (“L” or “R”) to ensure tool compatibility and avoid cross-threading. Remember, the right (drive-side) pedal loosens counterclockwise, while the left (non-drive side) pedal loosens clockwise because of the reverse thread direction.
Make sure to secure the crank and stabilize your bike to prevent slipping. If the pedals feel stuck, try applying some penetrating oil and let it sit for a few minutes before trying again.
When reinstalling, put a thin layer of anti-seize on the threads. This will make future removal easier and protect against corrosion.
Using the proper tools guarantees a smooth, damage-free pedal change. It really makes the whole process much easier!
Grease the New Pedal Threads
Although it might seem like a small step, greasing the new pedal threads is essential for preventing seizing and corrosion. Before pedal installation, apply a thin, even layer of grease or an anti-seize compound to the pedal threads to ensure thread protection.
This simple action reduces friction between the pedal spindle and crank arm, making future removal easier and helping to prevent seizing. Use a high-quality, bike-specific grease—waterproof or lithium-based greases work best—to maximize durability.
Be sure to cover all threaded areas evenly to avoid cross-threading and ensure smooth engagement. After tightening, wipe off any excess grease to prevent dirt and debris buildup during rides.
Taking this precaution guarantees a smoother, longer-lasting pedal installation and protects your bike’s threads from damage. It’s a small effort that really pays off in the long run!
Install the New Pedals
Now that you’ve greased the pedal threads, it’s time to install the new pedals. Make sure you identify the correct pedal for each side, then start threading them by hand to avoid cross-threading.
Once they’re properly aligned, use a wrench to tighten them securely. This way, you’ll keep everything snug and safe for your ride.
Identify Correct Pedal
Before installing new pedals, you’ll want to identify the correct side by checking for the “L” or “R” markings on each pedal. The right (driveside) pedal tightens clockwise, while the left pedal has reverse threading.
Matching side and pedal threading is essential to avoid damage when you remove pedals next time. Mountain bike pedals especially require attention to threading and side to guarantee a secure fit.
| Pedal Side | Threading Type | Emotional Impact |
|---|---|---|
| Right (Driveside) | Clockwise (Standard) | Confidence |
| Left | Counterclockwise (Reverse) | Assurance |
| Incorrect Match | Risk of Cross-threading | Frustration |
| Proper Match | Smooth Installation | Satisfaction |
| Damaged Spindle | Difficult Removal | Annoyance |
Always match side carefully for a perfect ride.
Apply Grease Properly
Once you’ve confirmed each pedal matches its correct side, the next step is to apply grease properly to the pedal threads. Start by thoroughly cleaning the pedal threads and crank arm to ensure a clean fit.
Use a thin layer of bicycle-specific grease or anti-seize on the entire threaded portion of the pedal spindle. This proper application prevents seizing and makes future removal easier.
Be careful to grease only the threads and avoid excess that might drip or attract dirt. Make sure you’re greasing the right pedal for the corresponding crank arm to avoid cross-threading.
After you finish installing the pedals, wipe off any extra grease from the crank arm area to keep things clean and ensure smooth operation. Applying grease correctly helps maintain your bike’s performance and longevity.
Hand-Thread Before Tightening
Although it might be tempting to use a wrench right away, you should always start threading new pedals by hand to guarantee the threads align properly and prevent cross-threading.
Begin by verifying the “L” or “R” markings on each pedal to ensure you install them on the correct side. For the right pedal, turn clockwise; for the left, turn counterclockwise to match their crank threads.
Use your fingers to gently rotate the pedal into the crank arm until fully engaged. This hand-thread process helps you detect any cross-threading early, which can damage the crank or pedal threads if unnoticed.
After hand-threading, you can proceed with proper tightening using a wrench, ensuring the pedals are secure without risking damage that might require pedal removal later.
Tighten and Check Pedal Security
How tight should your bike pedals be? You want to tighten pedals to a pedal torque of about 35Nm to 50Nm. This ensures they’re secure without damaging the pedal threads.
Always use a proper tool like a pedal wrench or Allen key to apply even force. Remember, the right pedal threads tighten clockwise, while the left pedal tightens counterclockwise.
After tightening, check pedal security by gently wiggling the pedals; they should feel firmly attached with no play. Don’t over-tighten, as that can strip threads and cause damage.
Regularly inspect and retighten pedals during maintenance to prevent loosening while you ride. Following these steps keeps your pedals safe and your ride smooth.
Conclusion
Changing your bike pedals is like planting new seeds on a journey. With each step—from gathering tools to tightening pedals—you’re nurturing a fresh connection between you and your ride.
Just as roots firmly grip the earth, your pedals will hold steady, ready to push you forward. Embrace this simple ritual, and soon enough, every pedal stroke will feel like a promise of smooth, unstoppable adventures ahead.
Keep turning, and enjoy the ride. Remember, changing bike pedals not only improves your bike’s performance but also ensures safety and comfort while riding. So take your time with each step, and you’ll be back on the road in no time, pedaling with confidence and ease.