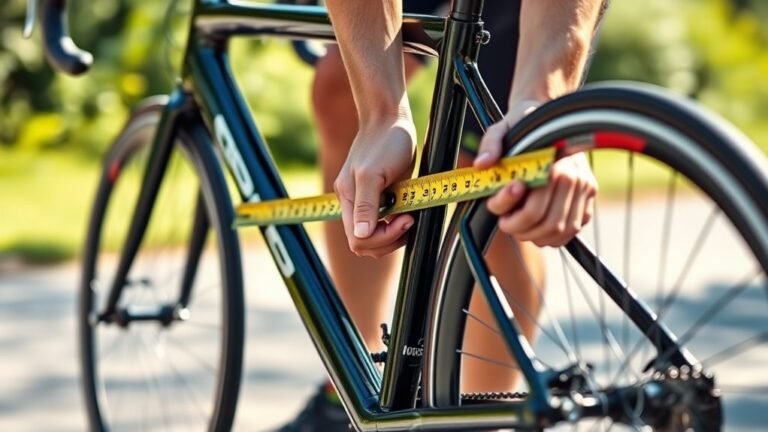
How to Measure Your Inseam for a Bike in 7 Easy Steps
To measure your inseam for a bike in seven easy steps, you’ll need a few simple tools: a measuring tape, a book, and something to mark with. This measurement is key to finding the right bike size that fits you comfortably and helps you ride efficiently.
Start by standing barefoot against a wall with your back flat and heels touching it. Then, place the book firmly between your legs, making sure it’s parallel to the ground and touching your pubic bone.
Next, mark the top edge of the book on the wall. After that, measure the distance from the floor to the mark you made. It’s a good idea to repeat this process a few times and take the average for accuracy.
Keep going with these steps, and soon you’ll understand how your inseam measurement fits into choosing the perfect bike size for you.
Gather the Necessary Materials
Before you begin measuring your inseam for biking, gather all the necessary materials to make the process smooth and accurate. Start by grabbing a measuring tape, which will be essential for getting an exact length.
You’ll also want a rigid hardcover book to help create a stable, level surface when marking your inseam. Keep a pen, pencil, bluetack, or masking tape handy to mark your measurement precisely.
Having a scrap of paper nearby lets you jot down your results immediately. Make sure everything is within reach before you start, so you don’t interrupt the process.
Prepare for an Accurate Measurement
Before you start measuring, make sure you have all the essential tools like a flat object and a tape measure ready.
Clear a space near a wall where you can stand straight without any distractions. Setting up properly helps guarantee your inseam measurement is accurate and reliable.
It’s a simple step, but trust me, it makes a big difference!
Gather Essential Tools
To get an accurate inseam measurement, you’ll need a few essential tools ready at hand. Having everything prepared guarantees you won’t have to pause mid-measurement, keeping the process smooth and precise.
The right tools help you get a reliable result, which is vital for bike fitting.
Gather these tools before you start:
- A flexible measuring tape or a piece of string for measuring
- A sturdy, straight-edged object (like a hardcover book) to create a firm contact point
- A pen, pencil, or masking tape to mark the measurement spot
- A flat wall or door for standing barefoot or in stocking feet
- All tools within easy reach to avoid interruptions
With these tools at hand, you’ll set yourself up for an accurate inseam measurement.
Clear Measurement Space
With your tools ready, focus on creating a clear, stable space for measuring. Choose a flat, hard surface like a tiled or wooden floor to guarantee your measurement space is sturdy and reliable.
Clear away any clutter or objects that might interfere with your stance or the placement of your ruler or tape. Stand near a sturdy, straight-backed chair or a wall to help maintain proper posture while you measure.
Wearing minimal or form-fitting clothing prevents extra bulk from skewing your inseam reading. By preparing this tidy, stable environment, you’ll avoid distractions and inaccuracies, making it easier to get a precise inseam measurement that will help you find the perfect bike fit.
Stand Properly Against a Wall
When measuring your inseam for a bike, you’ll want to stand barefoot against a wall, making sure your heels are touching it. This position helps guarantee an accurate inseam measurement by keeping your body aligned properly.
To stand correctly, keep your back flat against the wall with hips flush to it. Position your legs shoulder-width apart for a natural stance.
Maintain an upright posture without leaning or slouching. Hold your pelvis in a neutral position, neither tilted forward nor backward.
Stay relaxed and still to avoid altering the inseam length. Following these steps, you create a consistent base to measure your inseam accurately.
This is vital for selecting the right bike size and ensuring comfortable riding.
Position a Book or Level Between Your Legs
Although standing properly is crucial, positioning a book or level between your legs guarantees you get an exact inseam measurement.
Stand with your back against a wall or door, feet shoulder-width apart, and legs straight. Take a hardcover book and place it horizontally between your legs, pressing gently against your groin area.
Make sure the book is parallel to the ground and contacts your pubic bone or sit bones directly. Keep your posture upright without tilting or shifting while holding the book in place.
This careful placement ensures the inseam measurement reflects the true length from floor to groin. Using a book in this way helps you get a precise inseam measurement, essential for finding the right bike fit.
Mark the Top Edge of the Book
Make sure the book sits firmly and level against your pubic bone to get an accurate inseam measurement. Hold it straight and steady between your legs without any slant.
Then, mark the exact top edge where the book meets your body for a precise reference point. This will help you get a consistent and reliable measurement every time.
Positioning the Book Correctly
Since accurate inseam measurement depends on proper positioning, you’ll want to place a sturdy, hardcover book vertically between your legs, pressing it firmly against your pubic bone. This guarantees the measurement reflects the true inseam size needed for your bike.
Keep your feet shoulder-width apart and stand straight to maintain the correct posture. Make sure the top edge of the book is level and parallel to the ground to avoid skewed results.
- Use a hardcover book to prevent bending or slipping
- Press the book firmly to your crotch area for consistency
- Keep your feet evenly spaced to maintain balance
- Stand upright to avoid compressing your inseam size
- Check the book’s top edge is perfectly horizontal for accuracy
This careful positioning sets the foundation for a precise inseam measurement. It might feel a bit awkward at first, but getting it right really makes a difference!
Marking the Contact Point
After positioning the book firmly against your pubic bone, carefully mark the top edge where it contacts your body, keeping it perfectly level. This contact point is vital for an accurate inseam measurement.
Make sure the book stays pressed firmly against your groin area and remains parallel to the ground throughout the process. Use a pencil, pen, or masking tape to create a clear, precise mark right at the top edge of the book where it meets your body.
Avoid moving the book during marking to prevent errors. This exact marking ensures you record the proper inseam length—from the floor up to this contact point—so your bike fit will be comfortable and efficient.
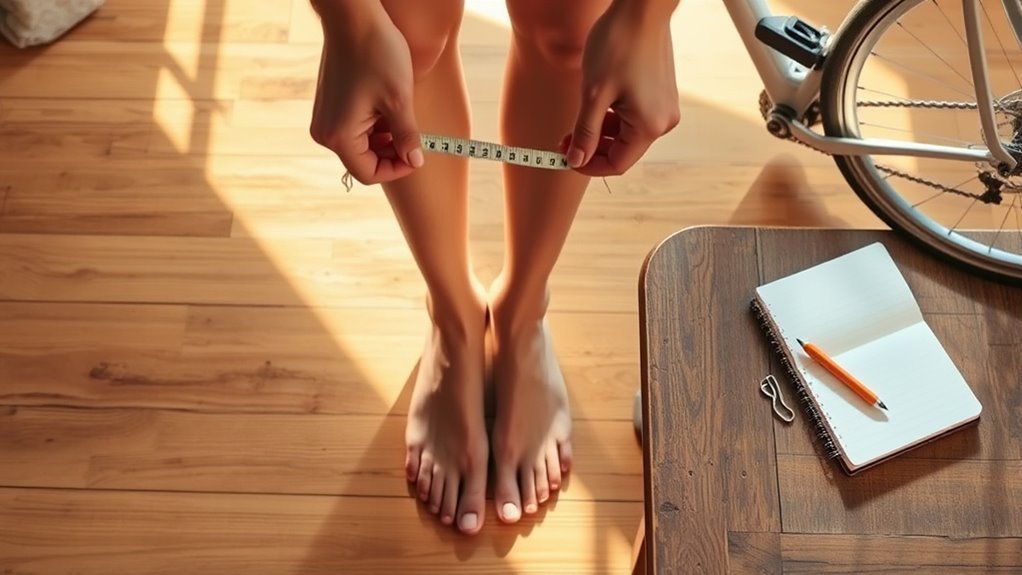
Measure the Distance From Floor to Mark
When you measure the distance from the floor to the mark, guarantee the person stands straight with weight evenly balanced on both feet. This ensures the height you record reflects an accurate inseam length, essential for proper bike fitting.
Use a measuring tape to check from the floor directly up to the mark you made earlier.
Keep these points in mind:
- Confirm the mark’s position aligns consistently with the person’s inseam.
- Record the measurement in inches or centimeters for precision.
Make sure the person maintains an upright posture without slouching. Measure at least three times to catch any slight differences.
Avoid shifting weight during measurement to prevent skewed results.
This method helps you get a reliable inseam height, critical for adjusting your bike saddle correctly.
Calculate the Average of Multiple Measurements
Measuring your inseam multiple times helps capture any slight differences caused by posture or positioning. To get the most accurate result, take at least three inseam measurements using the same method each time—such as placing a book between your legs while standing upright.
Write down each measurement carefully to avoid confusion. Once you have your inseam measurements, calculate the average by adding them together and dividing by the number of measurements, usually three.
This average gives you a more reliable inseam length, which is vital for finding the right bike fit. Taking the time to calculate the average ensures your bike setup will be comfortable and efficient, reducing the chance of errors caused by small variations in individual measurements.
Conclusion
Now that you’ve measured your inseam, imagine the perfect bike frame fitting you like a glove. Every pedal stroke becomes smooth and effortless.
With these simple steps, you’re not just measuring—you’re uncovering a ride that feels natural and comfortable. So, stand tall and mark your inseam with confidence.
Get ready to hit the road with a bike that’s truly made for you. Your best ride starts here, thanks to knowing how to measure your inseam for a bike accurately. This essential step ensures your bike fits perfectly, giving you better control, comfort, and enjoyment every time you ride.