How to Pump a Bike Tire in 5 Easy Steps
First, identify whether your bike has a Schrader or Presta valve to make certain your pump fits. This step is key to ensure a smooth inflation process without any hassle.
Next, remove the valve cap and prep your pump accordingly. Attaching the pump nozzle securely is important to avoid any air leaks while pumping.
Then, inflate the tire slowly, keeping an eye on the pressure gauge to reach the recommended PSI. This helps you get the perfect tire pressure for a smooth ride.
Finally, carefully detach the pump, secure the valve, and replace the cap to keep the air sealed.
Keep going to uncover more tips for perfect tire inflation.
Identify Your Valve Type
How do you know which valve your bike tire has? To identify valve type, first check the valve itself. A Schrader valve is wider, about 8mm in diameter, and has a spring-loaded pin in the center. It usually comes with a plastic valve cap.
On the other hand, a Presta valve is narrower, roughly 6mm, and features a threaded valve with a small metal screw at the top that you must unscrew before inflating tires. Recognizing the valve type is vital for pump compatibility.
Using the correct pump ensures you maintain the right air pressure without damaging the valve. Always check for the valve cap and the valve’s design to choose the correct pump or adapter needed to inflate tires efficiently.
Prepare Your Pump and Tire
Once you’ve identified your valve type and removed the valve cap, you’re ready to prepare your pump and tire for inflation. If you have a Presta valve, make sure to unscrew the small lock nut at the tip before proceeding.
For Schrader valves, simply remove the cap and keep it safe. Next, select the correct pump nozzle that fits your valve type.
Before you attach the pump, check the pressure gauge if your pump has one; this will help you monitor and avoid overinflating. Make sure the nozzle is clean and free of debris to ensure a tight seal.
When everything is set, you’re ready to attach the pump to the valve and begin to inflate your tire accurately and safely.
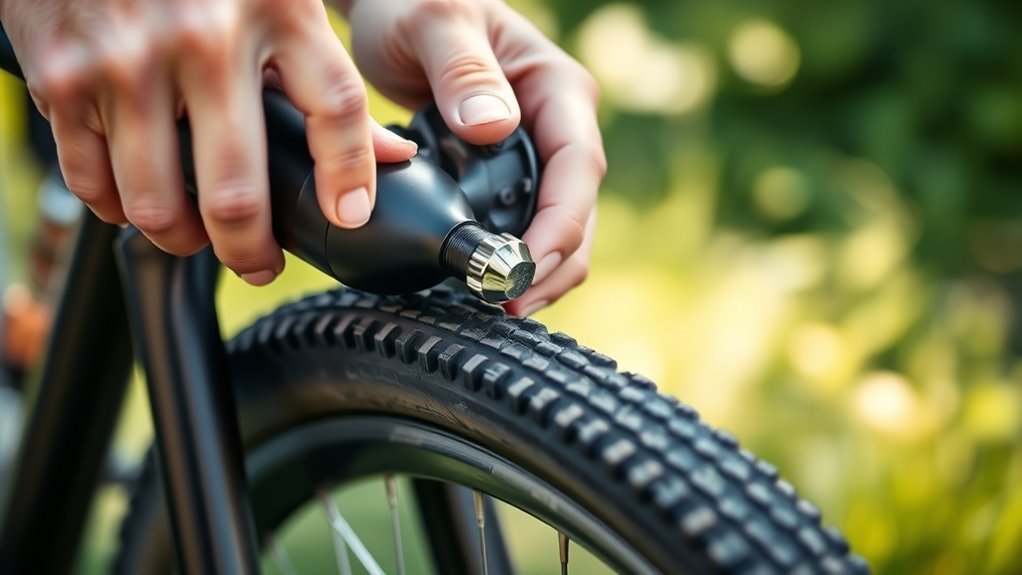
Attach the Pump to the Valve
Before you start pumping, make sure the pump nozzle matches your valve type to guarantee a proper fit.
To attach the pump securely, follow these steps based on your valve type.
For Presta valves, unscrew the lock nut first, then press the pump nozzle firmly onto the valve to create an airtight, secure seal.
If you have a Schrader valve, just press the pump nozzle straight on and lock the lever to secure the pump connection.
Confirm the valve attachment is tight and stable to prevent air leaks.
Here’s a quick guide:
| Valve Type | Preparation | Attach Pump |
|---|---|---|
| Presta | Unscrew lock nut | Press nozzle firmly |
| Schrader | No prep needed | Press nozzle, lock lever |
| Both | Check nozzle fit | Ensure pump secure |
This guarantees your pump connection stays airtight while you inflate.
Inflate the Tire to the Recommended Pressure
After securing the pump firmly to the valve, you can start inflating the tire. It’s important to keep an eye on the tire pressure with a pressure gauge to avoid over- or under-inflation.
Here’s how to inflate it properly:
- First, check the tire sidewall for the recommended PSI range. Road bikes usually need 80-120 PSI, while mountain bikes require 25-35 PSI.
- Start pumping air slowly into the tire, watching the pressure gauge closely.
- Pause now and then to check the current PSI, making sure you don’t go over the recommended amount.
- Keep pumping until the tire reaches the right pressure and feels firm. That way, you know it’s properly inflated.
Detach the Pump and Secure the Valve
When you finish inflating the tire, carefully detach the pump from the valve to prevent air from escaping or damaging the valve. To disconnect the pump nozzle, give it a gentle pull—avoid twisting or yanking to protect the valve.
If you’re working with a Schrader valve, simply lift the pump nozzle straight off. For a Presta valve, first close the lock nut and unscrew the valve tip before removing the pump nozzle.
Once detached, quickly replace the valve cap or tighten the lock nut to secure the valve and keep dirt out. Always verify the valve remains sealed after pump removal to prevent leaks.
Conclusion
Pumping your bike tire might seem tricky at first, but once you know the steps, it’s quick and easy. Don’t worry if you’re new to this—you won’t risk overinflating or damaging your tire when you follow the recommended pressure.
Just take your time attaching the pump properly and checking the pressure gauge. With a little practice, pumping your tire will become second nature, saving you time and keeping your ride smooth and safe.
Remember, knowing how to pump a bike tire correctly not only ensures your safety but also improves your bike’s performance. By following these simple steps, you can maintain the right tire pressure and enjoy a comfortable, efficient ride every time. So grab your pump, check the pressure, and get ready to hit the road with confidence!