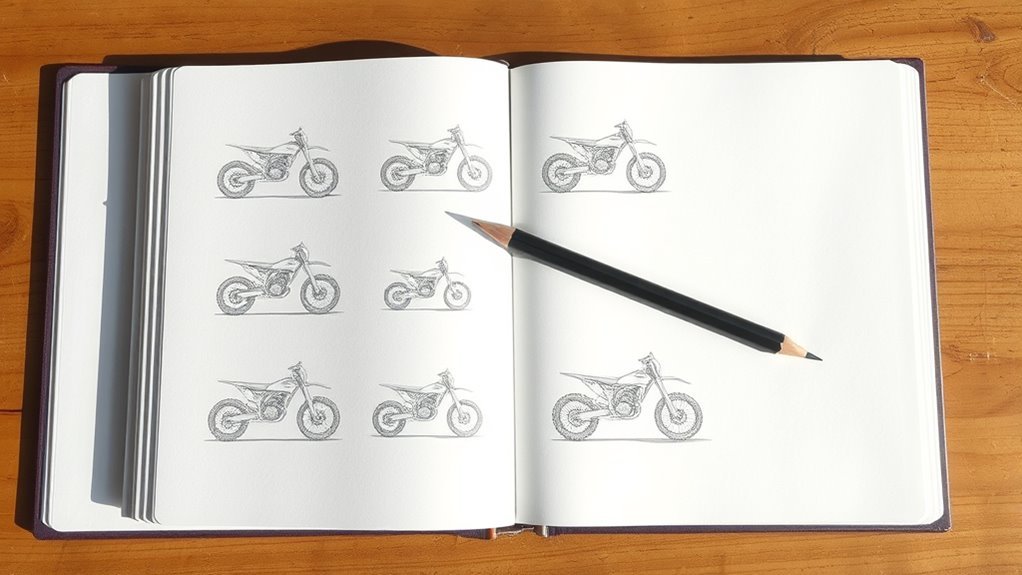
How to Draw a Dirt Bike in 10 Easy Steps
Start by sketching two large circles for the wheels and connect them with straight lines to form the frame. These basic shapes set the foundation for your dirt bike drawing.
Add smaller circles inside the wheels for rims and spokes, then draw the fork and handlebars above the front wheel. This helps bring your bike to life with more detailed parts.
Outline the engine, seat, and exhaust with curved lines, adding mechanical details. Don’t worry about getting everything perfect right away; just focus on capturing the main shapes.
Refine your drawing by erasing guidelines and smoothing edges. This step cleans up your sketch and prepares it for the finishing touches.
Finish with colors and shading for depth and realism. Stick around, and you’ll soon master every detail of your dirt bike drawing. It’s easier than you think once you break it down into simple steps!
Sketch the Basic Guidelines and Wheel Placement
When you begin drawing a dirt bike, start by sketching two large, horizontally aligned circles to represent the wheels. These circles establish the essential wheel placement and set the foundation for your drawing.
Next, draw two parallel straight lines extending from the center of one wheel to form the axle and frame structure. Connect the wheels with a horizontal guideline at the bottom to define the bike’s base.
Draw two parallel lines from one wheel center and connect both wheels with a base guideline.
Add smaller circles around the large wheels to indicate tires and rims, helping you visualize proportions. Cross the second wheel with straight lines to outline the wheel well, then erase overlapping sections to clarify the shape.
Finally, sketch the bike’s basic body outline using straight and zigzag lines, extending upward for the fork. Don’t forget to add a small rectangle above for the handlebar area.
Draw the Wheels and Tire Details
After laying down the basic guidelines and wheel placements, focus on defining the wheels and adding tire details. Start by drawing two large circles for the wheels, making sure they’re proportional to the bike’s frame.
Then, add smaller concentric circles inside each wheel to represent the rims and tire treads. To bring your wheels to life, follow these steps:
- Sketch straight lines from the engine area to the wheels, forming spokes that radiate from hub to rim.
- Add tiny hexagons or textured shapes along the tire’s outer edge to mimic tire treads.
- Erase any extra guidelines cluttering your drawing.
- Refine the wheels and rims for a crisp, clear look.
- Check that tire treads look consistent and realistic.
This attention to detail makes your dirt bike’s wheels stand out vividly. Just take your time with these parts—they really help bring your drawing together.
Outline the Engine and Transmission Components
Now, focus on outlining the engine’s compact shape using smooth, curved lines. Sketch the transmission details with irregular shapes and small circles to capture gears and casings.
Pay attention to how these components connect to the frame for a realistic look. It really helps to take your time here, so the details come through clearly.
Engine Shape Basics
Although the engine block has an irregular shape, you can start by sketching curved lines to represent the cylinders and cooling fins. This approach helps you capture the engine’s complexity without getting overwhelmed.
Next, outline the engine casing with smooth, curved lines to emphasize its compact, sturdy design. Keep these tips in mind as you draw:
- Use curved lines to define the engine cylinders and cooling fins.
- Enclose the engine with rounded shapes for the casing.
- Add simple shapes for pipes or tubes extending from the engine.
- Avoid clutter by erasing unnecessary construction lines.
- Focus on the engine’s overall form before adding intricate details.
Transmission Detail Sketching
How do you capture the intricate connection between the engine and transmission? Start by outlining both with curved and irregular lines to reflect their complex shapes. Focus on adding essential details like small circles and hexagons to represent bolts, screws, and gear components within the transmission system.
Use straight lines to link the engine to other bike parts, showing mechanical connections clearly. To give depth, enclose the engine area with detailed shading or extra lines, emphasizing its dimension.
As you work, make sure to erase any overlapping or unnecessary guidelines to keep your sketch clean and precise. By carefully combining these elements, you’ll effectively portray the engine and transmission details, making your dirt bike drawing look realistic and mechanically accurate.
Create the Bike Frame and Fork Lines
Where do you start when creating the bike frame and fork lines? The first step is drawing two parallel straight lines extending upward from the front wheel to form the bike’s fork structure. This sets the foundation for your dirt bike drawing.
Next, focus on sketching the main frame with straight lines connecting the front fork to the rear wheel, forming a zigzag chassis. To keep it clear:
- Draw two parallel lines upward from the front wheel for the fork
- Connect these with straight lines to the rear wheel area
- Extend the fork lines and add a small rectangle on top for the handlebar mount
- Add front suspension lines linking the fork to the wheel hub
- Keep all lines proportionate and smooth for a sturdy look
This method guarantees your first step in drawing two key frame parts is solid. It’s a simple approach but really effective for getting the basics right.
Add the Front Panel and Handlebar Structure
Once you’ve laid down the bike frame and fork lines, start by sketching the pointed front panel using smooth, curved lines to shape the bike’s nose. Extend straight lines upward from the front panel to form the fork tubes, which connect the front panel to the handlebars.
Draw a small cylinder atop the fork tubes to represent the steering stem, then use partial circles or curved lines to outline the rounded grip area of the handlebars. This structure creates the bike’s front support and control area.
| Component | Purpose |
|---|---|
| Front Panel | Defines the bike’s nose shape |
| Fork Tubes | Connect front panel to handlebars |
| Handlebars | Provide grip and steering control |
| Steering Stem | Attaches handlebars to fork tubes |
Detail the Handlebars and Controls
Now that you have the basic handlebar structure, it’s time to add the controls. Make sure to place the throttle, clutch, and brake levers accurately on the bars.
Don’t forget to include small switches or buttons near the grips to complete the details. These little touches really bring the handlebars to life. Just take your time with the placement, and you’ll have it looking great in no time!
Handlebar Structure Basics
Although the handlebars may seem simple, they form the essential control center of your dirt bike drawing. To capture this accurately, focus on these key elements:
- Draw the handlebar as two straight lines extending from the front fork, ensuring proper proportion and alignment. Enclose the ends with partial circles or curves to create the grips, adding small lines or texture for realism.
- Sketch control levers, like the clutch and brake, near the grips using small curved or straight lines. Include the throttle assembly by drawing a cylindrical shape with a circular cap on one handlebar end.
- Connect the handlebar smoothly to the front fork, maintaining a natural, balanced look.
This approach will give your dirt bike’s handlebar structure a solid, believable foundation. It’s all about keeping things clear and proportionate so your drawing feels real.
Control Components Placement
When you place the control components on the handlebars, focus on their exact positions and shapes to make your dirt bike drawing convincing. Start by sketching the handlebars as straight or slightly curved lines extending from the top of the fork.
On the right side, add the throttle as a small cylinder or circle, representing the twist grip. Right next to it, draw the brake lever using a curved line or a small rectangle, showing its proximity to the throttle.
On the left side, include the clutch lever, typically a small curved or straight line with a rounded end. These details may be small, but they’re essential for realism.
Positioning the throttle, clutch, and brake accurately will give your dirt bike drawing a functional, authentic look. It’s those little touches that really bring your drawing to life!
Define the Seat and Exhaust Shape
As you outline the seat and exhaust of your dirt bike, focus on capturing their distinctive shapes to bring authenticity to your drawing. The seat is elongated and slightly curved, designed for rider comfort and stability.
The exhaust pipe starts near the engine, extending outward with an upward or side curve, finishing in a rounded or tapered tip. Keep these tips in mind:
- Use smooth, curved lines for the seat to connect naturally to the frame.
- Draw the exhaust as a cylindrical pipe narrowing at the outlet.
- Add details like vents or heat shields on the exhaust for realism.
- Emphasize the seat’s curve to suggest comfort.
- Capture the exhaust’s upward or side bend for dynamic shape.
Defining these shapes well makes your dirt bike drawing look accurate and lively. Just take your time with these parts, and your sketch will really come to life!
Enhance the Wheels With Spokes and Tread Patterns
A key step to make your dirt bike drawing stand out is enhancing the wheels with detailed spokes and tread patterns. Start by drawing evenly spaced straight lines radiating from the wheel’s center to the rim to create realistic spokes.
For added depth, include concentric circles connecting these spokes, emphasizing the wheel detailing. Next, depict tread patterns on the tires by sketching zigzag or rectangular shapes to mimic the knobby designs typical for off-road traction.
These patterns give your bike a rugged, authentic look. Focus on varying the shape and depth of the tread to reflect their function accurately.
Erase Extra Lines and Refine the Drawing
Now that your dirt bike sketch is taking shape, it’s time to erase any unnecessary lines that clutter the image. Focus on cleaning up construction marks to make your drawing clearer and more precise.
Then, sharpen the important details so the bike’s features really stand out. This will help your sketch look neat and polished, making all the cool parts pop!
Removing Unnecessary Sketch Lines
Before you finalize your dirt bike drawing, make sure you carefully erase all unnecessary construction lines and guidelines. This step is vital for refining your artwork and giving it a clean, professional look.
Use a fine eraser to gently remove extra sketch marks without damaging your main outlines. It really helps to focus on these key points:
- Remove all leftover guidelines that clutter the drawing.
- Smooth out jagged or rough edges for better refinement.
- Erase overlapping or confusing lines to enhance clarity.
Keep your eraser handy for precise touch-ups. And try to avoid smudging by using light, controlled erasing motions. It makes a big difference!
Enhancing Detail Clarity
Once you’ve erased the unnecessary sketch lines, focus on sharpening the main outlines of your dirt bike. Use a fine-tipped pencil or pen to trace clean, smooth lines, enhancing outline clarity.
Next, refine any rough edges by smoothing curves and straightening lines for better overall refinement. Add detailing like tire treads, spokes, and engine parts with precise, deliberate strokes.
Step back occasionally to spot and erase any leftover sketch marks, ensuring a polished final drawing.
| Task | Action |
|---|---|
| Erase Lines | Remove extra construction lines |
| Outline | Trace final shapes with precision |
| Refinement | Smooth rough edges and curves |
| Detailing | Add spokes, treads, engine parts |
| Final Review | Check from a distance, erase stray marks |
Apply Colors and Final Touches to Your Dirt Bike
Although the sketch is complete, you’ll want to bring your dirt bike to life by applying vibrant colors like red, blue, yellow, or green. Focus on colors, shading, and details to give your drawing depth and realism.
Here’s how you can finish your masterpiece:
- Use bold colors on the bike’s body to make it pop.
- Apply shading and highlights to emphasize curves and metallic parts.
- Color the tires black, adding gray or white rims with detailed tire treads.
- Add background elements like dirt tracks or mud splashes for context.
- Review your work for color consistency and neatness.
With these final touches, your dirt bike will look ready to hit the trail!
Conclusion
Now that you’ve brought your dirt bike sketch to life, it’s time to enjoy the quiet satisfaction of a job well done. Your drawing might not roar down a trail, but it carries the spirit of adventure and freedom waiting just beneath the surface.
With a little practice, your pencil will guide you through countless journeys, turning simple lines into exhilarating rides. So, keep your creativity fueled and let your imagination take the wheel!
Drawing a dirt bike in 10 easy steps is not just about sketching; it’s about capturing the thrill of the ride on paper. Keep practicing, and soon your dirt bike drawings will be as dynamic and bold as the real thing. Happy drawing!