How to Use a Bike Pump in 10 Simple Steps
First, check your tire’s current pressure with a gauge. This step helps you know exactly how much air your bike tire needs.
Identify if your valve is Presta or Schrader and remove the valve cap.
Next, open the valve by unscrewing or removing the dust cap.
Then, firmly attach your pump’s nozzle and lock it in place. Make sure it’s secure so no air escapes.
Pump steadily, monitoring pressure until you reach the recommended PSI.
It’s important not to rush this part to avoid over-inflating.
Finally, detach the pump carefully, close and seal the valve, then replace the cap.
Following these simple steps guarantees safe inflation, and with a bit more insight, you’ll master the process fully.
Check Your Current Tire Pressure Level
Before you start pumping, check your current tire pressure with a tire pressure gauge to get an accurate PSI reading. First, locate the valve on your bike tire and make sure it’s fully closed if your gauge attaches directly to the valve. This prevents air from escaping and ensures a precise measurement.
Next, press the pressure gauge onto the valve stem firmly to get your tire pressure reading. Compare this PSI to the recommended range found on your tire sidewall or in the manufacturer’s specs.
Keep in mind, temperature changes can affect PSI by 1-2 pounds per 10°F, so check regularly before rides. Knowing your current tire pressure helps you decide how much to inflate, maintaining ideal performance and reducing the risk of flats.
Identify Your Pump Type
Since different pumps serve different purposes, you’ll want to identify whether you’re using a floor pump, hand pump, or electric inflator. A floor pump is large and stable, often featuring a built-in pressure gauge. It’s perfect to quickly inflate tires with high volume.
Hand pumps are compact and portable, great for on-the-go repairs when you need controlled air delivery. Electric inflators use power to rapidly inflate tires and usually include a digital pressure gauge for accuracy.
Next, check if your pump includes adapters or nozzles compatible with your bike’s valves—Presta or Schrader—to guarantee proper connection. Knowing your pump type helps you manage pressure effectively. That way, you can inflate your tires safely and efficiently.
Prepare the Valve for Inflation
First, identify whether your bike has a Presta or Schrader valve to know how to handle it properly. Next, remove the valve cap to expose the valve stem.
If you have a Presta valve, loosen the lock nut and press gently to open it before attaching the pump. Easy, right? Just make sure it’s open so the air can flow in smoothly.
Identify Valve Type
Two common valve types, Presta and Schrader, require different handling when you prepare your bike for inflation. First, identify your valve type by checking the shape and size under the valve cap.
For Presta valves, unscrew the threaded lock nut at the top and gently press the valve core to release a bit of air. Schrader valves are wider and similar to car tire valves.
Knowing your valve type helps you choose the right pump head and avoid damaging the valve core.
| Valve Type | Description | Handling Tips |
|---|---|---|
| Presta Valve | Narrow, threaded top | Unscrew lock nut, gentle press |
| Schrader Valve | Wider, car-like valve | Press valve core directly |
| Valve Cap | Small cover protecting valve | Remove carefully before inflate |
Remove Valve Cap
After identifying your valve type, the next step is to remove the valve cap by turning it counterclockwise to expose the valve stem. The valve cap plays an important role as it protects the valve from dirt and debris.
Here’s what you need to do:
- Unscrew the valve cap carefully and store it somewhere safe to avoid losing it.
- For Presta valves, unscrew the threaded lock nut by turning it counterclockwise before you attach the pump.
- Removing the dust cap is sufficient for Schrader valves; no other steps are needed.
- Avoid letting air escape while removing the valve cap to keep the tire pressure steady.
Removing the valve cap properly ensures the valve is ready for inflation and helps maintain your tire’s air pressure. Easy, right? Just take your time, and you’ll be all set!
Open Valve Core
Before attaching the pump, make sure you open the valve core to let air flow freely into your tire. Start by unscrewing the valve cap by hand to expose the valve and keep dirt out.
If you have a Presta valve, gently unscrew the small threaded lock nut at the top until it’s open, then press the valve briefly to release a small burst of air. This confirms the valve is open and ready for inflation. Be careful not to bend or damage the valve core or threading.
For Schrader valves, simply removing the dust cap usually prepares the valve without extra steps. Once the valve is fully open, you can securely attach your pump and begin inflating your tire with confidence.
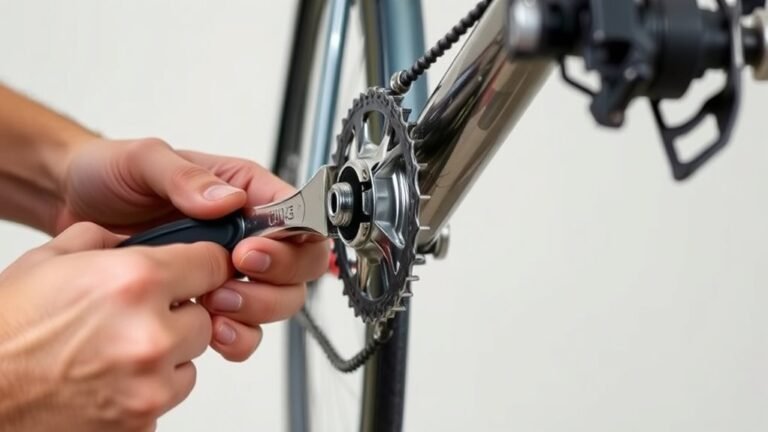
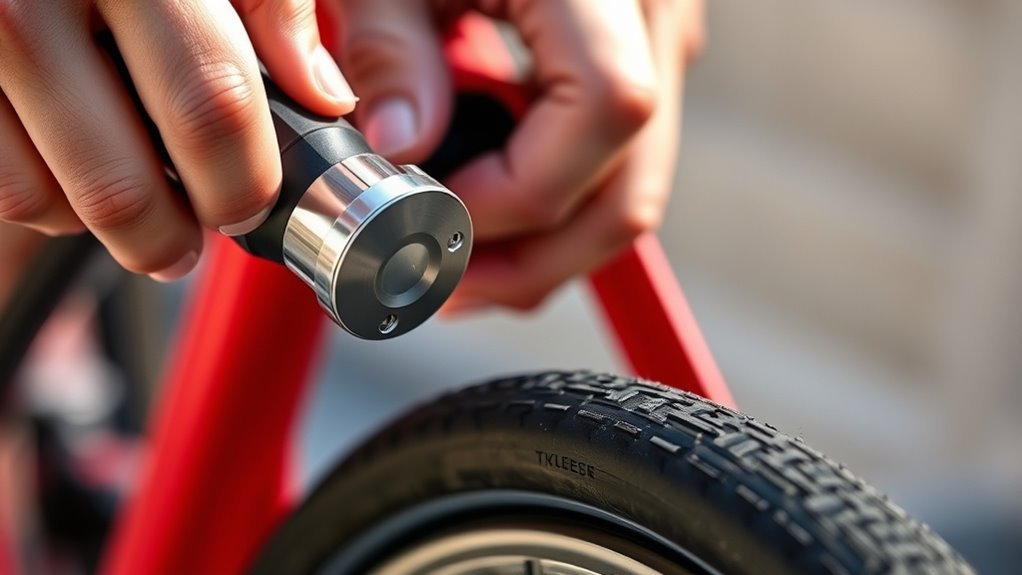
Attach the Pump Nozzle to the Valve
First, make sure your pump nozzle matches the valve type on your bike—Presta or Schrader. Then, securely attach the nozzle to the valve, pressing or screwing it on tight to avoid air leaks.
If your pump has a locking lever, flip it at a 90-degree angle to hold the connection firmly in place. This helps keep everything snug while you pump.
Match Nozzle and Valve
How do you guarantee a secure fit between your pump and bike valve? First, you need to match the pump nozzle to your valve type to ensure a proper seal. Different valves require different handling to attach the nozzle correctly.
So, start by identifying if your valve is Presta or Schrader. For Schrader valves, just press the nozzle on and lock it in place.
If you have a Presta valve, unscrew the small nut before you attach the nozzle. Then, use the pump lever at a 90-degree angle to lock the nozzle and prevent air leaks.
Press or screw the nozzle firmly onto the valve. You might hear some air escaping briefly—that’s normal as the nozzle and valve fit and seal tightly.
Matching the nozzle to your valve type is a crucial step before you start pumping air. It ensures everything fits snugly and keeps your tires properly inflated.
Secure Pump Connection
A secure pump connection starts by matching your nozzle to the valve type—Presta or Schrader—and attaching it firmly. For Presta valves, gently unscrew the lock nut before attaching the pump nozzle to avoid damage.
Press or screw the nozzle onto the valve, making sure it’s tight enough to create an airtight fit. Once it’s in place, engage the pump lever at a 90-degree angle if you’re using a floor pump to lock the nozzle securely.
You can confirm the air seal by feeling for slight resistance and checking that minimal air escapes while you pump. This airtight fit is key—it guarantees efficient pumping and keeps your bike pump working effectively every time you inflate your tires.
Secure the Pump Connection
Before attaching the pump, make sure its head matches your valve type—either Presta or Schrader—to guarantee a proper fit.
To secure the pump connection properly, follow these steps:
- Firmly push the pump nozzle onto the valve, ensuring an airtight seal.
- For Presta valves, unscrew the lock nut and press the valve slightly to open it before attaching.
- Flip the lock lever on the pump head, usually at a 90-degree angle, to lock the nozzle securely.
- Double-check that the pump connection is tight and stable to prevent air leaks.
It might seem like a lot, but taking these steps really helps keep the air in and avoids any frustrating leaks. Just take your time and you’ll be good to go!
Begin Pumping Air Into the Tire
Once you’ve secured the pump nozzle tightly onto the valve, start pumping with smooth, controlled strokes. Keep an eye on the pressure gauge so you don’t overinflate the tire.
Hold the pump firmly to keep a secure connection between the nozzle and valve. This helps prevent any air leaks while you’re inflating.
If your pump has a lever, use it to lock the nozzle in place. That way, it stays secure during inflation and you can focus on pumping steadily.
Keep watching the pressure rise on the gauge. Stop once you reach your tire’s recommended PSI or the pressure you prefer.
Monitor the gauge closely and stop pumping when your tire hits the ideal PSI.
Try to avoid sudden or jerky movements — this keeps the nozzle sealed and airflow consistent. When you’re done, carefully release the pump lever and remove the nozzle without losing much air.
Monitor Tire Pressure During Inflation
How often should you check the tire pressure while pumping? You need to monitor it regularly to avoid overinflation or underinflation. Use the pump’s gauge to check the PSI as you inflate the tire gradually.
Keep an eye on the gauge to maintain consistent pressure and stop once you reach the recommended PSI range.
Here’s how to monitor pressure effectively:
- Inflate slowly and pause frequently to check PSI
- Use a tire pressure gauge for accurate readings
- Refer to your bike’s recommended PSI range
- Stop pumping when the gauge shows the correct pressure
Remove the Pump From the Valve
When you’re ready to remove the pump, pull it off the valve carefully to keep air loss minimal. You might hear a brief hiss—that’s normal.
Afterward, make sure to close the valve securely to keep your tire inflated.
Detach Pump Carefully
Although it might be tempting to pull the pump off quickly, you should carefully pull the nozzle straight off the valve to avoid air loss and damage. When you detach the pump, expect a brief hiss of air—that’s normal.
To protect the valve and maintain air pressure, follow these steps:
- Gently pull the pump nozzle straight off the valve without twisting.
- For Presta valves, close the valve and screw the lock nut back before replacing the cap.
- For Schrader valves, simply screw the dust cap back on to keep dirt out.
- Avoid sudden or forceful pulls to prevent valve or tube damage.
Taking these precautions helps keep your tire properly inflated and your pump working smoothly.
Minimize Air Loss
To minimize air loss, you should carefully pull the pump nozzle straight off the valve while holding the valve steady with one hand. This prevents bending or damaging the valve stem and reduces sudden air escape.
For Presta valves, make sure the valve is fully closed before you detach the nozzle. With Schrader valves, gently twist or lift the pump head to disconnect without forcing.
Always remember to reattach the valve cap after removing the pump to keep dirt and debris out.
| Valve Type | Detach Method |
|---|---|
| Presta | Close valve, pull nozzle straight off |
| Schrader | Twist or lift pump head gently |
| All | Hold valve steady, reattach cap |
Secure Valve Closure
Since you want to keep your tire pressure steady, carefully pull the pump nozzle straight off the valve to minimize air loss and avoid damaging the valve stem. Expect a brief hiss of air—that’s normal when you remove the pump.
Next, verify a secure valve closure to maintain proper inflation.
Follow these steps to secure your valve:
- For Presta valves, screw the lock nut back on tightly after you remove the pump head.
- For Schrader valves, replace the dust cap securely to protect the valve from dirt and debris.
- Always check that the valve is fully closed after removing the pump.
- Confirm the cap is tight to prevent air leaks.
Close and Seal the Valve
Once you’ve finished inflating your tire, make sure you securely close the valve to prevent air from escaping. For a Schrader valve, carefully screw the valve cap back on to seal it airtight and protect it from dirt.
If your bike has a Presta valve, tighten the threaded lock nut fully after pumping. This ensures a tight seal and keeps the air from leaking out.
Listen closely for any hissing sounds—if you hear any, the valve isn’t sealed properly. Double-check that the valve is closed tightly before you ride to avoid unexpected air loss.
Taking these steps guarantees your tire stays properly inflated and your ride remains smooth and safe. Easy, right? Just a little extra attention goes a long way!
Replace the Valve Cap and Inspect
After you’ve securely closed the valve, reattach the plastic valve cap to protect it from dirt and debris. The valve cap acts as a shield, preventing dirt, dust, and debris from entering the valve and causing damage.
Make sure the valve cap is securely attached without overtightening, which can make removal difficult or damage the valve. To keep your valve in top shape, regularly inspect the cap and valve area to catch any issues early.
Remember, a properly sealed valve with a secure cap helps prevent air leaks and extends the life of your tire.
- Ensure the valve cap fits snugly to prevent it from falling off
- Avoid overtightening to protect the valve threads
- Inspect the valve cap regularly for dirt or damage
- Confirm the valve is fully closed and sealed after replacing the cap
Conclusion
Now that you’ve mastered these steps, pumping your bike tire is as easy as riding downhill with the wind at your back. Each squeeze of the pump fills your tire—and your confidence—bringing you closer to the open road.
Keep your wheels rolling smoothly by checking pressure regularly; think of it as giving your bike a deep breath before every adventure.
With this simple ritual, you’re always ready to pedal into your next journey. Using a bike pump properly ensures your tires stay inflated to the right pressure, making every ride safer and more enjoyable. So, keep that pump handy and make tire maintenance a quick, easy part of your biking routine. You’ll find that a well-pumped bike tire makes all the difference when you’re out exploring!