7 Easy Steps to Remove Bicycle Pedals
First, gather tools like a 15mm spanner or pedal wrench. Position your bike on a stable surface and set the crank arm horizontally. This setup makes pedal removal easier and safer.
Next, identify the right pedal (which has standard threading) and the left pedal (which has reverse threading). Knowing this is key because each pedal loosens in a different direction.
Apply lubricant to the pedal threads and let it soak in for a few minutes. This helps loosen any stubborn dirt or rust.
Then, loosen the right pedal by turning it counterclockwise, and the left pedal by turning it clockwise.
Once the pedals are off, clean and inspect the threads before reinstalling.
Taking these simple steps will make your pedal removal smoother and safer every time. Keep going, and you’ll discover more tips for hassle-free bicycle maintenance!
Gather the Necessary Tools
Before you begin removing your bike pedals, make sure you have the right tools on hand. Most bike pedals require either a 15mm spanner or an 8mm hex (Allen) key to loosen or tighten them.
Ensure you have a 15mm spanner or 8mm Allen key before removing bike pedals.
If your pedals have internal lockrings, you might need a larger tool like a specialized pedal wrench or a 15mm spanner. Older pedals with 9/16 inch flats typically work well with a 15mm spanner.
Before you start, clean the pedal threads and crank arm to avoid damage during removal. Applying a bit of grease or anti-seize on the threads when reinstalling will make future removal easier.
Having these tools ready ensures a smooth, damage-free process when working with your bike pedals. It really helps to be prepared!
Position the Bike and Crank Arm
Start by facing the drive side of the bike and making sure it’s stable on a flat surface or bike stand.
Position the crank arm horizontally—at 3 o’clock for the right pedal and 9 o’clock for the left—to get the best leverage.
This setup helps you remove the pedals safely and efficiently. Easy, right? Just makes everything smoother!
Crank Arm Positioning
When you position the bike on a stable surface and face the drive side, you’ll have clear access to the chainset and chain. Proper crank arm positioning is key to making pedal removal easier.
Rotate the crank arm so it’s at the 3 o’clock position—this aligns the pedal for straightforward tool engagement. Hold the brakes firmly to stabilize the bike while you work.
For the non-drive side, you’ll want to turn the crank arm to the 9 o’clock position, making it horizontal with the ground. This setup gives you the best leverage and access when loosening the pedal.
Bike Orientation Setup
Although it might seem simple, positioning your bike correctly is crucial for smooth pedal removal. Start by setting up your bike orientation on a stable surface, making sure it won’t tip over.
Face the right side, or drive side, where the chain and Shimano pedals are visible. Turn the crank arm so the right pedal body aligns horizontally at the 3 o’clock position—this gives you better leverage when loosening the pedal spindle.
To remove the left pedal, change bike sides and turn the crank arm to 9 o’clock, positioning the left pedal body and crank for easier access. This bike orientation setup ensures you’re working with the correct angle, making it safer and easier to remove both pedals.
Whether you’re loosening the right-hand side or left-hand side pedal axle using your foot or tools, having the bike set up right makes all the difference.
Stabilizing the Bicycle
To keep your bike steady while removing pedals, position it upright on a stable surface and secure it to prevent any movement. Turn the front wheel straight and hold the handlebars firmly to stabilize the frame.
Next, rotate the crank arm to the *best* position for easier pedal access—3 o’clock on the drive side or 9 o’clock on the non-drive side. This alignment gives you better leverage and control when loosening pedals.
Here’s how to stabilize your bike effectively:
- Secure the bike so it won’t tip or slide.
- Keep the front wheel straight and hold the handlebars firmly.
- Rotate the crank arm to 3 or 9 o’clock depending on the side.
This setup ensures smooth, safe pedal removal every time. Easy, right? Just follow these steps and you’re good to go!
Identify the Correct Pedal and Thread Direction
Before you start loosening the pedals, you need to identify which is which and understand their threading. The right pedal, usually marked with an “R,” has standard right-hand threads—it tightens clockwise and loosens counter-clockwise.
The left pedal, marked “L,” uses reverse threads, so it tightens counter-clockwise and loosens clockwise. This opposite threading prevents pedals from loosening during rides.
Both pedals generally have a 9/16-inch (14.3mm) thread size, but their directions differ. Double-check the markings on the pedals or inspect the threading to confirm which side you’re working on.
Knowing this guarantees you don’t strip the threads or damage your crank arms while removing or installing pedals. Getting this right sets you up for a smooth pedal removal process.
Apply Lubricant to Pedal Threads
When pedals haven’t been removed for a long time, applying penetrating lubricant like GT85 or Muc Off to the pedal threads can make the process much easier. Spray the lubricant generously onto the threads where the pedal spindle meets the crank arm, making sure it seeps deep into the threading.
Let it sit for several minutes to break down rust, corrosion, or grime that’s causing the pedal to stick. For best results, reapply lubricant and gently turn the pedal back and forth by hand to help the lubricant work its way in.
Remember, regular lubrication during installation prevents seizing and simplifies future removal.
- Spray generously on the pedal threads
- Let lubricant sit for several minutes
- Turn pedal gently to distribute lubricant evenly
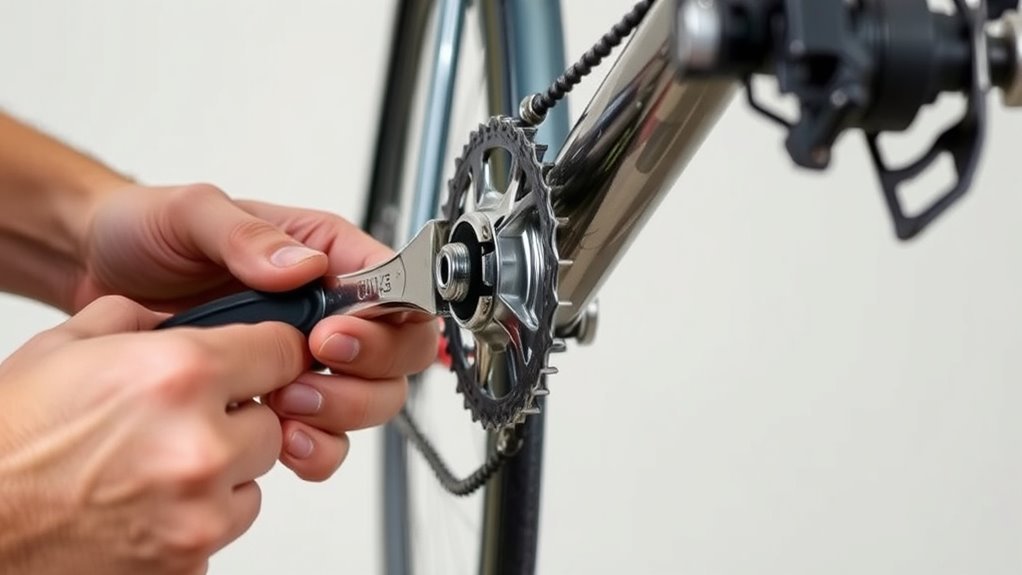
Remove the Right (Drive Side) Pedal
Applying lubricant thoroughly to the pedal threads helps loosen stubborn pedals, making removal smoother. To remove the right (drive side) pedal, first turn the crank so the pedal is at the 3 o’clock position.
This gives you easier access and better leverage. Use a 15mm spanner or the correct Allen key on the pedal flats or axle. Hold the brakes firmly to stabilize the bike and prevent it from moving.
Then, turn the tool counter-clockwise (anti-clockwise) with steady pressure. Remember, the right pedal is threaded clockwise to tighten, so turning it anti-clockwise loosens it.
Keep applying consistent force until the pedal comes free. Once loosened, you can unscrew it by hand and remove it completely.
Remove the Left (Non-Drive Side) Pedal
Start by locating the left pedal, which is on the non-drive side of your bike. Remember, its thread is reverse, so you’ll loosen it by turning clockwise.
Grab the correct tool, like an 8mm Allen key or pedal wrench, to get the job done smoothly. This will make removing the pedal much easier.
Locate Left Pedal
How do you identify the left pedal on your bike? The left pedal is the non-drive side, usually marked with an “L” or “Left” on the spindle or pedal body. Knowing this helps you avoid confusion when removing pedals.
To locate it quickly, turn the crank arm so the pedal is horizontal at the 9 o’clock position. This gives you better access and leverage.
Here are quick tips to spot the left pedal:
- Look for the “L” or “Left” marking on the pedal spindle or body.
- The left pedal sits opposite the chain and gears (non-drive side).
- Position the crank arm horizontally (9 o’clock) for easier handling.
With these pointers, you’ll easily find the left pedal and prepare to remove it.
Reverse Thread Direction
Why does the left pedal loosen in the opposite direction? The left (non-drive side) pedal has reverse threading, which means it tightens clockwise and loosens counter-clockwise. This design helps keep the pedal from loosening while you ride, so it stays securely attached.
When you remove the left pedal, you’ll turn your spanner or Allen key clockwise—this is the opposite of how you remove the right pedal. Before you apply any force, make sure you’re working on the non-drive side to avoid stripping the threads.
This reverse thread setup can be confusing at first, but once you know the correct direction, it really saves you frustration. Also, using penetrating fluid and the right tools makes the job easier, but we’ll get into tools in the next part.
For now, just remember: turn clockwise to loosen that stubborn left pedal.
Use Correct Tool
Although the left pedal is reverse threaded, you’ll want to use the right tool—like an 8mm Allen key or a pedal wrench—to loosen it effectively. Using the proper tool guarantees a secure grip on the pedal’s flats or socket, preventing damage and making removal smoother.
Remember, you’ll turn the tool clockwise to loosen this pedal, which is opposite from the right side.
To remove the left pedal with ease:
- Position the crank arm so the pedal is parallel to the ground at 9 o’clock for better leverage.
- Apply steady pressure while turning clockwise to avoid stripping threads.
- Use penetrating lubricant if the pedal feels stuck or hasn’t been removed in a while.
A correct tool and technique will save you time and frustration.
Inspect and Clean Pedal Threads Before Reinstallation
Before reinstalling your pedals, you should carefully inspect the pedal threads for any dirt, rust, or damage to guarantee a proper fit. Start by cleaning the crank arm threads with a brush or cloth to remove debris and prevent cross-threading.
Next, check both pedal and crank threads for wear or damage; replace either if you spot any issues. Then, apply a thin layer of grease or an anti-seize compound to the pedal threads to make future removal easier and prevent seizing.
Make sure the threads are clean and obstruction-free before screwing the pedal in. Finally, tighten the pedals to the manufacturer’s recommended torque to ensure a secure fit without damaging the threads.
Taking these steps will keep your pedals functioning smoothly. It’s a simple routine that can save you a lot of trouble down the road!
Conclusion
Removing your bicycle pedals is as straightforward as riding a bike once you know the steps. By gathering the right tools, positioning your bike correctly, and remembering which way to turn each pedal, you’ll save time and effort.
Don’t forget to apply lubricant and inspect the threads to keep everything running smoothly. With a little care, pedal removal becomes a quick task you’ll handle with confidence every time you need to maintain your ride.
Learning how to remove bicycle pedals properly not only helps you perform routine maintenance but also ensures your bike stays in top shape. Whether you’re replacing worn pedals or upgrading to a new set, following these easy steps makes the process hassle-free and efficient. So next time you need to remove your bicycle pedals, you’ll be ready to tackle the job with ease and keep your cycling experience smooth and enjoyable.