Now you’ve got your wakeboarding gear, and know where to go riding, it’s time to learn how to wakeboard.
I’m sure you’ve seen a tonne of videos on YouTube, but it’s not as easy as it looks.
Even if you’re a complete beginner and haven’t even had your first lesson, it’s worth spending some time understanding what an instructor is going to ask of you.
That means you’ll spend less time bailing and more time riding.
Jump To Section
Wakeboarding Stance
The first thing you’ll need to determine, is the type of stance that suits you.
Like snowboarding and skateboarding, there’s two stances; goofy and regular.
You’ll need to know this before you jump on a board.
But, when you start learning and watching wakeboarding videos, there’s a good chance the instructor rides different to you; so, you’ll have to account for that.
9 times out of 10, you’ll be able to determine which way you ride, simply by knowing if you are left or right-footed.
Goofy Wakeboarding Stance
Goofy riders are typically left-footed and left-handed.
Your lead foot will be your right foot, and your back foot is your left.
Regular Wakeboarding Stance
Regular riders will typically be right-footed and right-handed.
Your strongest foot (right) will be at the back of the board, and your lead foot will be your left.
Is Riding Goofy Or Riding Regular Better?
Goofy isn’t better than regular, and vice-versa.
Your foot positioning for wakeboarding simply comes down to which foot is your strongest. If you’re riding the wrong way (i.e. goofy when you should be regular), it’s going to make learning a lot more difficult.
How To Get Up On A Wakeboard
Until you learn how to get up on a wakeboard – bad-news; it’s going to be incredibly frustrating.
So, it’s worth getting the technique down and watching some videos, before you have a lesson. That’s going to mean less time eating water, and more time on the wake.
1. Experiment with your stance
If you’ve already decided on a foot stance (goofy or regular) but are really struggling, try switching.
Being goofy or regular, usually comes down to being left or right footed; but not all the time.
So, if you’ve had 10+ attempts at getting up, switch feet and you’ll instantly feel whether the new foot placement is better or worse.
2. Leave your arms on each side of your knees
For beginners, leaning your arms on each side of your knees will give more support as you lift out of the water.
3. Let the cable pull you up
A big mistake for beginners is trying to get up, or pulling yourself up.
If you’re having to force the issue, the cable or boat hasn’t built up enough speed to keep you upright.
And, if there’s an option to shorten the cable/tow rope, take it. A shorter rope usually makes getting up a lot easier for beginners.
4. Squat for a lower center of gravity
As getting up on a wakeboard becomes more natural, you’ll hardly have to think about body position.
But, an effective way for beginners to get up quickly, is to squat, a lot!
This lower center of gravity will give you more stability, so as you bobble, you’ll have some leeway, thanks to your bent knees. If you’ve not got a low centre of gravity, you’ll find you get off balance extremely easily.
5. Hold your position until you’re out of the water
Any sharp movements as the rope pulls up and out the water will be quick and jerky, and they are hard to counter balance.
Think about body position and centre of gravity, and hold it right up until the point that you’re up and out the water. Controlled movements are what this is all about.
6. Make sure your board is positioned correctly
There’s a fine line between the board creating too much drag, and you going face first.
To ensure you’re not doing either, we’d suggest watching the video below to understand the correct board positioning for getting up, before you get out on the water.
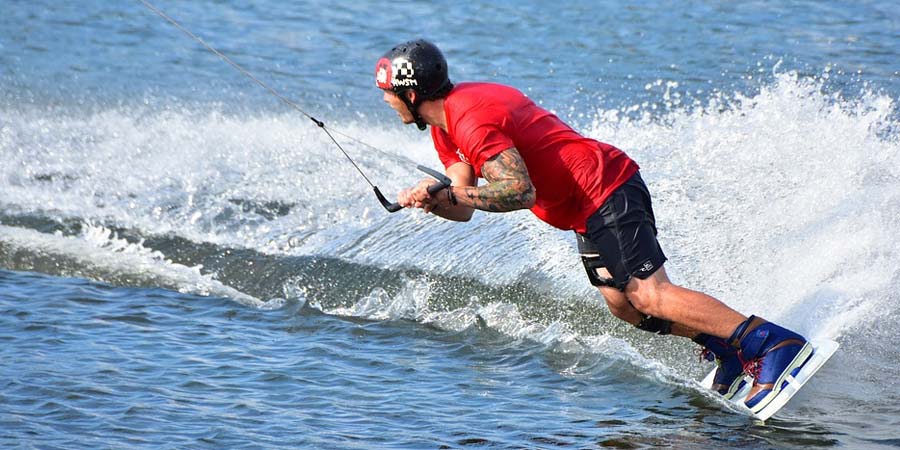
How To Turn On A Wakeboard (Edging)
Now you’ve learnt how to get up on your board, you need to be able to turn.
On a wakeboard, it’s not so much a turn, as it is a carve; like surfing. And, you do this by edging.
1. Lean with your toes
A toe-side edge is when you turn by leaning in with your toes. As you lean, you’ll use more edge on your board, hence the name.
2. Or lean with your heels
A heel-side edge is when you turn by leaning with your heels.
For instance, riders riding regular will have their left foot forward and be leaning backwards to turn left.
Riders that are riding goofy with their right foot forward will be leaning backwards, but edging to turn right.
3. Look where you are going
Like mountain biking, surfing, and a tonne of other sports, where you look is usually where you go.
Look at your feet, and there’s a good chance you’ll be going under. Instead, think about how your next manoeuvre is progressing and look to where to want to be in the next 5-10 seconds.
If you’re on a cable and swinging out wide to edge, look at the point you want to hit.
As you reach it, turn smoothly to look back at the cable, as that’s where you’ll want to be heading.
4. Build speed by using the tension of the rope
Edging will scrub off speed. The more edge you use on the board, the more speed you’ll drop.
To keep speed maintained (and for short-sharp boosts of speed), you’ll need to use the tension on the rope.
5. Turn smoothly
I’m sure you’ve already watched a tonne of wakeboarding videos where they are edging quickly and sharply, setting up for tricks.
Usually, that’s intermediate-advanced wakeboarders using some level of progressive edge to build up to a trick.
Realistically, you want to avoid this as a beginner.
Make everything as smooth as possible.
Sudden turns will upset your centre of gravity, and there’s a good chance you’ve not got the technique to counter this correctly, until you build up some more experience.
How To Ride Switch (Fakie)
Riding switch (or, fakie), is riding the opposite way to what you do usually.
For regular riders (usually having their left foot forward), riding fakie means having their right foot forward.
For goofy riders, riding switch means riding with their left foot forward.
With some practice, the technique of riding switch comes completely naturally. But, the first few attempts are going to feel incredibly awkward.
Essentially, you’ll have to remember the techniques and tips that got you up and edging in the first place, and apply them to riding switch.
A lot of tricks (180 for instance) rely on riding fakie/switch. So, you’ll need to be able to do this comfortably before you progress.
How To Do Tricks On A Wakeboard
Feeling brave? Below we’ve got video tutorials on 6 of the most popular wakeboarding tricks.