This is part 4 of our beginner’s guide to BMX.
If you’re looking for places to ride your BMX, but don’t have anything local, there is another way; build your own trails.
Building dirt jumps isn’t easy, but it’s worth it.
So, here’s our quick-fire guide on how to build dirt jumps for BMX.
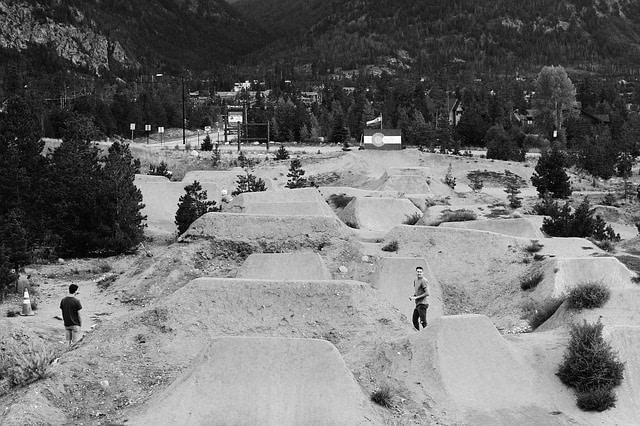
Ready to make your backyard look like this?
Step 1 – What You Need To Build Dirt Jumps
Before you learn how to build dirt jumps, you need to grab the tools of the trade.
Here is what you need to make your trail.
#1 – Stiff Brush
You’ll need a completely clean landing and take-off area.
And, unless you plan to pick up every stone and rock by hand, you’ll need a stiff brush.
#2 – Wheelbarrow
When you get to digging you’ll need to remove and pile up dirt.
To move this dirt for your jumps, you’ll need a wheelbarrow; a big one.
#3 – Shovel
The shovel is the most important part of a trail builder’s tool kit.
You’ll use this not just for digging, but also for patting down and compacting jumps.
Jumps that aren’t compact will fall to pieces after just a few rides.
#4 – Access To Water
Ever watered a plant and seen the soil sink? That’s what happens with jumps.
If you build a jump and don’t water it, when it rains, it will sink.
You’ll need some access to water to help pack your jump so it’s solid.
If you’ve got no access to a hose, you’ll have to bottle it and carry it to your BMX jump spot.
Step 2 – Get Land
Next, you’ll need land. It doesn’t matter if it’s in the woods, your backyard, or at a park.
Whatever-the-weather, you need to make sure you have the landowner’s permission.
If you don’t, you’re not just breaking the law, there’s a good chance your jumps are going to get trashed when unapproving locals find them.
Step 3 – Cleaning The Jump Spot
With your barrow, shovel and brush, clean an area slightly bigger than the jump you’re going to make.
You don’t want any debris on the landing or take-off.
Step 4 – Build The Base
Next, you’ll need to dig out enough soil to create the basis for your jump.
For beginners, we’d suggest building tabletops.
Once you’ve mastered the table top, you can carve out the middle to make it into a double.
Don’t Use Deadwood
Although many people do, it’s not advisable to use dead-wood.
This will continue to rot and compact long after you build your jump, and that means your jumps are going to lose their shape and fall to pieces.
Bad news.
Don’t Dig Exactly Where Your Jump Is
The biggest mistake beginner trail builders make is digging exactly where their jump is going to be.
When it rains, water needs to drain. And, if you’ve just created a big hole before the takeoff and after the landing, guess where the water is going to go?
Dig away from the jump, but not so far that it’s a chore to barrow the soil.
Step 5 – Pack Down The Soil
There’s nothing complicated about this.
Get the dirt into the rough shape of your table top. Use your shovel and feet. Go to town on it.
Don’t worry too much about the exact shape when the soil is loose. By the time you pack it down, it’s probably going to lose half of its size.
At this point, you’re just trying to create a semi-solid base to work with.
Step 6 – Water Your Jump
Water the jump so that any part that plans on sinking, does it now.
Then repack the dirt as you did in step 5.
Step 7 – Shape The Jump
If you’re tired out, this is an appropriate time to take a break.
This allows the last bits of soil to sink before you begin a final pack-down of the soil.
Then, you’ll want to shape your jump. You’ll want to make a quarter-pipe type take off that’s not too steep, and a landing that’s similar.
Most trail builders build weak and smooth landings. That’s all good and well if you don’t need to pump the landing for speed for the next jump.
The landing shouldn’t be as steep as the take-off, but still have a curve in it that starts steep and slowly evens out, giving you the ability to pump to the next jump you make.
If you do this right, each jump will provide you with more and more speed, so you can build bigger and bigger jumps.
Step 8 – Leave It Time To Rest
If nothing you do compacts any part of the jump any more, you’re done. You need to let it set.
If you ride on a jump that’s not set, it will develop ruts, and start to break apart.
How long does a dirt jump take to set?
It depends on the weather, and the type of dirt. This could take anything up to a week.
Have a few test runs on the jump after it sets and check you’re not creating ruts, or parts of the soil are moving.
If this is the case, it needs more time to set.
Step 9 – Build Your Set
Now your first jump is done, you can test it out.
Can you jump it with no problems?
Is the landing good enough for you to pump more speed?
These two things affect where and how big the next jump in your set is.
If you’re clearing the first jump with no problems, and feel like you can pump speed on the landing; go bigger.
Rinse and repeat until you have full trail.
And, enjoy!