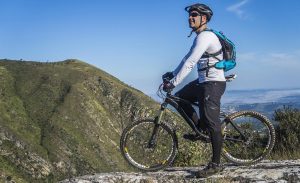
Looking for an adrenaline filled sport to keep you fit? Look no further than mountain biking.
In our 10-minute beginner’s guide to starting mountain biking, we’ll cover everything you need to know.
If you know what you’re looking for, use the quick navigation on the right. Otherwise… let’s get started!
Jump To Section
The Mountain Biking Essential Kit List
#1 – Mountain Bike
Price: $500-4,000 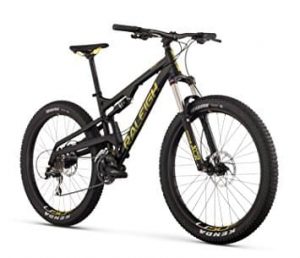
It goes without saying, you’ll need a MTB.
But, which one?
XC, trail, or enduro? Is a 27” or a 29er the best, or should you just stick to a 26”? Full suspension or hard-tail?
If you skip over to our “The Best Type Of Mountain Bike For Beginners” section, we’ll cover all of that in detail.
#2 – Helmet
Price: $39-90 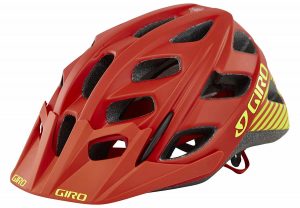
Unless you’re planning on downhill mountain biking (not advisable for first time off roaders), we’d be looking at a simple open-faced MTB helmet.
That’s going to offer you more than enough protection.
At the same time, it offers plenty of breathability (something you won’t get with a full face helmet).
I’ve had MTB helmets from Lazer, Giro, Fox Racing and Bell. These are leading brands in body protection.
Fox Racing, Bell and Lazer, all have an extensive line of motocross helmets too; they are action sports junkies like us.
Giro specifically focus on cycling helmets.
So, they are not cheap low-quality brands and I’d recommend their products all day long.
I’ve actually created a 3-minute guide to the best mountain bike helmets here.
#3 – Gloves
Price: $15-45 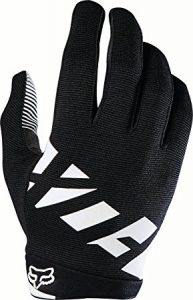
You’re going to want some MTB gloves. Your gloves are going to protect you from blisters, but they also offer important protection elsewhere.
At speeds, you’ll be clipping branches and brambles. And, when you do fall off, if you’re not wearing gloves, there’s not going to be much left in the way of skin.
Pretty much any MTB or MX glove will do here. I do see a lot of fingerless gloves on the market and I’m not a fan. I’d always go with a full glove from a leading brand.
Popular brands include Fox Racing, 661 and Giro.
If you’re looking at MX gloves, there’s a ton of options from Thor, Troy Lee Designs, One Industries.
#4 – Knee & Elbow Protectors
Price: $25-35 per pair 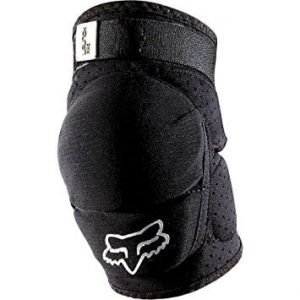
Like the motocross riders I go riding with, not all MTB riders wear knee and elbow protection. Some wear both, some wear one or the other, some none at all.
I personally prefer to wear both.
What you’ll want from your protection is a sleeve type pad, that also has straps. Any sleeveless padding is going to ride up, or when you fall, it will be knocked out of place.
I’m currently using the 661 Knee & Elbow protectors. The elbow pads are fine, but the knee pads are slightly bulky for XC. I’d suggest something a little slimmer for the knee.
For example, the Fox Pro Racing MTB Knee guard looks much slimmer and has some great reviews.
A word of warning. I’ve tried lower end products. They will ride up, rub and chaff, and offer little protection.
Save yourself the disappointment and go with a well-known brand from day 1.
#5 – Hydration Pack
Price: $20-100 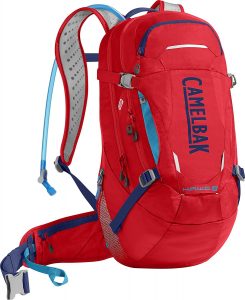
If you’re planning on riding for more than 30-minutes, there’s a good chance you’ll need a hydration pack.
In fact, I’d advise taking one anyway. You’ll have an integrated reservoir so you can grab a drink at any time.
But, most hydration packs come with extra storage space. That means you can fit in spare socks, tools, snacks; whatever you like.
I’m not against the cheap hydration packs, but you’ll want to check the fit.
I use a CamelBak Mule for motocross, enduro and MTB riding. It’s got loads of space and it’s comfortable. More importantly, it doesn’t move around too much.
At the very least, I’d consider checking reviews to see mentions of how much the hydration pack moves, and the quality of the shoulder padding.
Also, a chest strap is a necessity (this distributes weight evenly to reduce chaffing).
You’ll need to be budgeting at least $40 to find a high-quality hydration pack.
Check out our guide to the best hydration packs for mountain biking here.
#6 – MTB Shoes
Price: $40-100 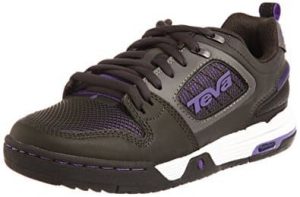
Now, this depends if you have clip-in pedals (a lot of XC MTBs have these), or not.
I personally don’t, as I ride more downhill and free ride, rather than XC.
If you’re looking to get into free or trail riding, then you’ll need a flat shoe, with a thick sole and some level of support.
If not, when you land from jumps, you’re really going to feel the strain on your foot and ankle.
At under $40, the Teva Links MTB shoe is excellent value for money.
#7 – MTB Shorts
Price: $20-80 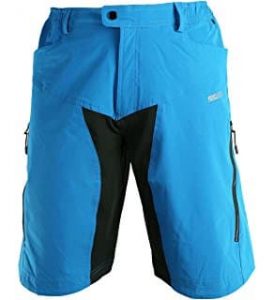
Next, you’ll want some loose fitting and breathable shorts. As usual, I aim for brands like Fox Racing, although there are some much cheaper options.
The focus is a loose fit, and breathable material. I currently use Endura with a padded liner.
#8 – Breathable Tee
Price: $15-40 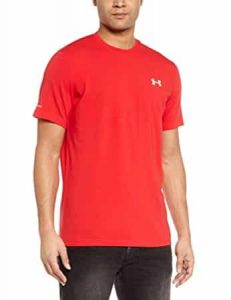
You will get hot and sweaty. But, a breathable tee can help to regulate body temperature. And, if the tee has moisture wicking properties, sweat will dry quickly.
I’ve got a couple of Under Armour breathable tees that I use for all types of outdoor activities. Although, there are mountain biking specific tees available.
Essential Tools & Spares For MTB Rides
Now you’ve got your MTB, and all your kit, you’ll need to take a few extras. Tools and spares on the trail can be an absolute life saver.
Here’s our essential list.
#1 – Multi-tool
Price: $15-45 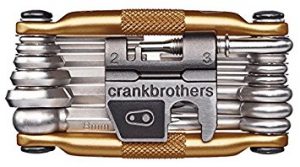
You’ll want a multi-tool that can do, well, multiple things. That means having an Allen-key, screwdriver and even a file. There’s no way you want to carry all these tools individual.
For a start – weight. Where ever you can shed weight (bike, kit, tools), you’ll want to do so.
Secondly, loose tools are dangerous. If you fall with loose tools in your hydration pack, there’s a good chance they’ll cause you severe damage!
There’s a ton of cheap MTB multi-tools out there. But, if you want brand recommendations, I’d be leaning towards Crank Brothers and Park Tool.
#2 – Zip Ties
Price: $5-10
You can’t take a full spares kit on an MTB trail.
But, the ultimate transformer for all spares, is a zip tie. It’s amazing how many temporary fixes can be made with a zip tie.
#3 – Spare Tubes
Price: $10-20
You will get a puncture at some stage. And, when you do, you better have the tools to fix it.
You’ll need all the tools to remove the wheel, as well as tyre levers (or brute force).
Don’t buy low quality tubes. If you do, there’s a good chance that’s the reason you’re swapping out for a spare in the first place.
One of the leading brands manufacturing MTB tubes is Continental.
#4 – Pump
Price: $10-20
You’ll need a pump to get some air into you’re tube.
Buy one with a bike mount so you don’t have to carry it in your pack.
If you’re forced to carry it in your pack, you’ll need a compact pump (bear in mind their capacity is small, so it takes a long time to pump up a tube).
#5 – Chain Lube
Price: $10-15
If you’re planning on going to sandy trails, you’ll want to protect your chain. You may have to wipe down and re-oil the chain on the trail.
And, chain lube can be used to lube pretty much anything – it comes useful in quick-fix scenarios.
#6 – Spare Chain Link
Price: $5-$10
There’s a good chance you’ll break a chain on the trail.
When you do, you’ll be kicking yourself if you didn’t spend the whole $5 for a spare chain link.
Instead, you’ll be pushing your bike home!
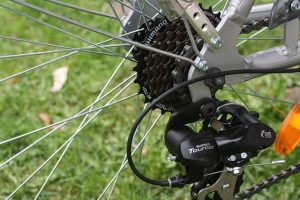
#7 – Derailleur Hanger
Price: $10-$20
Like chains, derailleurs are prone to breaking.
Most of the time if you hit something with the derailleur, it’s just the bracket that bends.
Swap out the bracket and you’re good to go!
Best Type Of Mountain Bike For Beginners
Before you go forking out enormous amounts of cash, you’ll need to decide which type of mountain bike is suitable for you as a beginner.
And, there’s two things you need to decide:
- Do you want a trail, XC or free-ride (enduro) MTB?
- Is a 26”, 27.5” or 29er most suitable for beginners?
Types Of Mountain Bikes
Trail Bikes
If you’re looking for an all-rounder, a trail bike is a good choice.
It’s not quite a XC bike, nor is it a free-ride bike. Maybe you want to do some XC, some light DH trails, but ride some fire-roads and jumps too?
You’ll be looking at suspension in the 120mm-140mm range which covers most trails.
The head angle is usually less aggressive than a DH or free-ride bike. That means you’ll have plenty of stability, but not enough that it affects climbing.
Cross-Country Bikes
If your focus is fitness rather than trails, a XC bike is going to be suitable.
You’ll be spending as much time climbing up hills, as going down them. Usually, you’ll be looking at distances in the 15km-20km range.
These bikes are all about being lightweight, and the head angle is focused on climbing.
Likewise, suspension travel is reduced for 80-100mm, so you’ll really feel it on rough downhills.
All-Mountain, Freeride & Enduro Bikes
All-mountain and enduro bikes are always my top pick, and I think they’re great for beginners.
There’s a ton of suspension travel, usually in the 140mm-170mm range.
That said, I’d be leaning towards the lower end (140mm) as that offers more than enough suspension, and you won’t compromise on weight.
The only time I use a 170mm travel bike, is on DH trails.
Trail, XC or All-Mountain/Enduro/Freeride For Beginners?
If budget allows, I’d aim for an all-mountain/enduro/freeride bike that offers around 140mm of travel.
They are forgiving enough to enjoy trails (thanks to their suspension), but lightweight enough for climbs.
And, they are loads of fun!
Which MTB Wheel Size For Beginners?
This is straight forward. There are three types of wheel size:
- 26”
- 27.5”
- 29”
26” Wheel Size
A 26” wheel will provide the most maneuverability. Being a smaller wheel, it will also weigh a little less.
But, you’ll find that it doesn’t soak up bumps as easily as a bigger wheel.
This is particularly noticeable on difficult obstacles such as roots and ruts. You’ll find the wheel snaps away from you if you’re holding on too tight.
27.5” Wheel Size
Now you’re in the middle ground.
You’ll have slightly more weight, and a tiny bit less maneuverability.
But, that’s the compromise for having a bike that doesn’t jerk around as much over rocks and roots.
29” Wheel Size
You’re leaning towards 100% stability. You don’t mind the extra weight, if you get a better feel for your bike on the downhills.
The compromise of course, is maneuverability. It’s going to make it much harder to negotiate the tight and twisty trails.
26”, 27.5” or 29” MTB Wheels?
If you’re going for a freeride/all-mountain/enduro bike, I don’t feel even a beginner needs the added stability from the larger wheels.
After all, you’ll have 140mm of travel; and that’s a lot. There’s a lot more fun factor in a 26” wheel.
But, if you’ve not ridden bikes before, are a complete beginner to offroad cycling, and want as much stability as possible, go for a 27.5”.
If the same applies and you’re over 6ft and consider yourself to have a strong core (for maneuverability and pedaling power), you’ll get away with a 29”.
The reduced maneuverability will be counterbalanced by your weight and power.
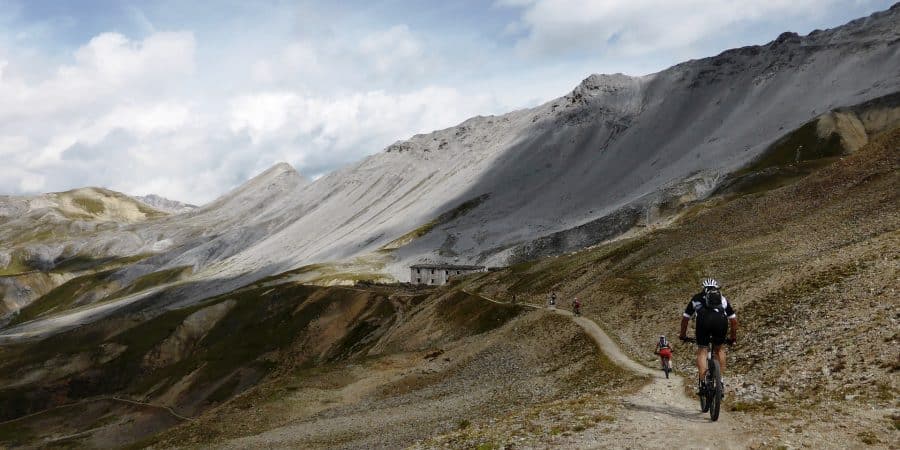
Where To Find MTB Trails
The next question, where can you find local mountain bike trails? 
There’s a great global resource over at Single Tracks.
In fact, it’s coupled with a great community too, so there’s an opportunity to ask questions about anything you’re unsure about.
Where To Find A MTB Riding Partner
But, finding trails is the easy bit. What about if you don’t have a partner?
There’s a small group on Reddit where you can find local bike buddies.
Likewise, there’s a hive of activity over at Cycling Buddy, with buddies looking for partners on a worldwide scale.
And, with over 1,000,000 members and 1,000 meetups currently online, the Meetup.com MTB group is a perfect way to find someone to ride with.
Mountain Biking Techniques – From Braking To Drop Offs
Mountain biking for a complete beginner is daunting.
I’m sure you’ll get to a drop-off or downhill section and think “there’s no way a bike goes down there”, only to see a few seconds later, a rider hits a drop-off and disappears into the distance.
But, there’s more to mountain bike riding than drop-offs.
Everything from learning how to climb to save energy, riding roots, and how to jump will help you enjoy your ride.
But, putting the fundamentals in place early on will mean you progress quickly.
Let’s start basic and work out way up.
Tips For Climbing
Personally, I hate climbing. I’m all about the downhill. So, it’s particularly annoying when we reach the top and my partner says “that was a good climb”…what?
Unfortunately, if you’re doing MTB for fitness, this is the part when you’re going to really put your body under pressure.
#1 – Seat Position
For large climbs, you’ll want to adjust your seating position.
Riding a lot of downhills, I tend to have a low seat, and that’s no good for climbing. You won’t be able to extract the maximum amount of power; lift it up.
#2 – Suspension Lock-out
Most newer bikes with have a lock-out system for the suspension.
It’s usually a small lever on the top of the forks or shock. Suspension saps energy, so lock it out before the climb. Don’t forget to unlock it for downhill sections.
#3 – Deep Breathing
Bike fitness will come over time.
But, to give yourself the best shot of reaching the top of each climb today, make sure you inhale and exhale deeply. Get into a rhythm and avoid short-sharp breathing.
If you do this correctly, you’ll be supplying muscles with the most oxygen possible, climbing for faster and longer.
Braking Technique
On downhill sections, your brakes are a lifeline. But, you’ll want to brake smoothly and keep as much forward momentum as possible.
If you brake too harshly you’ll either:
- Fall off as a wheel slips out.
- Lose all momentum and have to pedal to get back up to speed.
#1 – Hovering
I personally have one finger hovering over each brake lever for every section of downhill.
You’ll notice your brake has a small void where nothing happens, and then you eventually reach the biting point.
By hovering over your brake, you’ll be able to react faster, and know exactly where the bite point is.
The average person reacts in around 0.2.-0.25s.
So, if an unexpected obstacle appears and I need to brake, assume I’m doing that within 0.25s.
If you’re not hovering over your brake, that’s your reaction time to simply move your fingers towards the lever; you’re probably going to hit the deck.
And, as panic sets in, there’s a good chance you’ll grab too much brake and become unstable.
#2 – Surface Changes
You won’t apply the brakes and hold them there.
Different obstacles and terrain requires a different brake bias (i.e. 40% front and 60% rear) and brake pressure. You’ll be adjusting brake pressure and bias throughout the descent.
As an example, you’ll lean back to negotiate a larger rock face, so you’ll also reduce brake pressure on both brakes (rocks are slippy).
And, you’ll want to move the brake bias further to the back. Mainly, because you’ll be leaning backwards, taking weight off the front. Applying the same brake bias and pressure as before, will result in the front wheel slipping out.
On a similar note, if you see a section small roots that lasts for 1ft, you’d probably release the brakes all together (or at least the front).
So, as you’re riding, account for surface changes by reducing (or releasing) brake pressure, and changing brake bias.
#3 – Cornering Momentum
Maybe you think it’s not a race, but still, it’s a nice feeling hitting a corner at optimum speed.
Like a Formula 1 car, your entry speed is directly connected to your exit speed.
Look far ahead, judging terrain. We want smooth and steady braking that feeds you into the corner.
The idea of brakes here is to keep you on the edge of the top speed you can handle into, and throughout the corner.
So, you’ll progressively let off the brakes into and around the corner, rather than flicking them on and off light a light switch.
As you move from being a complete beginner, you’ll want to have done all your braking before you hit the corner.
Cornering Technique
#1 – Body Position
Hopefully, you’ll already have your elbows out, and knees slightly bent. This doesn’t just help to absorb bumps throughout the corner, it helps if you suddenly become off balance.
#2 – Focus On Entry Speed
Don’t focus too much on making it to the corner as fast as you can, and braking at the last second. You’ll completely ruin momentum for the exit.
Instead, setup up the corner well in advance, so that you can travel through the corner with as much speed as possible.
This will mean you carry more speed on the exit.
#3 – Racing Line
If you’re on an intermediate trail, there’s a good chance the racing line has already been formed.
It’s usually the shortest and smoothest route through the corner (avoiding hard obstacles) and that means one thing; it’s the fastest.
So, where possible, try to find the racing line and follow it to keep up as much speed as possible.
How To Ride Rocks & Roots
Rocks and roots are the hardest part of the trail.
There’s not just a lack of grip for turning and braking, but they are sometimes so slippery, they snatch the front wheel away from you.
Here’s a few tips for beginners looking to negotiate rocks and roots (hint, you can use ruts to help you out).
#1 – Look Ahead, Not Below
The biggest mistake beginners make is they look at the exact obstacle they are travelling over, and not the one that’s coming up.
If you’re looking at the obstacle below to get setup for it, it’s already too late. You should have been setup (braking, body position etc) before negotiating it.
Look ahead. Setup for obstacles in advance.
#2 – Search For Grip
The hardest part of negotiating rocks and roots is finding grip. You’ll need grip to turn and these obstacles don’t exactly offer it in abundance.
Look out for patches of gravel or dirt, as these will provide some level of grip for braking and turning.
Even more important, search for ruts.
Ruts are where bikes have carved through the dirt to make a line. And, your wheels will track in that line, offering stability (even if there are rocks below).
#3 – Loose Body Positioning
You’ll want to be in an attack position when crossing roots, or riding rocks. Elbows up and out, with knees bent, as low as possible; this low centre of gravity will help improve stability.
More importantly, the flex you’re allowing in your arms, elbows and knees are all lifelines.
Just like your suspension, your body will absorb bumps.
And, if your elbows, arms and legs are absorbing bumps when there are any snaps of the front wheel, that means your hands aren’t; you’ll have much better control throughout the trail.
How To Jump A Mountain Bike
There’s two types of jumps you’ll encounter during a MTB trail ride.
- Man-made jumps. They tend to be smooth and the easiest type of jump to negotiate.
- Natural jumps. These are difficult. This might include using the first root in 3-6ft long section to jump the whole lot.
#1 – Man Made Jumps
If you’re a beginner to mountain biking, I’d suggest spending some time jumping man-made jumps only, before going onto the technical and natural jumps.
Most beginners make the mistake of trying to throw the bike around too much.
The fact is, you’ll be hitting jumps at speed.
By allowing your body to naturally transfer weight towards your feet (as you go up the lip) and then letting the bike come up (by letting your legs and arms bend as you exit the lip) – you’ll clear most jumps.
Start small and remember, don’t be rigid. You need to let the weight transferred from your feet push upwards, and that’s only going to happen if you’re loose.
I’d suggest spending 10-15 minutes at a time on the same jump. Slowly increase speed, and feel how the weight transfers. If you get brave, you can start adding a pump into the lip and a slight lift as you take off.
#2 – Natural Jumps
You’ll flow down technical trails a lot easier if you can jump natural obstacles such as rocks and roots. They are extremely slippery, so if you can clear them, it makes life a lot easier.
It’s important to realise roots and rocks are known for “snapping” the front wheel out of your hands. For this reason, you need to ride incredibly loose, and in the full attack position. The more you bend your knees and elbows, the more of a lifeline you have.
They’ll absorb any sharp impacts so you can track straight on the take off. If your front wheel snaps away on the take-offs, it’s really nothing but bad news from there on out!
How To Ride Drop Offs
I see a tonne of beginner MTB riders getting to their first drop off with good intentions. Then they get cold feet, hit the brakes (when it’s too late) and end up face planting.
Like jumps and trail difficulty; start small; stupidly small.
Practice drop offs on the smallest you can find (even if it’s like 30cm) and dial in your technique.
As you build to bigger drop offs you’ll find the fundamentals are the same, but you adapt things such as body position.
#1 – Entry Speed
If there’s a clear run after a drop off, never compromise speed by braking. Braking is going to upset your whole centre of gravity (throwing it forwards), and you don’t want to go over the bars!
The higher the speed you carry, the less effort you’ll need to aid the bike in the drop off.
#2 – Lean Back
As you enter the drop off, lean towards the rear, somewhere between the rear of the seat and over the back wheel is fine.
Assuming you carry enough speed, you won’t need to flick up the front end.
#3 – Front-end Flick
There will be times where you realise body position alone won’t keep the bike level as you take off.
Typically, this is if you’ve just applied the brakes, or if you are in a low speed section – the forward momentum will mean the bike dips forward.
In these scenarios, you’ll need to flick the front end to give it that extra push.
I say flick, but it’s actually one fluid action of letting the bike roll away from you by slowly extending your arms as you exit the drop off.
BONUS: Interesting Mountain Biking Websites & YouTube Channels
Websites
Single Tracks
Single Tracks is a huge online resource and community. If you want to talk-bikes with like-minded people, then this is where you need to go.
Pink Bike
Like Single Tracks, Pink Bike is an incredible resource for mountain bikers; beginner right through to expert.
More importantly, this is the place to go if you want a high quality second hand bike, or want some quality parts cheap.
I’ve bought various bikes, frames and parts here well below RRP in perfect condition.
YouTube Channels
The Singletrack Sampler
Not necessarily informational, but entertaining nevertheless. If your making mountain biking your next hobby, then you’ve got to go and check this guy out.
Global Mountain Bike Network
If you’re looking for some top-notch MTB videos then you want to go and check out the Global Mountain Bike Network.
There’s some good general videos, but also a tonne of hints and tips when it comes to mountain biking technique.
What’s Next?
Thanks for reading our guide to starting mountain biking.Got a question? Leave a comment below.And, don’t forget to hop on our email lists for tips, tricks and MTB product recommendations.