Welcome to our 10-minute beginner’s guide to hiking.
Looking to get into the great outdoors, but don’t know where to start?
We’ve got you covered.
In our comprehensive guide, we’re going to cover everything you need to know to start hiking, including:
- The Essential Hiking Gear List
- Checklist – What To Bring On A Hike
- Finding Hiking Trails
- Finding Hiking Partners
- Planning A Hike
- What To Do If You Get Lost
- Hiking Etiquette
- Hiking For Weight Loss
- BONUS: The Best Hiking Websites & YouTube Channels
Jump To Section
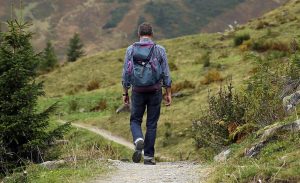
Essential Hiking Gear List
Before you hit the trail, you’ll need to grab some essential gear. Not just so you’re comfortable, but so you can carry everything you need, stay fed, stay hydrated and stay dry.
I’ve detailed a full list of what I have. But, you’ll need a rucksack, hiking boots and a high-quality waterproof jacket at the very least.
#1 – Rucksack
Price: $40-100 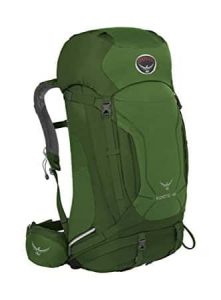
You’re going to be taking a tonne of stuff when you start hiking, so you’re going to need a quality rucksack.
For full-day hikes, something in the 40L-50L range will be more than enough.
However, for the average hiker something in the 30L-40L range is going to be suitable, and comfortable too.
Remember, many of the things you’ll take with you, don’t need to be waterproofed. So, if you’re pack is getting a little full, you can strap some items to the outside of your pack.
For that reason, you’ll want plenty of webbing and straps.
And, if you see a pack labelled with a + (i.e. 30+10L), that’s a good sign.
The + section of the description relates to an expandable compartment.
In our example, you could expand the pack to gain a further 10L capacity. When it’s not needed, you resort back to the lightweight and compact 30L setup.
There’s plenty of great hiking rucksacks available from Vango, Berghaus and Osprey.
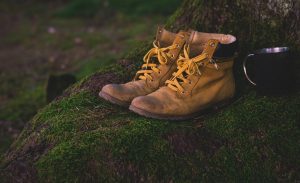
#2 – Hiking Boots
Price: $40-200 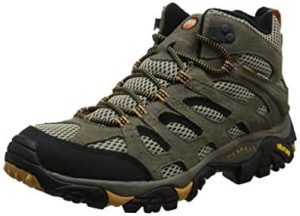
Your hiking boots are the first line of defence for your feet.
I always prefer hiking boots with two things:
- A waterproof material, such as Gore-Tex
- A Comfortable sole, such as Vibram
I’ve currently got a pair of Merrell boots. And, they’ve stood the test of time.
More importantly, they offer a tonne of support. So, when I do slip, I don’t damage any ligaments in my ankle.
Although there are hiking boots available for as little as $40, they’re unlikely to be comfortable, waterproof, or offer the support you need.
Realistically, you should be budgeting $80 upwards for a pair of boots that are going to offer everything you need, and be durable.
There’s some great boots on offer from Merrell, Salomon and Columbia in this price range.
#3 – Hiking Socks
Price: $5-20 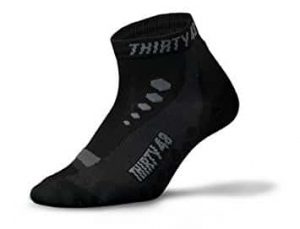
It’s not just puddles and rain that make us uncomfortable when hiking.
If you’re hiking for long distances, or in the heat, your feet are going to sweat.
And, this is where a quality pair of hiking socks is going to help you out.
The ideal hiking sock is going to be merino wool. That’s going to offer the comfort needed to stop blisters, but has the moisture wicking properties to allow sweat to dry quickly.
So, any breathable sock will be better than an everyday sock.
But, if you want something hiking specific to offer additional comfort, there’s some great products on offer from Darn Tough and Thirty48.
#4 – Gaiters
Price: $15-35 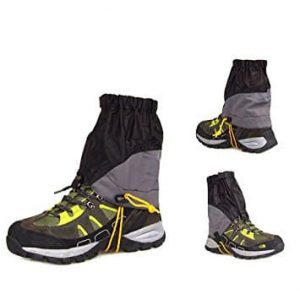
Gaiters for your boots are important if you’re planning to hit muddy or wet trails.
Even if your pants cover your boots, the bottom of your pants will get wet and that eventually seeps into you boot.
Not nice!
Hiking boot gaiters cover the top section of your boot, and the bottom of your pants. Hey Presto, your feet are kept dry throughout the hike!
If the gaiters are waterproof, I don’t really have a preference on brand, so you should be able to pick up a quality set for $20.
#5 – Zip-Off Pants
Price: $30-100 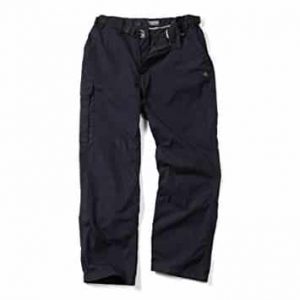
Next, you’ll want some breathable hiking pants.
I always prefer a zip-off that converts into a pair of shorts, rather than carrying (or buying) shorts separately.
Most top brands like CragHoppers, SingBring and Columbia will offer pants with breathable qualities, as well as UPF50 sun protection.
And, if you go for a cargo pant, you’ll have some extra storage for essentials you want to-hand throughout the trail (like a map, compass, and a cheeky snack).
A cheaper pair of pants in around $30-50 will see you good for years. But, you might want a different pair of hiking pants for winter.
I use Mountain Equipment’s Softshell pants. They don’t have storage, but they offer much better wind resistance than my CragHoppers, so they keep me toasty in the colder months.
#6 – Breathable T-Shirt
Price: $20-50 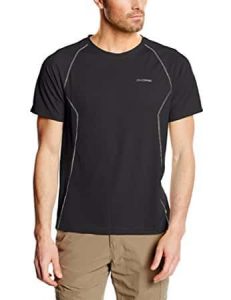
I’m not as fussy as most when it comes to which t-shirt I’ll wear for hiking.
All I know, is I want it to be breathable. We’ve reviewed the best running t-shirts here, and if you have one of those, you’ll be good to go.
But, if you’ve got the budget to buy a specific tee for hiking, I’d do that.
One example is the Icebreaker merino t-shirt.
When it’s cooler, the merino wool offers a little more warmth than any normal breathable t-shirt. And, in the summer, it offers the breathability you need to keep you cool.
As we’ve already mentioned above with the hiking socks, merino wool has excellent moisture wicking properties, so sweat is going to dry quickly.
Most people assume sweat drying quickly is only important in the summer.
The opposite is true.
Even in the cold, you’ll sweat, and if it doesn’t evaporate quickly, it’s going to drop your core temperature; fast!
#7 – Baselayers (For Winter Hikers)
Price: $15-80 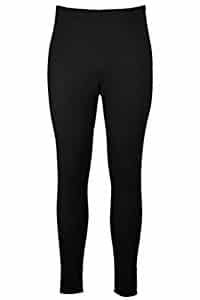
Thinking of hiking in the colder months? No problem.
Baselayers are the way to keep yourself warm. Their snug fit means they’ll trap a small layer of heat between their fabric and your body.
There are shorts, full length leggings and even t-shirts in the form of base layers.
Even if you’re not planning on hiking in excessively freezing conditions, it’s worth carrying a baselayer tee as a precaution, at the very least.
#8 – Waterproof Jacket
Price: $75-300 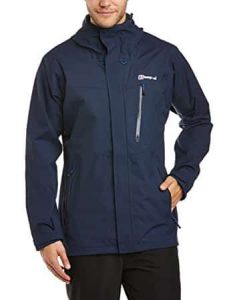
Your options when it comes to a waterproof jacket are endless.
If you don’t have the budget for multiple jackets, I’d suggest investing in a decent merino tee, and a full set of base layers.
This way, you’ll be able to use a lightweight waterproof jacket (without your base layers) in the warmer months, and then gear up with your base layers in the winter.
Or, if you don’t plan to go hiking in the heat, or the extreme cold, buy something in between, get a medium thickness jacket.
I’ve got a few jackets including: Mountain Equipment (lightweight), Patagonia (for the extreme cold), and a Berghaus Softshell (mid-weight, excellent wind resistance, but only water resistant).
#9 – Hat
Price: $10-30 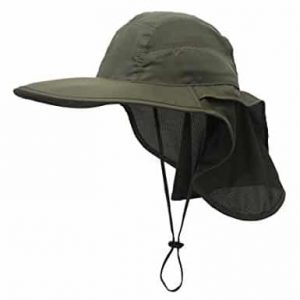
A lot of the times when I hike, it’s warm. Being out in the sun all day can really take it out of you.
Any hat to protect your head from the sun is going to be worth chucking in your pack. Especially if you’re prone to heat stroke.
#10 – Hiking Poles Or Sticks
Price: $30-65 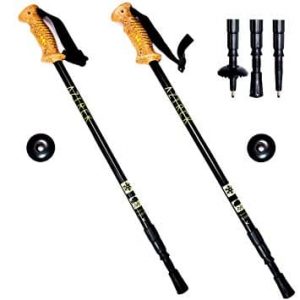
I’ll be the first one to admit I don’t use hiking poles, they’ve never suited me.
However, they do offer a huge benefit to people that suffer with knee or back pain.
If that sounds like you, they are going to make your hiking life, a whole lot more comfortable.
What To Bring On A Hike
So, you’ve got your gear, and you’ve got a decent rucksack to chuck it all in.
So, what do you need to bring on your hike?
Hiking Essentials Checklist
#1 – Map & Compass
Most hiking trails are clearly marked. But, some aren’t. If you want to be able to get out of a sticky situation (i.e. find your way home when you’re lost), take a map and a compass.
#2 – Sunscreen
Even if clouds are low and the sun isn’t strong, you’ll want to protect yourself.
Being out on a full day hike without sunscreen and lip-balm is going to lead to one thing; sunburn.
#3 – First Aid Kit
Some of the simplest injuries can be fatal (or, get infected). A compact first aid kit will have everything you need to tend to cuts, bites and grazes on the trail.
#4 – Water
Take as much water as you can carry. Whether that’s in bottles, or a hydration reservoir.
You’re always going to consume more fluids when exerting yourself physically. More importantly, if you get lost, you need enough water to get you home.
#5 – Food
Pack your meals for the day, but pack extra too.
If you’re already reaching your weight threshold, consider packing some lightweight dry foods like energy bars and nuts.
You might need them if you get lost, or decide to take a longer route.
#6 – Emergency Kit
If you’re not planning on hiking a well beaten trail, it might be hours or days before someone finds you if you get into trouble.
In these scenarios, it’s worth taking emergency kit:
- A torch or headlight so you can find your way off the trail
- Cell phone (or sat phone for low signal areas – check this beforehand)
- Emergency shelter (such as a bivvy) to protect you from the elements
- Fire starting equipment, and read our guide on how to start a fire before you leave for your hike
- A water filter, so you can source extra clean water, if you run out.
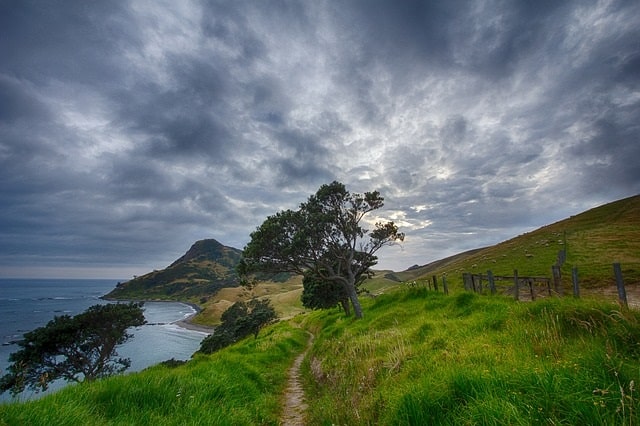
Finding Hiking Trails
There’s 1000s of great trails across the globe. But, how do you find them? 
We’ve listed a couple of great resources below.
For beginner hikers, we’d always recommend sticking to the most popular trails.
Finding Hiking Trails In The UK
If you’re looking to hike trails across the UK, there’s a great resource over at Walking Britain.
And, another great resource thanks to MapMyHike. This combines not just routes, but an app to map where you’ve been.
Finding Hiking Trails In The USA
MapMyHike isn’t just a resource for the UK; it’s a global resource for hiking trails.
It’s been produced by Under Armour and it allows you to see other people’s trails and even what food they took with them. And, you can even log details of your own adventures for other people to follow.
Another great resource for those in the USA is the Hiking Project.
It’s a community driven website with a tonne of the very best trails to choose from.
There’s no charge to access the trails, although the Hiking Project does have plans to introduce a premium membership in the future.
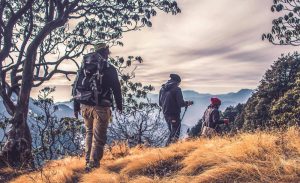
Finding Hiking Partners
Unfortunately, not all of us have a hiking partner.
So, you either don’t go hiking, or you do it on your own.
There is a third option, and that’s to go and find a hiking partner.
UK
8TH Day Adventure
![]()
I’ve spoken a couple of times to the owner, Ross. He’s cool, but his club is much cooler : )
If you want to meet like-minded people, this is the place to go.
They’ve got over 2,500 members and they post regular meet-ups for just about anything to do with the outdoors.
Not sure what it’s about?
Skip over to their FaceBook page and you’ll be able to see what’s going on.
USA
If you’re in the USA, you’ve got a couple of options. First, you can head over to Trekking Partners.
People list the itinerary for their adventure, and the budget. Others signup to join them.
It’s about as simple as that!
If you can’t find what you are looking for there, Meetup.com will have you covered. There’s over 10m members and over 9,000 hiking meetups currently listed.
Planning A Hike
We’d always advise planning your hike in advance. And, that’s not just for beginners to hiking, but for experienced hikers too. 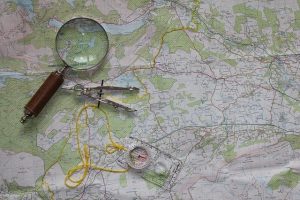
Hiking Trail Difficulty
Different trails (and countries) have different methods of grading the difficulty of their trail – you need to know what you’re getting yourself into.
But, on some scale they all boil down to three categories.
Easy Trails
Expect little elevation change throughout the trail. It’s going to be extremely well marked, and well maintained. It’s unlikely you’ll get out of breath.
Easy hiking trails are usually a couple of km or less.
Moderate Trails
Expect to see slight elevation changes, but nothing spectacular.
The trail is likely to be a little more technical, with some roots and obstacles to negotiate. They should be clearly marked.
Expect a moderate trail to be in the 4-10km range.
Hard Trails
Expect high levels of elevation change. So, if you get out of breath easily, these are not the trails for you.
Generally, they are well marked, but not always, so it’s always wise to take a map and compass.
You’ll need to negotiate the likes of tree stumps, roots, large rocks and may even have to do a little scree-running.
Hard trails can be 10km or more.
Research The Trail
What Do Other Hikers Say
There are a tonne of hiking forums, not to mention the resources we mention above, like MapMyHike.
Check out some of the reviews from fellow hikers.
Did they embark on an easy trail, only to find it felt like a moderate trail?
Do they mention the levels of elevation change make it difficult for those with bad knees?
This will give you a better idea of whether this trail is suitable for you.
Find A Get Out Clause
If you look at most trails on a map, you’ll see they regularly get close to roads, or fire roads.
If the trail gets too difficult, you’re going to tire, and that could result in a trip or fall.
It’s better to get off the trail and find something easier next time.
So, make sure you know in advance, the sections of the trail where you can bail onto a road or easy footpath.
How To Not Get Lost, And What To Do If You Are Lost
Let’s face it. Nobody likes getting lost.
But, there’s a good chance of that being the case at some point, especially if you’re hiking on trails that are not well marked. 
How To Not Get Lost
Route Planning
We’ve already discussed route planning.
Check out the route before-hand, and be sure to check reviews of the trail on sites like MapMyHike.
This will highlight any potential issues when it comes to how well the route is marked.
Landmarks
As you progress through a trail, make a mental note of landmarks.
Maybe it’s an amazing cluster of trees, or a derelict building. If you do get lost, you can track your way back and use these landmarks as milestones.
If you’re as forgetful as me, and you know you’re on a trail that’s terribly marked, grab your smart phone. Take pictures as you progress through the trail.
Then you’ll have a photo-log of the route back if you’re stuck.
Check Conditions
If you’re a beginner to hiking, it’s not advisable to go out in harsh conditions.
Wind, rain and snow all impair our vision. It’s easy to miss markers, and it’s much harder to pick out landmarks.
In the USA you can check the weather forecast on websites like Weather.com, and in the UK, a good resource is the Met Office.
What To Do If You Are Lost
Stop Hiking
I know the “1km more and then we’ll turn around” feeling. The next marker could be around the corner, or not.
It’s much better to stop where you are. Think about the landmarks you’ve passed (or refer to your smart phone pictures), to try and figure out where you went wrong.
Don’t go so far down a trail that you don’t know how to get back.
Map, Compass And Route Plan
Grab your map, compass and your route plan (if you packed it), and figure out where you are.
If you’ve lost the trail completely, you’ll need to navigate to a nearby road.
Plan Your Next Steps
Take the easiest route (in terms of navigation). If you can easily follow the trail back, that’s the right thing to do.
If you can’t, the next best thing is to aim for a road, or a fire road.
Use Your Cell Phone/Sat Phone
There’s a good chance there’s someone nearby that can help, if they know where you are. That might be a local that knows the trail, a park ranger, or mountain rescue.
It’s worth calling someone to inform them of your situation.
If it’s not a desperate situation, explain you think you can make your way out, your current location, the path you’re choosing and how long you expect it to take.
Call when you’ve gotten yourself out of trouble, and if you don’t manage to find a way out, or you don’t call, at least someone knows where you are.
Hiking Etiquette
Most managed trails are only there, because Forestry Commissions and volunteers help to maintain them.
Take a minute to understand basic hiking etiquette, so that they keep giving us access to these amazing trails. 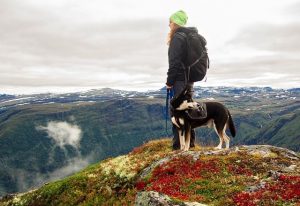
#1 – Noise Is OK, Sometimes
Try and keep noise to a minimum, but there are sometimes when making noise is the right thing to do.
Unless you’re afraid of sheep, cows and ladybirds, there’s not much in the way of wildlife in the UK that’s going to cause any frights.
In other places, there are bears and even wild cats.
But, whether it’s a cow, or a bear, they don’t like being scared. When they’re scared, they attack.
So, if you’re in an area where there are animals, don’t be afraid to make a noise.
These animals are not tame, but remember you are not their prey.
They’d sooner run away than confront you, so let them know you are there.
#2 – Toilet Etiquette
If you must relieve yourself on the trial, do it properly.
Don’t do it anywhere near the trail (but don’t go so far from the trail that you get lost).
More importantly, don’t do your business anywhere near a water source.
It’s not just animals that drink from these water sources. If you’re in an area where wild campers are present, there’s a good chance they are filtering water from here too.
If you plan an all-day trail, holding it is not really an option. But, it’s always polite to take a trowel and dig a 6-8” hole to bury any waste.
#3 – Stay On The Marked Trail
This is particularly important in areas where Forestry Commissions are trying to grow a new crop of trees.
Straying from the trail might mean you’ll be trampling on new seedlings, making void any work they’ve done to make this trail as natural as it can be.
Plus, if you get injured, you’re unlikely to be found.
#4 – Taking Your Children Hiking
Make sure you inform your children about straying from the trail, and sneaking up on wildlife.
More importantly, make sure they know the “leave no trace” rule. They shouldn’t be damaging the trail.
#5 – Leaving No Trace
Weather it’s a chocolate wrapper, or a can of soft drink; it doesn’t belong on the trail.
Apart from your footprints, there shouldn’t be any evidence that you were ever on a hiking trail.
#6 – Taking Dogs Hiking
Dogs like hiking too. New terrain, new smells; they love it.
But, you need to make sure that dogs are allowed on each trail you visit.
And, if they are allowed, do they need to be on a lead? Usually they do.
Sure, your dog might be friendly, but other hikers don’t know that.
More importantly, if your dog is the inquisitive type, as soon as it sees a horse or sheep, it’s going to be off like a rocket, and scare them.
I’ve seen a dog chase a sheep that bolted. It tried to jump a barbed wire fence to get away, and it got caught in the barbed wire. That’s not hiking etiquette at all.
Finally, make sure you scoop their poop – nobody wants to tread in that!
Tips When Hiking For Weight Loss
If you’re looking to lose weight in a fun way and in the outdoors, hiking is the way to go.
A lot of people burn themselves out with weight loss programs because…they-are-boring.
So, get yourself outdoors and do something fun!
A common question: is hiking for weight loss better than walking? 
Either is going to help you lose weight, but the varied levels of energy and muscles needed in a hike mean that it burns calories faster.
And, that’s going to increase your metabolism rapidly. An increased metabolism indirectly helps you lose weight.
#1 – Don’t Avoid Elevation
Easy hiking routes have little or no elevation.
Throwing elevation into a hike, is a softer version of high intensity interval training.
The theory here is that instead of a slow and steady pace for a prolonged period, you have short periods of high intensity exercise.
And, this is exactly what elevation changes give you. A short, manageable workout, that burns calories quickly.
Hiking trails with elevation changes have another positive; they help with muscle toning.
You don’t want to just hike for weight loss, but for muscle tone too. You’ll be using muscles you didn’t even know existed.
#2 – Map Your Hikes
Improvement doesn’t just come in the form of weight loss.
For a start, muscle weighs more than fat. So, you’ll be losing fat, but toning and gaining muscles. You’ll look great, but the scales might not be showing your true achievement.
For motivation, use an app like View Ranger.
This will give you detailed stats on your hike, including time, distance and calories burnt.
It’s a base-line to measure yourself against. There’s a good chance if you’re increasing distance, and decreasing time, you’re going in the right direction to lose weight.
#3 – Use Hiking Sticks
Even though I have knee problems, and hiking sticks can help with knee pain, I never use them. But, I probably should.
If you have any kind of knee or back pain, this is going to put you off hiking altogether.
So, invest in some decent hiking sticks. The increased comfort means you’ll have the motivation to keep going!
#4 – Snacks Are A Necessity, Not A Reward
If you’ve planned a day hike, you need to make sure you’re hydrated and fed throughout.
But, the fact you’re hiking 10km doesn’t mean you should take a can of soda and your favourite treat.
Take healthy snacks like sandwiches, nuts and fruit to replenish calories needed to keep you going to the end of the hike.
BONUS: The Best Hiking Websites & YouTube Channels
Websites
To Find Partners
Head over to 8TH Day Adventure, if you’re in the UK. And, head over to Meetup’s hiking section if you are anywhere else in the World.
To Find Trails
For hikers in the USA there’s Hiking Project. And, for everyone else, there’s MapMyHike.
YouTube Channels
Sigma 3 Survival
If you want to get some outdoor prep in case you get lost, Sigma 3 Survival is the YouTube channel to go to.
Homemade Wanderlust
If you’re looking get into the hiking way of life, Wanderlust is a great channel to follow.
What’s Next?
Thanks for reading our beginner’s guide to hiking.
If you’ve not already, make sure you jump on our email list for hiking tips and gear recommendations.